It’s a seemingly simple task: bounce a ping-pong ball on a wooden paddle. So simple that almost anyone can pick up a ball and a paddle and make a reasonable job of it. Now, close your eyes and try to do it just by the sound the ball makes when it hits the paddle. That’s a little tougher, but this stepper-driven platform juggler manages it with aplomb.
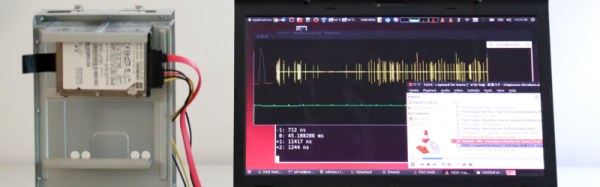
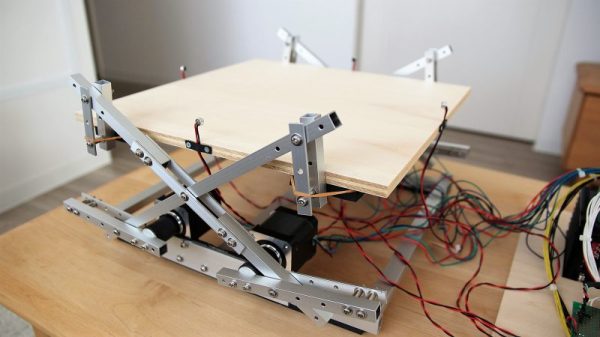
That’s not to say that the path to the finished product in the video below was a smooth one for [tkuhn]. He went through multiple iterations over the last two years, including a version that surrounded the juggling platform with a fence of phototransistors to track where the ball was at any time. That drove four stepper motors through a cross-linkage that popped the platform up at just the right moment to keep the ball moving, and at just the right angle to nudge it back toward the center of the platform. The current version of the platform does away with the optical sensors in favor of four small microphones. The mics pick up the sharp, well-defined sound of the ball hitting the platform, process the signal through an analog circuit, and use that signal to trigger a flip-flop if the signal exceeds a setpoint. An Arduino then measures the time delay between arriving signals, calculates the ball’s position on the platform, and drives the steppers through a PID loop to issue the corrective bounce.
The video below is entrancing, but we found ourselves wishing for a side view of the action too. It’s an impressive build nonetheless, one that reminds us of the many maze-runner and Stewart platform robots we’ve seen.
Continue reading “Juggling Machine Listens To The Bounce To Keep Ball In The Air”