Despite the fact that we’ve been doing them for years now, it’s still hard to predict how a Hack Chat will go. There’s no question it will be an hour of interesting discussion of course, that much is a given. But the dynamics of the conversation can range from a rigid Q&A, which isn’t exactly unexpected when you’ve only got a limited amount of time with a subject matter expert, to a freewheeling hangout with a group of people who all happen to be interested in the same thing.
 This week’s Vintage Pro Audio Hack Chat with Frank Olson definitely took the latter approach. The allotted hour flew by in a blink, with so many anecdotes and ideas flying back and forth that at times it was tricky to follow. But no worries, with the Chat transcript to pore over, we can make sure none of that accrued first-hand knowledge goes to waste.
So what did we learn during this Chat? Well, it probably won’t come as much of a surprise to find that those who have an opinion on audio gear tend to have a strong opinion on it. Folks were painting with some fairly broad brushes, with particular manufacturers and even whole fields of technology receiving a bit of good-natured ribbing. If your favorite brand or piece of gear gets a specific shout-out, try not to take it too personally — at the end of the day, most in the Chat seemed to agree that sound is so subjective that the right choice is more often than not whatever sounds best to you at the moment.
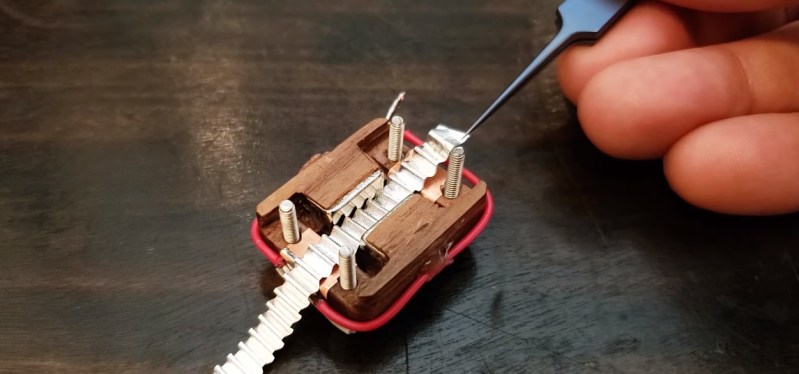
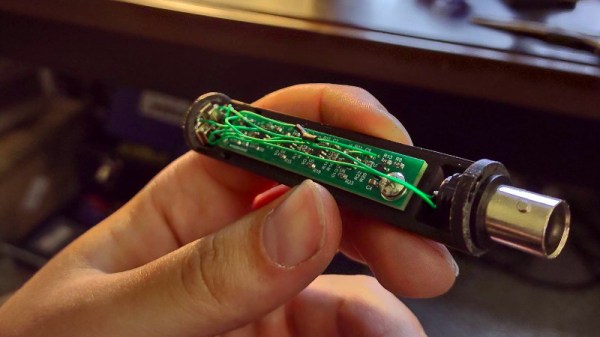
Which leads directly into Frank’s work with custom microphones. As a musician he knew the sound he was looking for better than anyone, so rather than spend the money on big-name gear, he prefers to build it himself. But the real hook here is their unique construction, with pieces that reimagine design concepts from mid-century commercial equipment using unexpected materials such as thin pieces of walnut cut with a vinyl cutter. Frank explains that the structure of the microphone isn’t as critical these days thanks to the availability of powerful neodymium magnets, which gives the builder more freedom in terms of materials and tools. He says the goal is to inspire others to try building gear from what’s available to them rather than assuming it won’t work because it’s unconventional.
We appreciate Frank, and everyone else, stopping by this week for such a lively and friendly discussion. Let’s be honest, a Chat specifically for folks who want to discuss concepts as personal and nebulous as how they perceive the warmth of sound could have gotten a little heated. But the fact that everyone was able to express their opinions or ask for advice constructively is a real credit to the community.
The Hack Chat is a weekly online chat session hosted by leading experts from all corners of the hardware hacking universe. It’s a great way for hackers connect in a fun and informal way, but if you can’t make it live, these overview posts as well as the transcripts posted to Hackaday.io make sure you don’t miss out.


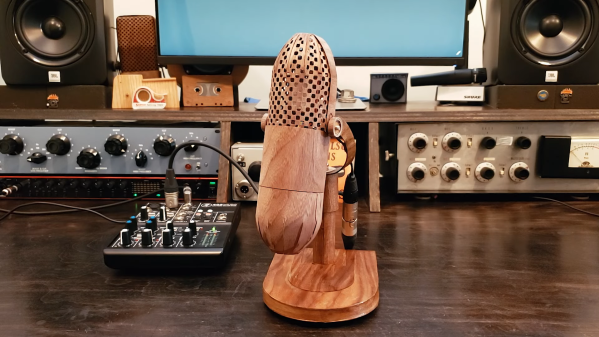
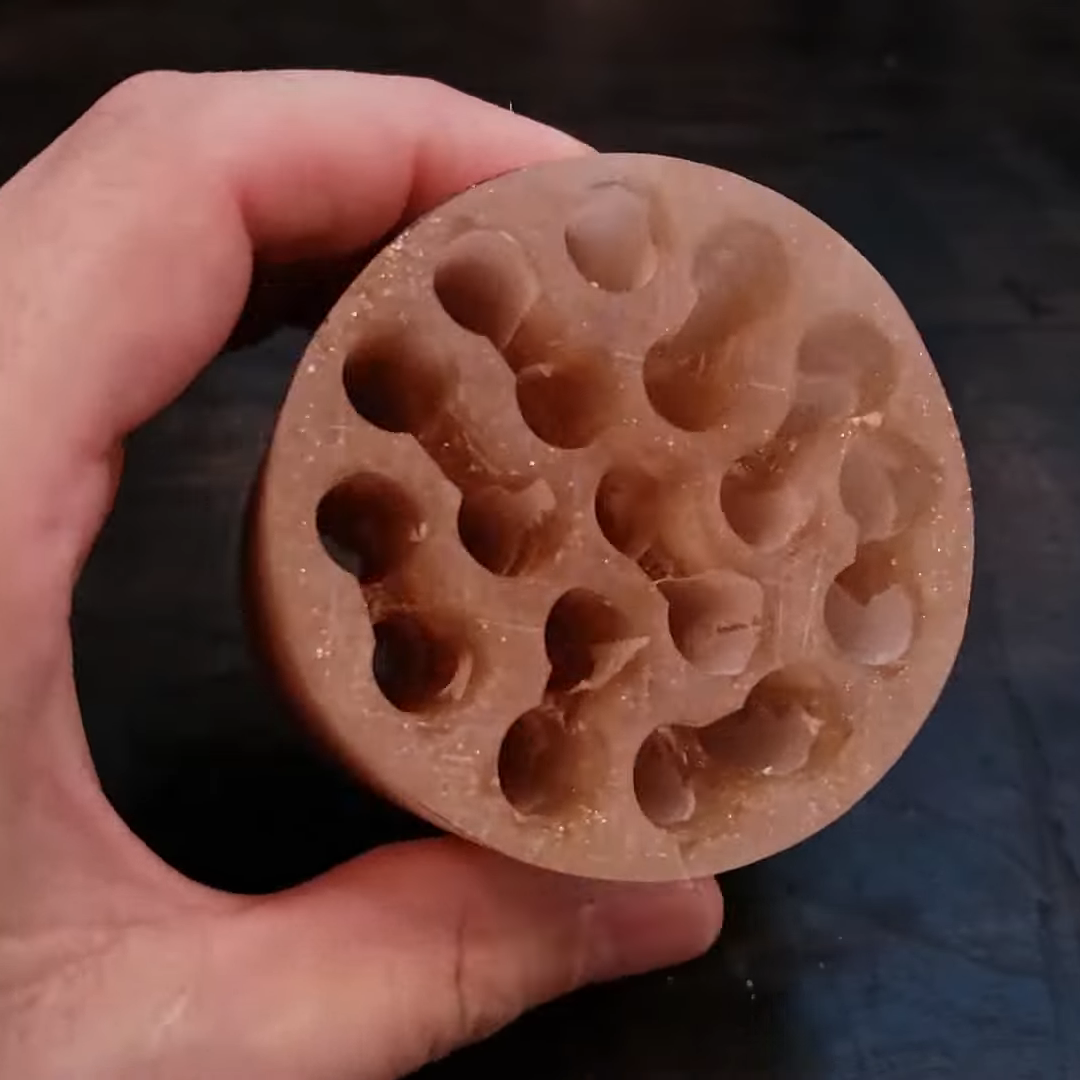 But ironically, this homage features a critical piece that’s actually not made of wood. The 77’s pickup pattern was cardioid, making for a directional mic that picked up sound best from the front, thanks to an acoustic labyrinth that increased the path length for incoming sound waves. [Frank]’s labyrinth was made from epoxy resin poured into a mold made from heavy paper, creating a cylinder with multiple parallel tunnels. The tops and bottoms of adjacent tunnels were connected together, creating an acoustic path over a meter long. The ribbon motor, as close to a duplicate of the original as possible using wood, sits atop the labyrinth block’s output underneath a wood veneer shell that does its best to imitate the classic pill-shaped windscreen of the original. The video below, which of course was narrated using the mic, shows its construction in detail.


