The True Cost Of Multimeters

If you are building a home shop, it is common to try to get the cheapest gear you can possibly get. However, professionals often look at TCO or total cost of ownership. Buying a cheap car, for example, can cost more in the long run compared to buying an expensive car that requires less maintenance. Most consumers will nod sagely and think of ink jet printers. That $20 printer with the $80 cartridges might not be such a deal after all. [JohnAudioTech] bought a few cheap multimeters and now has problems with each of them. Maybe that $120 meter isn’t such a bad deal, after all.

The problems he’s seen are the same ones we’ve all seen: noisy selector switches, suspect display readings, and worn off lettering. You can see the whole story in the video below.

Continue reading “The True Cost Of Multimeters”

Finally, An Open Source Multimeter

For his Hackaday Prize entry, [Martin] is building an Open Source Multimeter that can measure voltage, current, and power. It’s an amazing build, and you too can build one yourself.

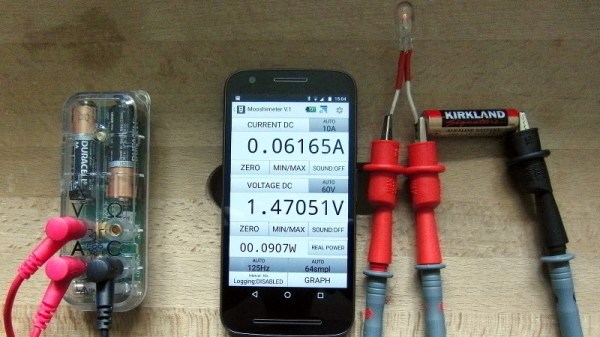
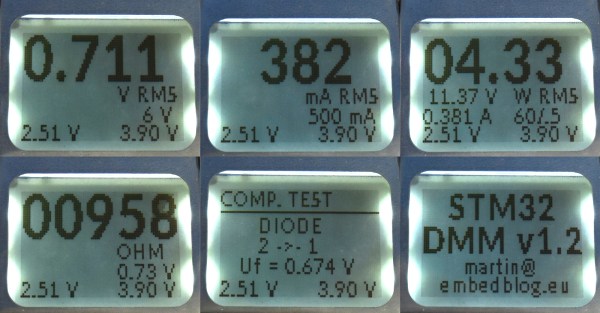
The features for this multimeter consist of voltage mode with a range of +/-6V and +/-60V. There’s a current mode, basically the same as voltage, with a range of +/-60 mA and +/-500mA. Unlike our bright yellow Fluke, there’s also a power mode that measures voltage and current at the same time, with all four combinations of ranges available. There’s a continuity test that sounds a buzzer when the resistance is below 50 Ω, and a component test mode that measures resistors, caps, and diodes. There’s a fully isolated USB interface capable of receiving commands and transmitting data, a real-time clock, and in the future there might be frequency measurement.

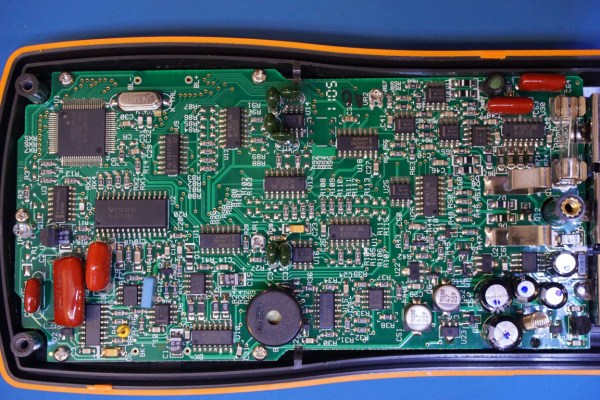
This build is based on the STM32F103 microcontroller, uses an old Nokia phone screen, and unlike so many other multimeters, this thing is small. It’s very small. More than small enough to fit in your pocket and forget about it, unlike nearly every other multimeter available. There’s one thing about multimeters, and it’s that the best multimeter is the one that you have in your hands when you need it, and this one certainly fits the bill.

The entire project is being written up on hackaday.io, there’s a GitHub repo for all the hardware and software, and there’s also a video demo covering all the features (available below). This is a stand-out project, and something we desperately want to get our hands on.

Continue reading “Finally, An Open Source Multimeter”

Cheap Multimeter Leads Come With Extra Ohms, Free!

[Nop head] discovered that cheap multimeter leads costing only a few bucks can come with more than one may have bargained for. The first set had a large amount of useful-looking attachments, but the wires used for the leads were steel with a resistance of about one ohm each. With two leads in use, that means any resistance measurement gets two ohms added for free. More seriously, when measuring current, the wires can heat up rapidly. Voltage measurements would be affected the least, but the attachments and lead design expose a large amount of bare metal, which invites accidental shorts and can be a safety hazard with higher voltages.

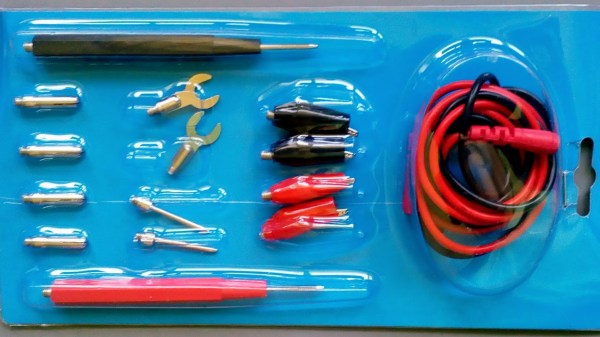
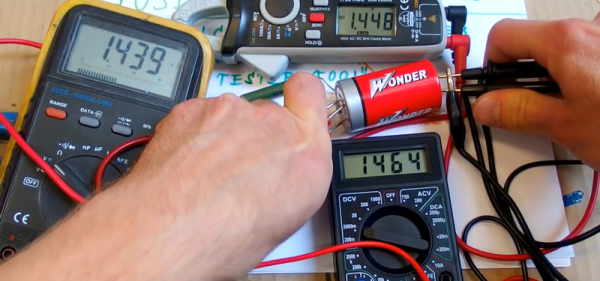
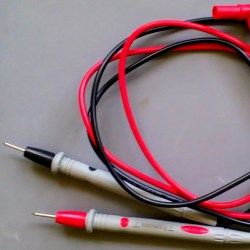
Are all cheap multimeter leads similarly useless? Not necessarily. [nop head] also purchased the set pictured here. It has no attachments, but was a much better design and had a resistance of only 64 milliohms. Not great, but certainly serviceable and clearly a much better value than the other set.

It’s usually not possible to identify garbage before it’s purchased, but [nop head] reminds us that if you do end up with trash in hand, poor quality counterfeits can be good for a refund. That goes for electronic components, too.

Agilent LCR Meter Teardown

Since 1999, one of the more popular manufacturers of test equipment has been Agilent, the spun-off former instrument division of Hewlett-Packard. From simple multimeters to fully-equipped oscilloscopes, they have been covering every corner of this particular market. And, with the help of [Kerry Wong] and his teardown of an Agilent LCR meter, we can also see that they’ve been making consistent upgrades to their equipment as well.

The particular meter that [Kerry] took apart was an Agilent U1731B, a capable LCR (inductance, capacitance, resistance) meter. He had needed one for himself and noted that while they’re expensive when new, they can be found at a bargain used, but that means dealing with older versions of hardware. For example, his meter uses an 8-bit ADC while the more recent U1733 series uses a 24-bit ADC. The other quality of this meter that [Kerry] made special note of was how densely populated the circuit board is, presumably to save on the design of a VLSI circuit.

While we don’t claim to stump for Agilent in any way, it’s good to know that newer releases of their equipment actually have improved hardware and aren’t just rebadged or firmware-upgraded versions of old hardware with a bigger price tag attached. Also, there wasn’t really any goal that [Kerry] had in mind besides sheer curiosity and a willingness to dive deep into electronics details, as those familiar with his other projects know already.

$3 Multimeter Teardown

[Diode Gone Wild] and his cat decided to see how a $3 meter worked inside. The meter was marked as a DT-830B and he already had an older one of the same model, and he wondered how they could afford to sell it — including shipping — for $3. You can see a video of his testing, teardown, and reverse engineering below.

What was odd is that despite having the same model number, the size of the meter was a bit different. When he opened the case to install a battery, he noticed the board didn’t look like it had fuses or components appropriate for the rated voltages. He decided the missing parts might be under the board and tested the meter.

Continue reading “$3 Multimeter Teardown”

Data Logging Like It’s 1982

If you want to log voltages or resistance these days, no problem. You can buy a multimeter with Bluetooth for a hundred bucks, and if you’re really fancy you can spring for the Fluke with a graphical display that will log values automatically. Things weren’t always this cheap and easy, but there was always a way to do it.

Back in the 80s, HP had GPIB, or HP-IB, or IEEE-488 connectors on the back of their benchtop equipment. This was an 8-bit interface not unlike a parallel port that allowed for remote control of test equipment. In a great demonstration of what this was actually like, [AkBKukU] posted a video of connecting an old benchtop multimeter to a vintage computer over GPIB.

The computer used for this feat of retrotechtacularness is an HP Series 80, a footnote in the history of desktop computers, but it does have a custom CPU and BASIC in ROM. As you would expect from vintage HP gear, there are a few slots on the back of the computer for connecting interface boxes, including a modem, a speech synthesizer, and of course, an HP-IB interface that can speak IEEE-488.

With the multimeter connected to the computer over the daisy-chainable parallel interface, it was a simple matter of writing a little bit of BASIC to read a potentiometer and a thermistor. With a little bit more code, this computer can even produce a graph of the resistance over time. This is data logging like it’s 1982, and it’s a fantastic example of exactly how far we’ve come.

Continue reading “Data Logging Like It’s 1982”

Putting The Mooshimeter To Sleep With A Bit Of Mercury

If you haven’t heard of it, the Mooshimeter is a two channel multimeter that uses your smartphone as a display over Bluetooth 4.0. The ability to simultaneously monitor voltage and current is rather unique, and the fact that you aren’t physically tethered to the thing makes it ideal for use in hard to reach or even dangerous locations. The promotional material for the Mooshimeter shows users doing things like leaving the device inside the engine compartment of a car while they drive around and take readings about the vehicle’s electrical system.

Note the vertical orientation

All that sounds well and good, but at the end of the day, the Mooshimeter is probably not going to be your primary multimeter. It’s going to stay on a shelf until a task befitting its unique abilities comes along. Unfortunately, as [nop head] found, that can be a problem. Like many modern devices, the Mooshimeter doesn’t actually turn off. It just sits there draining its battery until you’re ready to use it. Which of course means that when you’re finally ready to pull the thing out and put it to use, you get a low battery warning and need to put new AAs in it. First World problems.

The fix for this thoroughly modern problem is delightfully old school: a mercury tilt switch.

Using a small spacer made of Kapton tape, [nop head] was able to isolate the battery contacts from the PCB itself. He then soldered the mercury switch in place between them, making sure to position the bulb vertically. When the Mooshimeter is right side up, the mercury flows down and bridges the contacts; but when the device is inverted the contact is broken and the batteries stop draining. He still has to remember to put the Mooshimeter face down when he’s done with it, but it’s better than dealing with constant dead batteries.

There was a lot of initial interest in the Mooshimeter when it was announced in 2014, but we’ve seen precious little of it since. It certainly seems neat, but perhaps it’s a bit too niche for its own good? If Mooshimeter fulfills a critical role in your tool set, let us know in the comments below.