Tiny Tree Is A Thermometer For Christmas Fever

Tired of the usual methods for animating all those RGB LEDS for your holiday display? How about using trendiness in a non-trendy way?

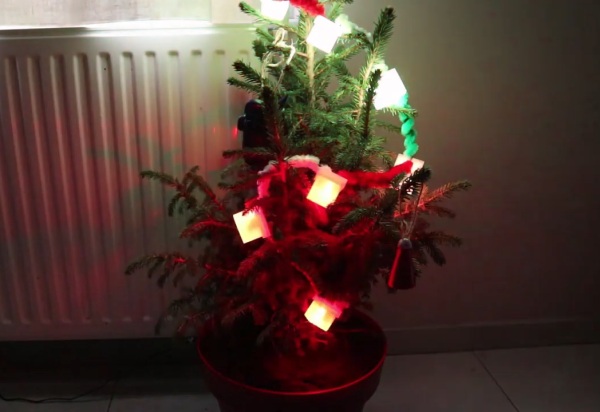
[8BitsAndAByte] caved in to increasing holiday madness and bought the cutest little Christmas tree. A special tree deserves special decorations, so they packed it with NeoPixels that turn from red to green and back again one by one. Here’s where the trendiness comes in: the speed at which they change is determined by the popularity of “Christmas” as a search term.

The NeoPixels are controlled by a Raspberry Pi 3B+ that uses PyTrends to grab a value from Google Trends once an hour. The service returns a value between 0 to 100, where 100 means the search term is extremely popular, and 0 means it’s probably the dead of January. Each NeoPixel is wired to the underside of a translucent printed gift box that does a great job of diffusing the light.

You know how Christmas trees have a tendency to stick around well into the new year? This one might last even longer than usual, thanks to the bonus party mode. Press the arcade button on the box cleverly disguised as a present, and the lights change from red to green and back at warp speed while the speaker inside blasts the party anthem of your choice. Be sure to check out the demo/build video waiting for you under after the break.

How could this little tree get any more special? Well, a rotating platform couldn’t hurt.

Continue reading “Tiny Tree Is A Thermometer For Christmas Fever”

Addressable LED Strings In Your USB

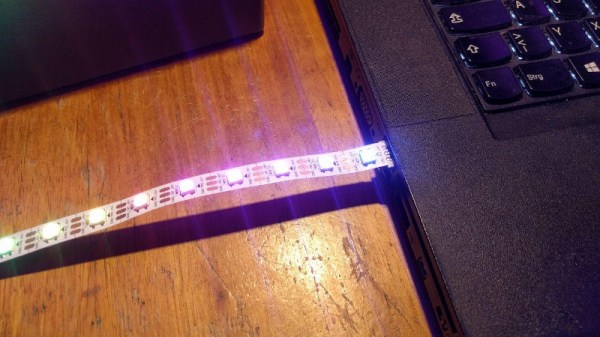
WS2812Bs, or NeoPixels, or whatever else you call them brought full-color LEDs to maker projects a meter at a time in recent years. Hooked up to a microcontroller, they make creating vibrant, full-color glowables a cinch. They won’t work on their own though, and a some point you want to ditch the dev board and let the blinking stand on its own two feet. Enter the USB LED Otter.

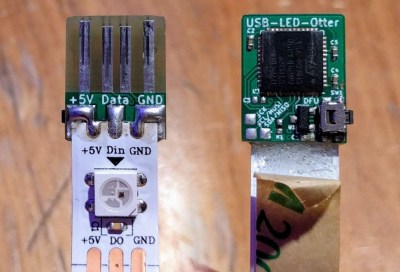
This small square of PCB lets you plug an LED strip directly into a USB port. The PCB itself has four traces on the back that mate with any USB port, and three pads for soldering the strip’s ground, 5 V line, and data. An STM32F072 microcontroller serves as the brains of the operation, packing plenty of horsepower and full compatibility with USB 2.0.

Code is flashed to the chip over USB using Device Firmware Upgrade (DFU) and once written the strip can then be driven by jamming the string into a suitably powerful USB wall charger. The woman behind the build, [Jana Marie], has mentioned that Open Pixel Control could be implemented but that may be an exercise left to the reader.

It’s a useful little tool, and one that promises to do even more with a little more development. Whipping up a few boards should be an easy task for anyone with a reflow oven and a free weekend. Oh, and if you’re tired of the WS2812? There’s other addressable LEDs out there, too!

Icosahedron Glows With The Best Of Them

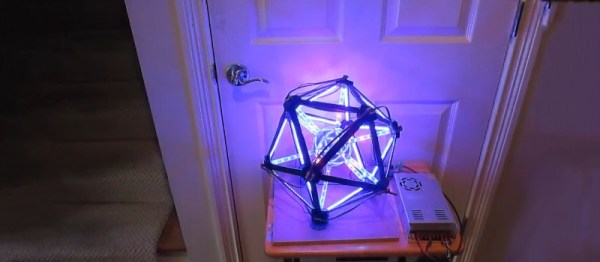
Glowables come in all shapes and sizes, and we’re always keen to see the multitude of different ways hackers find to put great masses of LEDs to good use. [cabrera.101] wanted to get in on the action, and whipped up a rather flashy icosahedron.

The build uses high-density 144-LED-per-meter strips for the edges, with 60-LED-per-meter strips used for the tubes that connect to the stainless steel ball in the centre. An Arduino Mega controls the Neopixel strips, with the wiring carefully planned out to ensure all LEDs have adequate power and signal to operate correctly. Not one to skimp on the juice, [cabrera.101] outfitted the rig with a 5V, 60A power supply – something that would have seemed ridiculous in 1992, but barely raises an eyebrow today.

It’s a build that would make a perfect whatchamacallit for a science fiction film. The reflections of the edge lights on the central sphere are particularly scintilliating. If you’re new to the realm of glowables, it’s easy to start – there are plenty of tools to help, too. Video after the break.

Continue reading “Icosahedron Glows With The Best Of Them”

Laser Crown Shines At Night

Sometimes you need something really flashy to complete an outfit. Whether it’s a sparkly pair of earrings or a stylish necklace, accessories are key to competing on the fashion battlefield. For those who want to bring some serious firepower, [p3nguin’s] laser crown might be just what the doctor ordered.

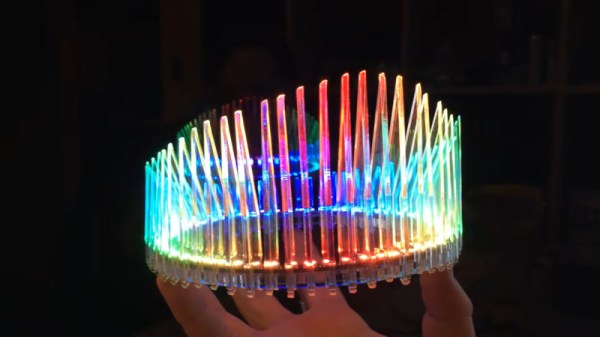
At the outset, we should state the crown only uses lasers in its construction, for cutting felt and acrylic. The light source is a Neopixel ring from Adafruit, capable of bringing the vibrant colors without risk of eye damage. The ring is then assembled with a series of snap-together acrylic parts and a felt cap, with slots for hair pins to keep the crown in place on the wearer’s head. A Trinket drives the show, with a LiPo battery used as a lightweight power supply.

It’s a nice build that’s sure to draw plenty of attention. We see some great wearables around these parts; this EL jacket is a particular favorite. Video after the break.

Continue reading “Laser Crown Shines At Night”

Hackaday Links Column Banner

Hackaday Links: September 8, 2019

We start this week with very sad news indeed. You may have heard about the horrific fire on the dive boat Conception off Santa Cruz Island last week, which claimed 33 lives. Sadly, we lost one of our own in the tragedy: Dan Garcia, author of the wildly popular FastLED library. Dan, 46, was an Apple engineer who lived in Berkley; his partner Yulia Krashennaya died with him. Our community owes Dan a lot for the work he put into FastLED over the last seven years, as many an addressable LED is being driven by his code today. Maybe this would be a good chance to build a project that uses FastLED and add a little light to the world, courtesy of Dan.

In happier news, the biggest party of the hardware hacking year is rapidly approaching. That’s right, the 2019 Hackaday Superconference will be upon us before you know it. Rumor has it that there aren’t that many tickets left, and we haven’t even announced the slate of talks yet. That’s likely to clean out the remaining stock pretty darn quickly. Are you seriously prepared to miss this? It seems like a big mistake to us, so why don’t you hop over and secure your spot before you’re crying into your Club-Mate and wondering what all the cool kids will be doing in November.

Of course one of the highlights of Superconference is the announcement of the Hackaday Prize winner. And while we naturally think our Prize is the best contest, that doesn’t mean there aren’t others worth entering. MyMiniFactory, the online 3D-printing community, is currently running a “Design with Arduino” competition that should be right up the alley of Hackaday readers. The goal is simple: submit a 3D-printed design that incorporates Arduino or other electronics. That’s it! Entries are accepted through September 16, so you’ve still got plenty of time.

Sometimes you see something that just floors you. Check out this tiny ESP32 board. It doesn’t just plug into a USB port – it fits completely inside a standard USB Type A jack. The four-layer board sports an ESP32, FTDI chip, voltage regulator, an LED and a ceramic antenna for WiFi and Bluetooth. Why would you want such a thing? Why wouldn’t you! The board is coming soon on CrowdSupply, so we hope to see projects using this start showing up in the tipline soon.

Here’s a “why didn’t I think of that?” bench tip that just struck us as brilliant. Ever had to probe a board to trace signal paths? It’s a common enough task for reverse engineering and repairs, but with increasingly dense boards, probing a massive number of traces is just too much of a chore. Hackaday superfriend Mike Harrison from “mikeselectricstuff” makes the chore easier with a brush made from fine stainless wires crimped into a ring terminal. Attached to one probe of a multimeter, the brush covers much more of the board at a time, finding the general area where your trace of interest ends up. Once you’re in the neighborhood you can drop back to probing one pad at a time. Genius! We’d imagine a decent brush could also be made from a bit of coax braid too.

Another shop tip to wrap up this week, this one for woodworkers and metalworkers alike. Raw materials are expensive, and getting the most bang for your buck is often a matter of carefully laying out parts on sheet goods to minimize waste. Doing this manually can be a real test of your spatial relations skills, so why not automate it with this cut list optimizer? The app will overlay parts onto user-defined rectangles and snuggle them together to minimize waste. The program takes any units, can account for material lost to kerfs, and will even respect grain direction if needed. It’s built for wood, but it should prove useful for sheet metal on a plasma cutter, acrylic on a laser, or even PCBs on a panel.

Giant LED Display Is 1200 Balls To The Wall

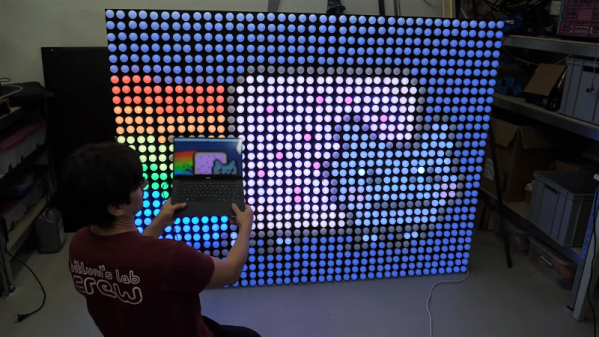
When you’re going to build something big, it’s often a good idea to start small and work out the bugs first. That’s what [bitluni] did with his massive 1200-pixel LED video wall, which he unveiled at Maker Faire Hanover recently.

We covered his prototype a while back, a mere 300 ping pong ball ensconced-LEDs on a large panel. You may recall his travails with the build, including the questionable choice of sheet steel for the panel and the arm-busting effort needed to drill 300 holes with a hand drill. Not wanting to repeat those mistakes, [bitluni] used the custom hole punch he built rather than a drill, and went with aluminum sheet for the four panels needed. It was still a lot of work, and he had to rig up some help to make the tool more comfortable to use, but in the end the punched holes appear much neater than their drilled counterparts.

[bitluni] mastered enough TIG welding to make nice aluminum frames for the panels, making them lightweight and easy to transport. 1200 ping pong balls, a gunked-up soldering iron, and a package of hot glue sticks later, the wall was ready for electronics. It took a 70-amp power supply and an ESP32 to run everything, but that’s enough horsepower to make some impressive graphics and even stream live video – choppy and low-res, but still usable.

We love the look this wall and we appreciate the effort that went into it. And it’s always good to see just how much fun [bitluni] has with his builds – it’s infectious.

Continue reading “Giant LED Display Is 1200 Balls To The Wall”

Neopixels Recreate Pinball Color Wheel That Never Was

With what pinball aficionados pay for the machines they so lovingly restore, it’s hard to imagine that these devices were once built to a price point. They had to make money, and whatever it took to attract attention and separate the customer from their hard-earned coins was usually included in the design. But only up to a point.

Take the 1967 Williams classic, “Magic City.” As pinball collector [Mark Gibson] explains it, the original design called for a rotating color filter behind a fountain motif in the back-glass, to change the color of the waters in an attractive way. Due to its cost, Williams never implemented the color wheel, so rather than settle for a boring fountain, [Mark] built a virtual color wheel with Neopixels. He went through several prototypes before settling on a pattern with even light distribution and building a PCB. The software is more complex than it might seem; it turns out to require a little color theory to get the transitions to look good, and it also provides a chance for a little razzle-dazzle. He implemented a spiral effect in code, and added a few random white sparkles to the fountain. [Mark] has a few videos of the fountain in action, and it ended up looking quite nice.

We’ve featured [Mark]’s pinball builds before, including his atomic pinball clock, We even celebrated his wizardry in song at one point.