Resurrecting Duckhunt

Bringing old things back to life holds a great sense of joy for most people. The never ending pursuit of recapturing our youth leads us down roads we’ve long forgotten. Along the way, we tend to bump into forgotten memories which jostle other forgotten memories which allows us to relive happy times we haven’t thought of in years, sometimes even decades. For some, the roar of a 351 small block sweeps them back to high school and the fast nights of cruising down main street with the FM radio cranked up as high as it would go.  For those of us who were born in the 80’s and 90’s, video games can bring back such memories. Who among us can forget our first encounter with Link, the elegant theme music of Final Fantasy or up-up-down-down-left-right-left-right-b-a-select-start?

Advances in processor technology has allowed us to relive our favorite games via emulators – programs that emulate processors of older computers. The games are ‘dumped’ from the ROM chips (where they are stored) into files. These game files can then be loaded into the emulator program, which allows you to play the game as if you were playing it on the original system.

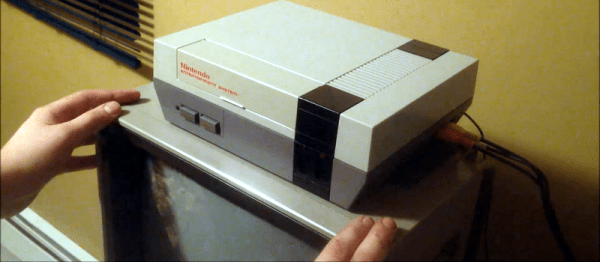
NES_02
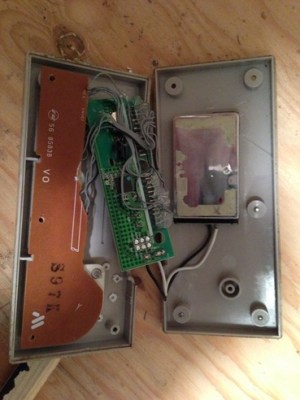
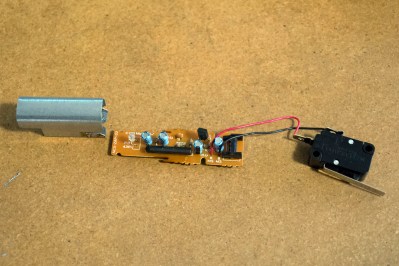
Guts of NES Zapper

Technology is truly a beautiful thing. It allows us to move forward, allows us to do today that which was not possible yesterday. There are a few cases, however, where this paradigm does not hold true. One of these has to do with the Nintendo Entertainment System and its “Zapper” gun controller. The NES was the most popular game console of its time, and rightfully so. From the minds of Nintendo engineers, programmers and audio experts came some of the best video games ever made. Unfortunately, some of these great games cannot be played on your Raspberry Pi favorite emulator due to the incompatibility of the Zapper gun and modern digital monitors.  None of us can forget the fun that Duckhunt brought. The game came as standard issue with all NES systems, so we’ve all played it. But its nostalgia is currently entombed by a technological quirk that has yet to be solved.

From one hacker to another – this can no longer be tolerated. First, we’re going to learn how the Zapper works and why it doesn’t work with digital displays. Then we’re going to fix it.

Continue reading “Resurrecting Duckhunt”

NES Reborn As Nexus Player And NES

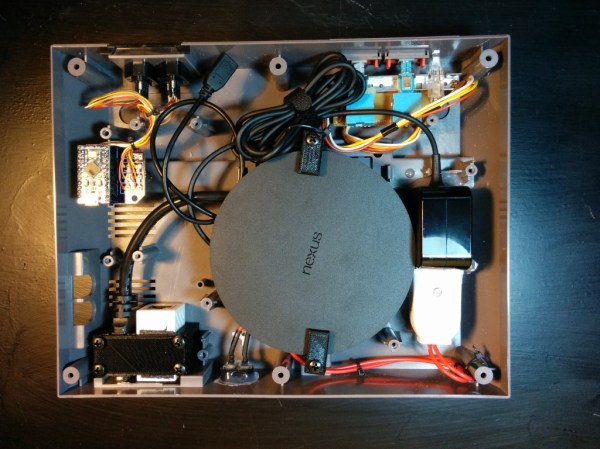
Anyone who has a Raspberry Pi and an old Nintendo has had the same thought. “Maybe I could shove the Pi in here?” This ran through [Adam’s] head, but instead of doing the same old Raspberry Pi build he decided to put a Nexus Player inside of this old video game console, with great success. Not only does it bring the power of a modern media player, it still works as an NES.

If you haven’t seen the Nexus Player yet, it’s Google’s venture into the low-cost home media center craze. It has some of the same features of the original Chromecast, but runs Android and is generally much more powerful. Knowing this, [Adam] realized it would surpass the capabilities of the Pi and would even be able to run NES emulators.

[Adam] went a little beyond a simple case mod. He used a custom PCB and an Arduino Pro Micro to interface the original controllers to the Nexus Player. 3D printed brackets make sure everything fits inside the NES case perfectly, rather than using zip ties and hot glue. He then details how to install all of the peripherals and how to set up the Player to run your favorite game ROMs. The end result is exceptionally professional, and brings to mind some other classic case mods we’ve seen before.

It’s A Sega It’s A Nintendo! It’s… Unique!

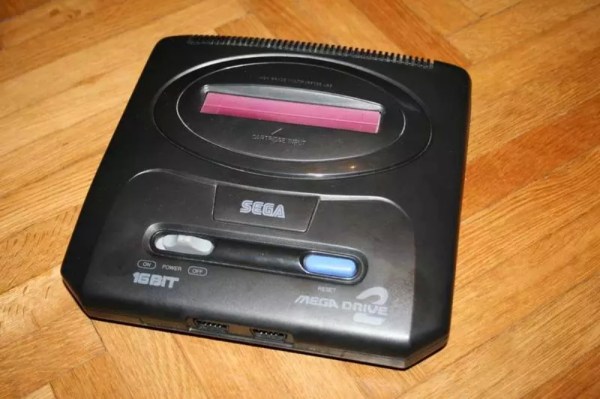
Before the days of the RetroPie project, video game clones were all the rage. Early video game systems were relatively easy to duplicate and, as a result, many third-party consoles that could play official games were fairly common. [19RSN007] was recently handed one of these clones, and he took some pretty great strides to get this device working again.

The device in question looks like a Sega Genesis, at least until you look closely. The cartridge slot isn’t quite right and the buttons are also a little bit amiss. It turns out this is a Famicom (NES) clone that just looks like a Sega… and it’s in a terrible state. After a little bit of cleaning, the device still wasn’t producing any good video, and a closer inspection revealed that the NOAC (NES-on-a-Chip) wasn’t working.

Luckily, [19RSN007] had a spare chip and was able to swap it out. The fun didn’t stop there though, as he had to go about reverse-engineering this chip pin-by-pin until he got everything sorted out. His work has paid off though, and now he has a video game system that will thoroughly confuse anyone who happens to glance at it. He’s done a few other clone repairs as well which are worth checking out, and if you need to make your own NES cartridges as well, we’ve got you covered there, too.

Neural Networks And MarI/O

Minecraft wizard, and record holder for the Super Mario World speedrun [SethBling] is experimenting with machine learning. He built a program that will get Mario through an entire level of Super Mario World – Donut Plains 1 – using neural networks and genetic algorithms.

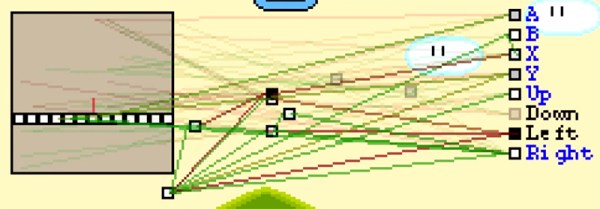
A neural network simply takes an input, in this case a small graphic representing the sprites in the game it’s playing, sends that input through a series of artificial neurons, and turns that into commands for the controller. It’s an exceedingly simple neural network – the network that can get Mario through an entire level is less than a dozen neurons – but with enough training, even simple networks can accomplish very complex tasks.

To train the network, or weighting the connections between inputs, neurons, and outputs, [SethBling] is using an evolutionary algorithm. This algorithm first generates a few random neural networks, watches Mario’s progress across Donut Plains 1, and assigns a fitness value to each net. The best networks of each generation are combined, and the process continues for the next generation. It took 34 generations before MarI/O could finish the level without dying.

A few members of the Internet’s peanut gallery have pointed to a paper/YouTube video by [Tom Murphy] that generalized a completely different technique to play a whole bunch of different NES games. While both [SethBling]’s and [Tom Murphy]’s algorithms use certain variables to determine its own success, [Tom Murphy]’s technique works nearly automatically; it will play about as well as the training data it is given. [SethBling]’s algorithm requires no training data – that’s the entire point of using a genetic algorithm.

Continue reading “Neural Networks And MarI/O”

Craft Bead NES Controller

NES Controller Made Out Of Fused Craft Beads

Close your eyes and think back, far back when you were a wee kid. Remember those colored beads that a child would populate on a small plastic peg board, arranged in some sort of artsy pattern, then ironed to fuse the beads together into a crafty trinket? They were fun for kids but what good are they to us adults nowadays? Well, [Lalya] has shown that they can be used to make a unique and interesting NES Controller.

First, the controller’s front panel was laid out on the pegboard, remembering to lay it out in reverse so the melted side of the beads was facing into the controller. Holes were left in the top panel for the D-pad and B/A buttons. The sides, back and bottom panels of the controller were made the same way. Hot glue holds the case panels together.

Craft Bead NES Controller

Inside the case is an Arduino and breadboard with three through-hole momentary buttons. These are wired up to the Arduino inputs and a sketch emulates keystrokes when connected to a computer. Unfortunately, the D-pad’s functionality is just a button right now. [Lalya] uses the project to control iTunes.  Maybe the next revision will be more video game friendly.

Having your own NES controller recreation might not be high on your list. But you have to admit that this s a pretty simple and inexpensive way to make custom enclosures.

LEGO NES Controller

Large NES Controller Made From LEGOs

If LEGO are cool, and abnormally large NES controllers are cool, then what [Baron von Brunk] has created is pretty dang cool. It’s a super large functional NES game controller…. made out of LEGO! Yes, your favorite building blocks from the past (or present) can now be use to make an unnecessarily large game controller.

lego-nes-internalsThe four main sides of the controller case are standard stacked grey LEGO bricks. The inside of the case is mostly hollow, only with some supporting structures for the walls and buttons. The top is made from 4 individual LEGO panels that can be quickly and easily removed to access the interior components. The large LEGO buttons slide up and down inside a frame and are supported in the ‘up’ position care of some shock absorbers from a Technic Lego set. The shocks create a spring-loaded button that, when pressed down, makes contact with a momentary switch from Radio Shack. Each momentary switch is wired to a stock NES controller buried inside the large replica. The stock controller cord is then connected to an NES-to-USB adapter so the final product works with an NES Emulator on a PC.

[Baron von Brunk] is no stranger to Hackaday or other LEGO projects, check out this lamp shade and traffic light.

Continue reading “Large NES Controller Made From LEGOs”

Tweeting From The NES Expansion Port

[Trapper] is an 80’s kid, and back in the day the Nintendo Entertainment System was his jam. One fateful night, he turned over his favorite gray box, removed a small plastic guard, and revealed the mythical expansion port. What was it for? What would Nintendo do with it?

The expansion port on the NES wasn’t really used for anything, at least in the US market. Even in the homebrew scene, there’s only one stalled project that allows the NES to connect to external devices. To fulfill [Trap]’s childhood dream, he would have to build something for the NES expansion port. Twitter seemed like a good application.

The first step towards creating an NES Expansion Port Twitter thing was to probe the depths of this connector. The entire data bus for the CPU is there, along with some cartridge pass-through pins and a single address line. The design of the system uses a microcontroller and a small bit of shared SRAM with the NES. This SRAM shares messages between the microcontroller and NES, telling the uC to Tweet something, or telling the NES to put something on the screen.

Only a single address pin – A15 – is available on the expansion port, but [Trapper] needed to read and write to a certain section of memory starting at $6000. This meant Addresses A13 and A14 needed to be accessed as well. Fortunately, these pins are available on the cartridge slot, and there are a number of cartridge pass-through pins on the expansion connector. Making a bridge between a few pins of an unused cartridge solved this problem.

From there, it’s just a series of message passing between a microcontroller and the NES. With the help of [Trap]’s brother [Jered] and a Twitter relay app running on a server, this NES can actually Tweet. You can see a video of that below.

Continue reading “Tweeting From The NES Expansion Port”