In Which Robots Fight The Console Wars

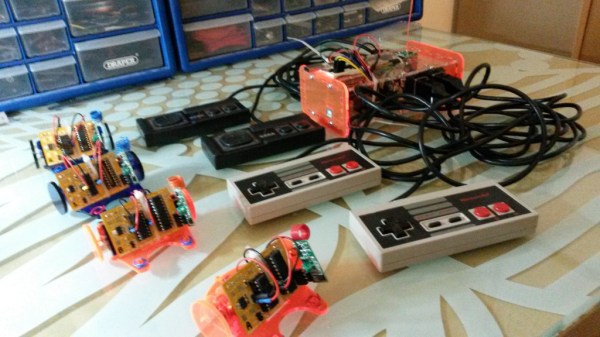
Though the names have changed over the years, the console wars wage on. [moop] must have been feeling nostalgic for the NES vs. SEGA days when he started his current project, Foobot, which is a tabletop football (soccer) game played by robots that are controlled with classic NES and SEGA controllers.

Each team has two robots that tool around on laser-cut perspex wheels attached directly to 16,000RPM motors. An SN754410 controls the motors, and each robot has an ATtiny2313 brain. They all communicate with a single transmitter over their 433MHz 1402 radio receiver modules. To avoid collisions, [moop] used a packet system, wherein each robot has an ID. The messages all contain a robot ID, message payload, and checksum. The robots ignore messages addressed to others, and any message with an invalid checksum.

[moop] has made everything available on his github, including the PCB layouts and CAD files for the robot chassis and transmitter case. Watch them battle it out after the break. If the Foobots have riled you up about vintage gaming, check out these sweet arcade hacks.

Continue reading “In Which Robots Fight The Console Wars”

[darNES] Stores Cached Netflix On NES Cartridge

Let’s play a quick word association game: Peanut butter…jelly. Arches…golden. NES…Netflix?  That last one sounds like a stretch, but the [darNES] development team had a Hack Day and a dream.  They started with cached Netflix data and ended up playing it on an ordinary NES. (YouTube link)

The data was pre-converted so that the video frames were stored as tilesets and stored in the ROM image. [Guy] used the NES memory mapper (MMC3) to swap the frames. [darNES] had originally planned to use a Raspberry Pi in the cartridge to handle the video conversion and networking, but had to change gears and make a static ROM image due to time constraints and resource availability.

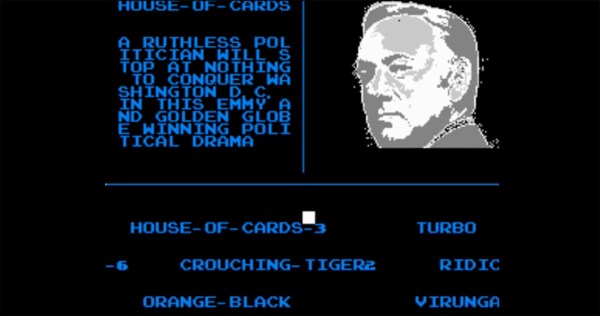
Accessing the Netflix data is just like the days of yore – load the cartridge into an unmodified NES and hit the power button (they didn’t even need to blow on it!). A bare-bones Netflix gallery appears. You can move the white cursor on the screen with the NES controller’s D-pad. House of Cards was the choice, and true to form, the next screen shows you a synopsis with a still image and gives you the option to Play. Recommend is also there, but obviously won’t work in this setup. Still, it got a chuckle out of us. [darNES] admits that due to time issues they did not optimize the color palette for the tilesets. They plan to release more of the technical info this week, but have already given us some hints on their Hacker News thread.

Check out the videos after the break to see the video they fit onto a 256K NES cartridge.

Continue reading “[darNES] Stores Cached Netflix On NES Cartridge”

BeagleSNES For Game Boy, Game Boy Advance, NES, And – Yes – SNES

By far the most common use for the Raspberry Pi is shoving a few dozen emulators on an SD card and calling it a day. Everybody’s got to start somewhere, right? There are other tiny, credit card-sized Linux boards out there, and [Andrew] is bringing the same functionality of the Raspi to the BeagleBone Black and BeagleBoard with BeagleSNES, an emulator for all the sane pre-N64 consoles.

BeagleSNES started as a class project in embedded system design, but the performance of simply porting SNES9X wasn’t very good by default. [Andrew] ended up hacking the bootloader and kernel, profiling the emulator, and slowly over the course of three years of development making this the best emulator possible.

After a few months of development, [Andrew] recently released a new version of BeagleSNES that includes OpenGL ES, native gamepad support through the BeagleBone’s PRU, and support for all the older Nintendo consoles and portables. Video demos below.

Continue reading “BeagleSNES For Game Boy, Game Boy Advance, NES, And – Yes – SNES”

PS4 NES

Add Extra Storage To Your PS4 With Retro Flair

[Frank] came up with a clever way to extend the storage of his PS4. He’s managed to store his digital PS4 games inside of storage devices in the shape of classic NES cartridges. It’s a relatively simple hack on the technical side of things, but the result is a fun and interesting way to store your digital games.

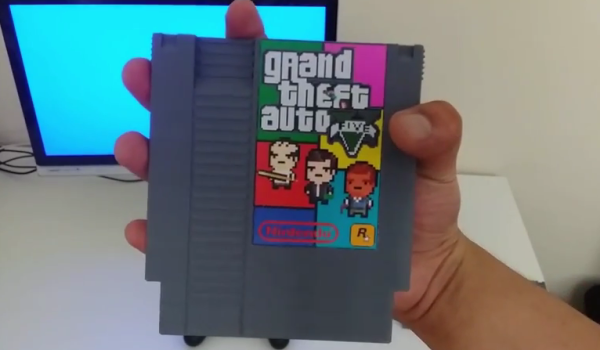
He started out by designing his own 3D model of the NES cartridge. He then printed the cartridge on his Ultimaker 3D printer. The final print is a very good quality replica of the old style cartridge. The trick of this build is that each cartridge actually contains a 2.5″ hard drive. [Frank] can store each game on a separate drive, placing each one in a separate cartridge. He then prints his own 80’s style labels for these current generation games. You would have a hard time noticing that these games are not classic NES games at first glance.

Storing the game in cartridge form is one thing, but reading them into the PS4 is another. The trick is to use a SATA connector attached to the PS4’s motherboard. [Frank’s] project page makes it sound like he was able to plug the SATA cable in without opening the PS4, by attaching the connector to a Popsicle stick and then using that to reach in and plug the connector in place. The other end of the SATA cable goes into a custom 3D printed housing that fits the fake NES cartridges. This housing is attached to the side of the PS4 using machine screws.

Now [Frank] can just slide the cartridge of his choice into the slot and the PS4 instantly reads it. In an age where we try to cram more and more bits into smaller and smaller places, this may not be the most practical build. But sometimes hacking isn’t about being practical. Sometimes it’s simply about having fun. This project is a perfect example. Continue reading “Add Extra Storage To Your PS4 With Retro Flair”

NES Controller

Turning A Classic NES Controller Into A Bluetooth Controller

[Pietronet] is like many of us in that he enjoys playing some classic console video games from time to time. He usually plays them on his PC using a Wiimote as a controller. The Wiimote has most of the classic buttons in a comfortable configuration. Plus, it’s got Bluetooth built-in, which makes it easy to pair up to your PC. [Pietronet] decided to take it a step further, though. He managed to cram all of the guts from a Wiimote inside of the original NES controller for a more authentic feel.

The first step was to crack open the Wiimote and locate pads for each button. Once they were located, [Pietronet] used a Dremel to cut the board into a smaller size. He cut off part of the circuit board that contained the directional pad as well as the connector for the nunchuck. Next he had to solder very thin wires to each of the button pads he located earlier.

The original NES controller has a very limited number of buttons, and [Pietronet] wanted to modify the original controller as little as possible. Therefore, he attached a magnetic reed switch to the Wiimote’s sync button. This way if he ever needs to sync the Wiimote to a new console, he can do it by holding a magnet in the right place. This is a function that isn’t often used, so the inconvenience should be negligible.

The next step was to connect the buttons from the original NES controller up to the wires that were added to the Wiimote. [Pietronet] left the original circuit board mostly intact. He did have to cut a small chunk of it away in order to make room for two AAA batteries, but this didn’t affect the functionality of the controller.

The inside of the NES controller had to be cleaned out of various standoffs and plastic bits to make room for all of the extra components. The Wiimote has an LED to indicate that the controller is connected properly. [Pietronet] soldered a red SMD LED in its place on the end of two thin wires. This LED was then placed on the bottom left side of the directional pad. It’s visible through a translucent filter. This allows [Pietronet] to see when the NES controller is synced up properly.

The case fits back together and everything is held in place. The result is what looks and feels like a classic NES controller, only this one has Bluetooth connectivity and a vibration motor. Check out the video demonstration below to get an idea of what it looks like in use. Continue reading “Turning A Classic NES Controller Into A Bluetooth Controller”

Fixing An NES For Good

Sometime in the late 80s, the vast collective consciousness of 8-year-olds discovered a Nintendo Entertainment System could be fixed merely by blowing on the cartridge connector. No one knows how this was independently discovered, no one knows the original discoverer, but one fact remains true: dirty pins probably weren’t the problem.

The problem with a NES that just won’t read a cartridge is the ZIF socket inside the console. Pins get bent, and that spring-loaded, VCR-like front loader assembly is the main point of failure of these consoles, even 30 years later. You can get replacement ZIF sockets for a few bucks, and replace the old one using only a screwdriver, but this only delays the inevitable. That ZIF socket will fail again a few years down the line. Finally, there is a solution.

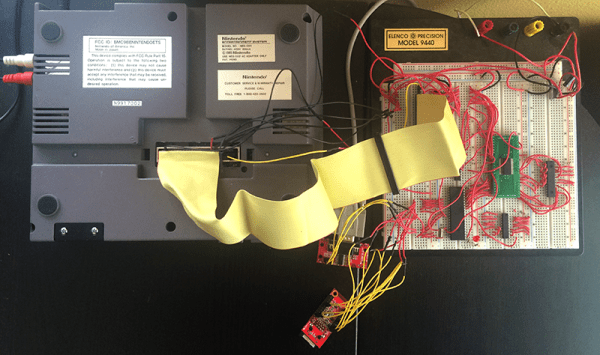
The Blinking Light Win, as this project is called, replaces the ZIF connector with two card-edge slots. One slot connects to the NES main board, the other to the cartridge connector. There’s a plastic adapter that replaces the spring-loaded push down mechanism created for the original ZIF connector, and installation is exactly as easy as installing a reproduction NES ZIF connector.

If you’re wondering why consoles like the SNES, Genesis, and even the top-loader NES never had problems that required blowing into the cartridge connector, it’s because the mere insertion of the cartridge into the slot performed a scrubbing action against the pins. Since the ZIF socket in the O.G. NES didn’t have this, it was prone to failure. Replacing the ZIF with a true card-edge slot does away with all the problems of dirty contacts, and now turns the NES into something that’s at least as reliable as other cartridge-based consoles.

Hackaday Links: August 3, 2014

hackaday-links-chain

A ton of people sent in this video of crazy Russians who have taken a microwave, removed the magnetron, taped it to a broom, and turned it on. Don’t try this at home. Or near us.

You know the Google Cardboard kit that’s a real VR headset made of cardboard (and a smart phone)? Google may have gotten their inspiration from Oculus, because every Oculus Rift DK2 ships with a Samsung Galaxy Note 3 inside.

paul allen

Ever design a PCB and be disappointed by the quality of the silkscreen? [Paul Allen] has been defining the edges of his PCB labels with the copper layer, and the examples are dramatic. Etching copper is what you actually pay for when you fab a board, so it should come as no surprise that the quality is a little higher.

Dunk tanks are fun, but how about competitive dunk tanks? [Chad] built a dunk tank (really more of a ‘dunk shower’) out of a 2×4 tripod, a garbage can, and a few parts from a the toilet aisle of Home Depot’s plumbing department. Then he built a second. Set up both dunk showers across from each other, give two people a few balls, and see who gets soaked last. Looks fun.

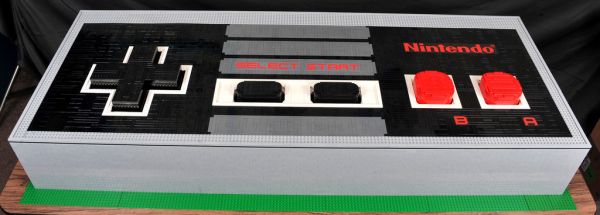
Want a MAME cabinet, but don’t want it taking up room in your house? Build a MAME coffee table! Here’s the reddit thread. Maybe we’re old-fashioned, but we’d rather have a giant NES controller coffee table.

Last week we saw a 16-bobbin rope braiding machine, but odd braiding machines like this aren’t limited to fibers. Here’s a wire twisting machine for making RS422 cables. It only produces a single twisted pair, but that’s really all you need to create a cable. Somebody get some paracord and make some Cat5.