White Oak Illuminated Bluetooth Speaker

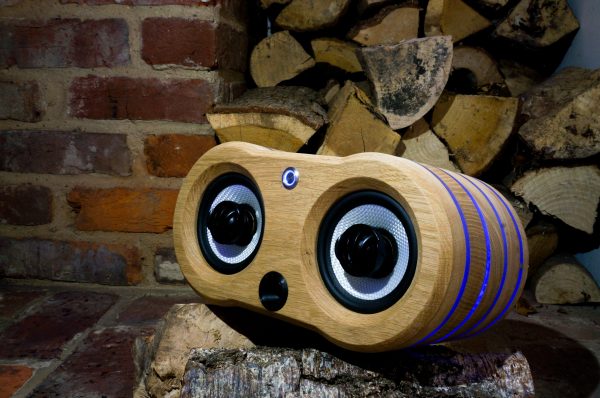
Besides being common tools available to most hackers and makers out there, 3D printing, CNC machines, and cheap Chinese electronics have one more things in common: they were all used by [Nick] to build a bluetooth speaker system that has some interesting LED effects built into the case.

This is fresh on the heels of another hack that used similar construction methods to build a “magic” wood lamp. [Nick] takes it a step further, though. His case is precisely machined in white oak and stuffed with the latest China has to offer: a bank of lithium-ion batteries, a DC-DC converter to power the amplifier, and a Bluetooth module. After some sanding, the speakers look professional alongside the blue light features hiding behind the polycarbonate rings.

Of course you’ll want to visit the project site for all the details of how [Nick] built his speaker case. He does admit, however, that the electronics are fairly inefficient and need a little work. All in all though, it’s a very refined set of speakers that’ll look great on a bookshelf or on a beach, workshop bench, or anyplace else that you could take them.

Continue reading “White Oak Illuminated Bluetooth Speaker”

Retrotechtacular: Coopering Guinness Barrels By Hand

For almost exactly 200 years, the Guinness brewery in Dublin, Ireland employed extremely skilled craftsmen to shape and construct wooden casks by hand. These men were called coopers, and plying their trade required several years of apprenticeship. The cooperage was a kind of closed society as many of the positions were passed down through generations of families. With the rise of aluminium and then stainless steel barrels in the late 1950s, the master coopers of Guinness became a dying breed.

Almost every step of the coopering process shown in this film is done without any kind of precise measurement. A master cooper like [Dick Flanagan] here needs only his eyes and his practiced judgment. His barrels start out as oak planks called ‘staves’ that have been drying in racks for at least two years. A cooper selects the staves that strike his fancy and he saws off the ends. This seems to be the only part of the process where a power tool is used.

The cooper shapes each stave by hand with axe and adze so that its ends are tapered just so. Once he has shaped enough of them to make a barrel, he arranges them in a cylinder around the inside of a metal band known as a hoop. The bound staves are steamed for half an hour to make them pliable enough for shaping.

After steaming, the splayed end of the staves are bound with wire rope to pull them close enough together that a hoop can be fitted over them. The inside of the cask is then charred with burning oak shavings, a process that seals the wood and removes its acidity. After this, the ends are sanded and the bunghole is drilled.

For each barrel, the cooper crafts a custom set of hoops. These are installed after the outside of the barrel has been shaved smooth. Finally, the heads that cap each end of the cask are made from more oak staves held together with dowel rods. This is the only time the cooper uses a tool to measure anything, and he does so to achieve the proper circumference on the heads. He bevels the edges so the heads will fit into bored-out grooves in the cask walls. Once they’re seated, the keg is ready for dark, rich stout.

Continue reading “Retrotechtacular: Coopering Guinness Barrels By Hand”

The Digistump Oak; An ESP8266 On Kickstarter

When it was first released, the ESP8266 was a marvel; a complete WiFi solution for any project that cost about $5. A few weeks later, and people were hard at work putting code on the tiny little microcontroller in the ESP8266 and it was clear that this module would be the future of WiFi-enabled Things for the Internet.

Now it’s a Kickstarter Project. It’s called the Digistump Oak, and it’s exactly what anyone following the ESP8266 development scene would expect: WiFi, a few GPIOs, and cheap – just $13 for a shipped, fully functional dev board.

The guy behind the Oak, [Erik Kettenburg], has seen a lot of success with his crowdfunded dev boards. He created the Digispark, a tiny, USB-enabled development board that’s hardly larger than a USB plug itself. The Digispark Pro followed, getting even more extremely small AVR dev boards out in the wild.

The Digistump Oak moves away from the AVR platform and puts everything on an ESP8266. Actually, this isn’t exactly the ESP8266 you can buy from hundreds of unnamed Chinese retailers; while it still uses the ESP8266 chip, there’s a larger SPI Flash, and the Oak is FCC certified.

Yes, if you’re thinking about building a product with the ESP8266, you’ll want to watch [Erik]’s campaign closely. He’s doing the legwork to repackage the ESP into something the FCC can certify. Until someone else does it, it’s a license to print money.

The FCC-certified ESP8266 derived module, cleverly called the Acorn, will be available in large quantities, packaged in JEDEC trays sometime after the campaign is finished. It’s an interesting board, and we’re sure more than one teardown of the Acorn will hit YouTube when these things start shipping.

Mephisto III Internet Radio

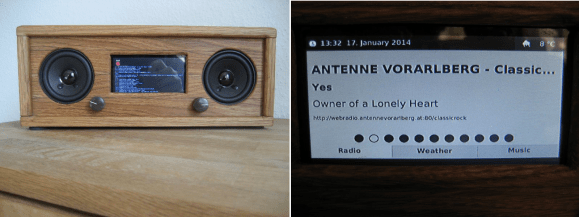
Avid Hackaday reader [Matthias] told us he takes a lot of inspiration from our site. That’s quite a compliment, because his work is both inspiring and beautiful. [Matthias] wanted to build a UI using JavaFX, so he made a really nice-looking Raspberry Pi-based Internet radio. We featured his previous radio build a few months ago when he modified an old Bakelite unit.

The Mephisto III is enclosed in a handsome oak cabinet built by [Matthias]’ father. Like his previous build, this one uses the Google Music interface to play MP3s and streams radio from the web. He also added weather and a clock, which is a nice touch. In addition to the Raspi and a USB WLAN stick, [Matthias] is using two relays. One relay powers the amplifier and the other enables the display. [Matthias] is impressed with the JavaFX API, but found that the performance of the Raspberry Pi is insufficient for smooth multithreading. He considered switching to a BeagleBone Black, but it has no component out.

If you want to be able to listen to vinyl, too, check out this killer media center. If you have lost your taste for Pi, build yourself a web radio from a tiny router.

[Thanks Matthias]

Fine Furniture Kegerator Serves A Lot Of Beer; Smokes A Lot Of Cigars

diy-kegerator

This kegerator looks like a piece of fine furniture but closer examination of the build shows that it is at least partially hacked together. As with most of the multi-keg variants on the idea this starts with a chest freezer, but it doesn’t utilize a custom collar as is often the case.

After cutting the holes in the lid of the freezer for these beer towers [Lorglath] began building a wooden frame around it using pocket hole screws. Despite his efforts to keep things plumb and square, there was some… creative… shimming done when it came time to wrap it in oak veneer boards and add the trim pieces. But knowing where to hide the flaws got him through this part of the project and onto the surface finish. Look closely at the image above, all of those scraps are cigar rings. That represents a lot of smoke!

The rings were laid down in layers, with thin resin pours between each. To achieve a smooth and clear finish a heat gun was used to level the surface and pop any bubbles that made their way into the goo. The finished version has room to store eight kegs which are connected to the octet of taps above. That’s a lot of beer to brew, and a lot to drink!

Building An Oak Telescope

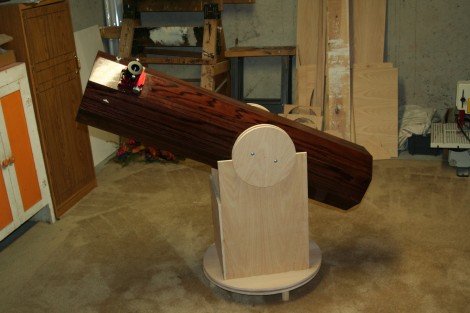
You might not think about the finish of your homemade telescope but if it’s build from solid oak you probably should. [Gregory Strike] built this 8″ telescope a few years back but just posted about it a few days ago. The optics are quite expensive but the rest of the build was done dirt cheap and he did a great job of it.That includes taking care to finish the oak boards that make up the octagonal body of the instrument.

This is much more approachable for the average hacker than something like the 22″ binocular build (or going way too far and building your own observatory). [Gregory] developed his design after looking at a couple of others. If you need a bit of a push to get started check out the telescope resource we ran across in our days of Internet infancy.