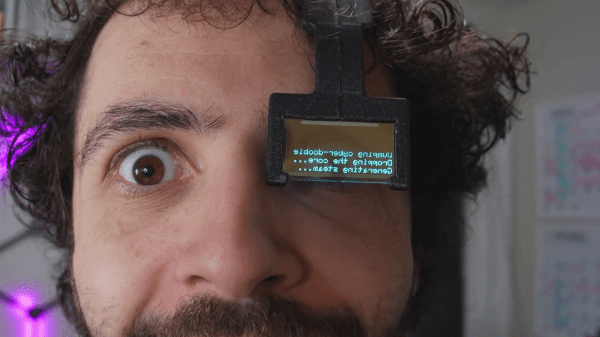
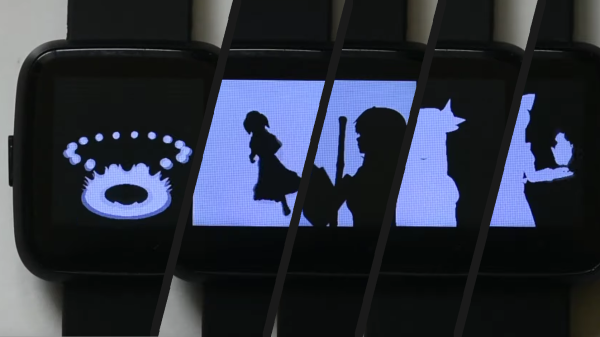
An OLED Photo Frame Powered By The ATtiny85

Rolling your own digital picture frame that loads images from an SD card and displays them on an LCD with a modern microcontroller like the ESP32 is an afternoon project, even less if you pull in somebody else’s code. But what if you don’t have the latest and greatest hardware to work with?

Whether you look at it as a practical application or an interesting experiment in wringing more performance out of low-end hardware, [Assad Ebrahim]’s demonstration of displaying digital photographs on an OLED using the ATtiny85 is well worth a look. The whole thing can put put together on a scrap of perfboard with a handful of common components, and can cycle through the five images stored on the chip’s flash memory for up to 20 hours on a CR2032 coin cell.

As you might expect, the biggest challenge in this project is getting all the code and data to fit onto the ATtiny85. To that end [Assad] wrote his own minimal driver for the SSD1306 OLED display, as the traditional Adafruit code took up too much space. The driver is a pretty bare bones implementation, but it’s enough to initialize the screen and get it ready for incoming data. His code also handles emulating I2C over Atmel’s Universal Serial Interface (USI) at an acceptable clip, so long as you bump the chip up to 8 MHz.

For the images, [Assad] details the workflow he uses to take the high-resolution color files and turn them into an array of bytes for the display. Part of that it just scaling down and converting to 1-bit color, but there’s also a bit of custom Forth code in the mix that converts the resulting data into the format his code expects.

This isn’t the first time we’ve seen somebody use one of these common OLED displays in conjunction with the ATtiny85, and it’s interesting to see how their techniques compare. It’s not a combination we’d necessarily chose willingly, but sometimes you’ve got to work with whats available.

Analog Style VU Meter With Arduino And OLED Display

Looking for a digital recreation of the classic analog volume unit (VU) meter? If you’ve got an Arduino, a few passive components, and a SSD1306 OLED, then [mircemk] might have the answer for you. As you can see in the video below, his code turns a handful of cheap parts into an attractive and functional audio display.

The project’s Hackaday.IO page explains that the idea is based on the work of [stevenart], with code adapted for the SSD1306 display and some tweaks made to the circuit. While [mircemk] says the code could be modified for stereo as long as the two displays don’t have conflicting I2C addresses, he decided to simply duplicate the whole setup for each channel to keep things simple. With as cheap as some of these parts are nowadays, it’s hard to blame him.

[mircemk] has provided source code for a couple different styles of VU indicators, the colors of which can easily be inverted depending on your tastes. He also clarifies that the jerky motion of the virtual “needle” seen in the video is due to the camera; in real-life it sweeps smoothly like the genuine article.

Much like the project that aimed to recreate authentic “steam gauges” with e-paper displays, this as an excellent technique to file away for use in the future. Compared to authentic analog gauges, these digital recreations are quicker and faster to implement, plus going this route prevents any antique hardware from going on the chopping block.

Continue reading “Analog Style VU Meter With Arduino And OLED Display”

Gesture-Detecting Macro Keyboard Knows What You Want

[jakkra] bought a couple of capacitive touchpads from a Kickstarter a few years ago and recently got around to using them in a project. And what a project it is: this super macro pad combines two touchpads with a 6-pack of regular switches for a deluxe gesture-sensing input device.

Inside is an ESP32 running TensorFlow Lite to read in the gestures from the two touchpads. The pad at the top is a volume slider, and the square touchpad is the main input and is used in conjunction with the buttons to run AutoHotKey scripts within certain programs. [jakkra] can easily run git commands and more with a handful of simple gestures. The gestures all seem like natural choices to us: > for next media track, to push the current branch and to fetch and pull the current branch, s for git status, l for git log, and the one that sounds really useful to us — draw a C to get a notification that lists all the COM ports. One of the switches is dedicated to Bluetooth pairing and navigating menus on the OLED screen.

We love the combination of inputs here and think this looks great, especially with the double touchpad design. Be sure to check out the gesture demo gif after the break.

Gesture input seems well-suited to those who compute on the go, and a gesture glove feels like the perfect fit.

Continue reading “Gesture-Detecting Macro Keyboard Knows What You Want”

Roller Skating, Wile E. Coyote-Style

They say you learn something new every day, and they’re usually right about that. Today’s tidbit is that just anybody (including [Ian Charnas]) can exchange money for jet engines, no questions asked. Scary, huh? So once [Ian] secured the cutest little engine, he took a poll regarding possible uses for it. Jetpack rollerskating won, that’s obvious enough. So let’s get into those details.

[Ian] procured this particular jet engine from an outfit called CRX Turbines. It tops out at 98,000 RPM and 30 kg (66 lbs.) of thrust. Essentially, he is pulsing the engine’s ECU with PWM from an Adafruit RadioFruit and controlling it with a pair of stripped drills that are just being used for their convenient grips and switches. One is wired as a dead man’s switch, and the other controls the throttle signal.

In order to run the thing and test the thrust a bit before strapping it on his back, [Ian] went about this the smart way and welded together a sliding stand. And he didn’t use just any old Jansport backpack, he welded together a frame and roll cage for the engine and attached it to a full-body harness. There’s also a heat shield to keep his backside from catching fire.

At first he tested the jet pack with shoes instead of skates to make sure it was going to behave as he predicted. Then it was time to bust out the roller skates. [Ian] achieved a top speed of 17 MPH before losing his balance, but he knew it could go faster, so he invited some roller derby skaters to try it out. One of them went over 30 MPH! Be sure to check it out in the build and demo video after the break.

If you’re at all familiar with [Ian]’s videos, you know that he usually raffles off the build and gives the money to charity. Well, not this time! That wouldn’t be prudent. Instead, he’s going to choose the best suggestion for what to attach it to, build it, and raffle that off. Hopefully, he stays away from airports with that thing on his back.

Continue reading “Roller Skating, Wile E. Coyote-Style”

Play Your Favorite Nokia Game On The Raspberry Pi Pico

In many people’s memories, Snake lived and breathed on Nokia handsets from the late 90s and early 2000s. However, the game has been around for much longer than that, and will continue to live on in the future. That’s at least in part thanks to people like [Hari Wiguna] keeping it alive by implementing it on new platforms.

[Hari] set about writing Snake in MicroPython for the Raspberry Pi Pico. The hardware side of things is simple enough – five buttons hooked up to the Pico, along with an 128×64 I2C OLED screen to display the game on. On the software side of things, [Hari] pushed the boat out, deciding that his version of Snake had to have the player character slither like the real thing. This took a little effort to get right, particularly when navigating corners in different directions. However, perseverance paid off and [Hari] got the job done.

Code is on GitHub for those that want to tinker at home. It’s a tidy piece of work, though not the weirdest place we’ve seen the game appear – we’ve actually seen it run within PCB routing software before thanks to some nifty scripting. Video after the break. Continue reading “Play Your Favorite Nokia Game On The Raspberry Pi Pico”

The Future’s So Bright, You Gotta Wear Arduglasses

Tiny OLED displays are an absolute must-have in the modern parts bin, so what better way to show your allegiance to the maker movement than with a pair of Arduino-compatible OLED glasses? Created by Arduboy mastermind [Kevin Bates], these digital spectacles might not help you see any better — in fact, you’ll see a bit worse — but they’ll certainly make you stand out in the crowd at the next hacker con. (Whenever we can have one of those again, anyway.)

The key to this project is a pair of transparent CrystalFonts OLED displays, just like the ones [Sean Hodgins] recently used to produce his gorgeous volumetric display. In fact, [Kevin] says it was his success with these displays that inspired him to pursue his own project. With some clever PCB design, he came up with some boards that could be manufactured by OSH Park and put together with jewelry box hinges. Small flexible circuits, also from OSH Park, link the boards and allow the frames to fold up when not being worn.

The Arduglasses use the same ATmega32U4 microcontroller as the Arduboy, and with a few basic controls and a small 100 mAh rechargeable battery onboard, they can technically run anything from the open source handheld’s extensive software library. Of course, technically is the operative word here. While the hardware is capable of playing the games, [Kevin] reports that the OLED displays are too close to the wearer’s eyes to actually focus on them. That said the ability to easily create software for these glasses offers plenty of opportunity for memes, as we see in the video below.

For reasons that are probably obvious, [Kevin] considers the Arduglasses an experiment and isn’t looking to turn them into a commercial product or kit. But if there’s interest, he’s willing to put the design files up on GitHub for anyone who wants to add a pair of Arduino glasses to their cyberpunk wardrobe.

Continue reading “The Future’s So Bright, You Gotta Wear Arduglasses”

A Handy Reference For Display Drivers And LCD Controllers

Ever tried to find the data on a mysterious LCD controller that’s kicking around in your parts bin? Well check out this list of various LCD controllers that [Achim] has put together. He summarizes the basic specifications for each controller and includes data sheet links if available (note — the website is in German, although most of the data itself is in English). All in all, he has collected 72 controllers from five different manufacturers, and 46 of them have data sheets. For each controller, he tabulates maximum resolution, color depth, type of interface, and the targeted display technology. For example, here is the entry for the Ilitech ILI9341 TFT controller commonly found in embedded projects:

Furthermore, many of the controllers also have a short video clip showing them in operation posted over on [Achim]’s YouTube channel, where he also has a bunch of quick (less than one minute) videos of all sorts of embedded goodies. We do find this table of controllers to be a little dated — for example, another popular controller used on small color OLED displays, the Solomon Systech SDS1351, is not included. But it is certainly a good resource to bookmark.

We suspect that [Achim] made this table as a result of developing µGUI, a small (only three files) C-language graphics library (see the GitHub repository) he released back in 2015. Do you have any good resources for tracking down unknown LCD controllers? If so, share in the comments below. And thanks to [Dmitry] for sending in this tip.

Continue reading “A Handy Reference For Display Drivers And LCD Controllers”