[Aaron Lager]’s Pi-O-Scope-Pong project takes a minimal approach to Pong by drawing on an oscilloscope to generate crisp paddles and ball. A Raspberry Pi takes care of the grunt work of signal generation, and even uses the two joysticks of an Xbox controller (connected to the Pi over Bluetooth) for inputs.
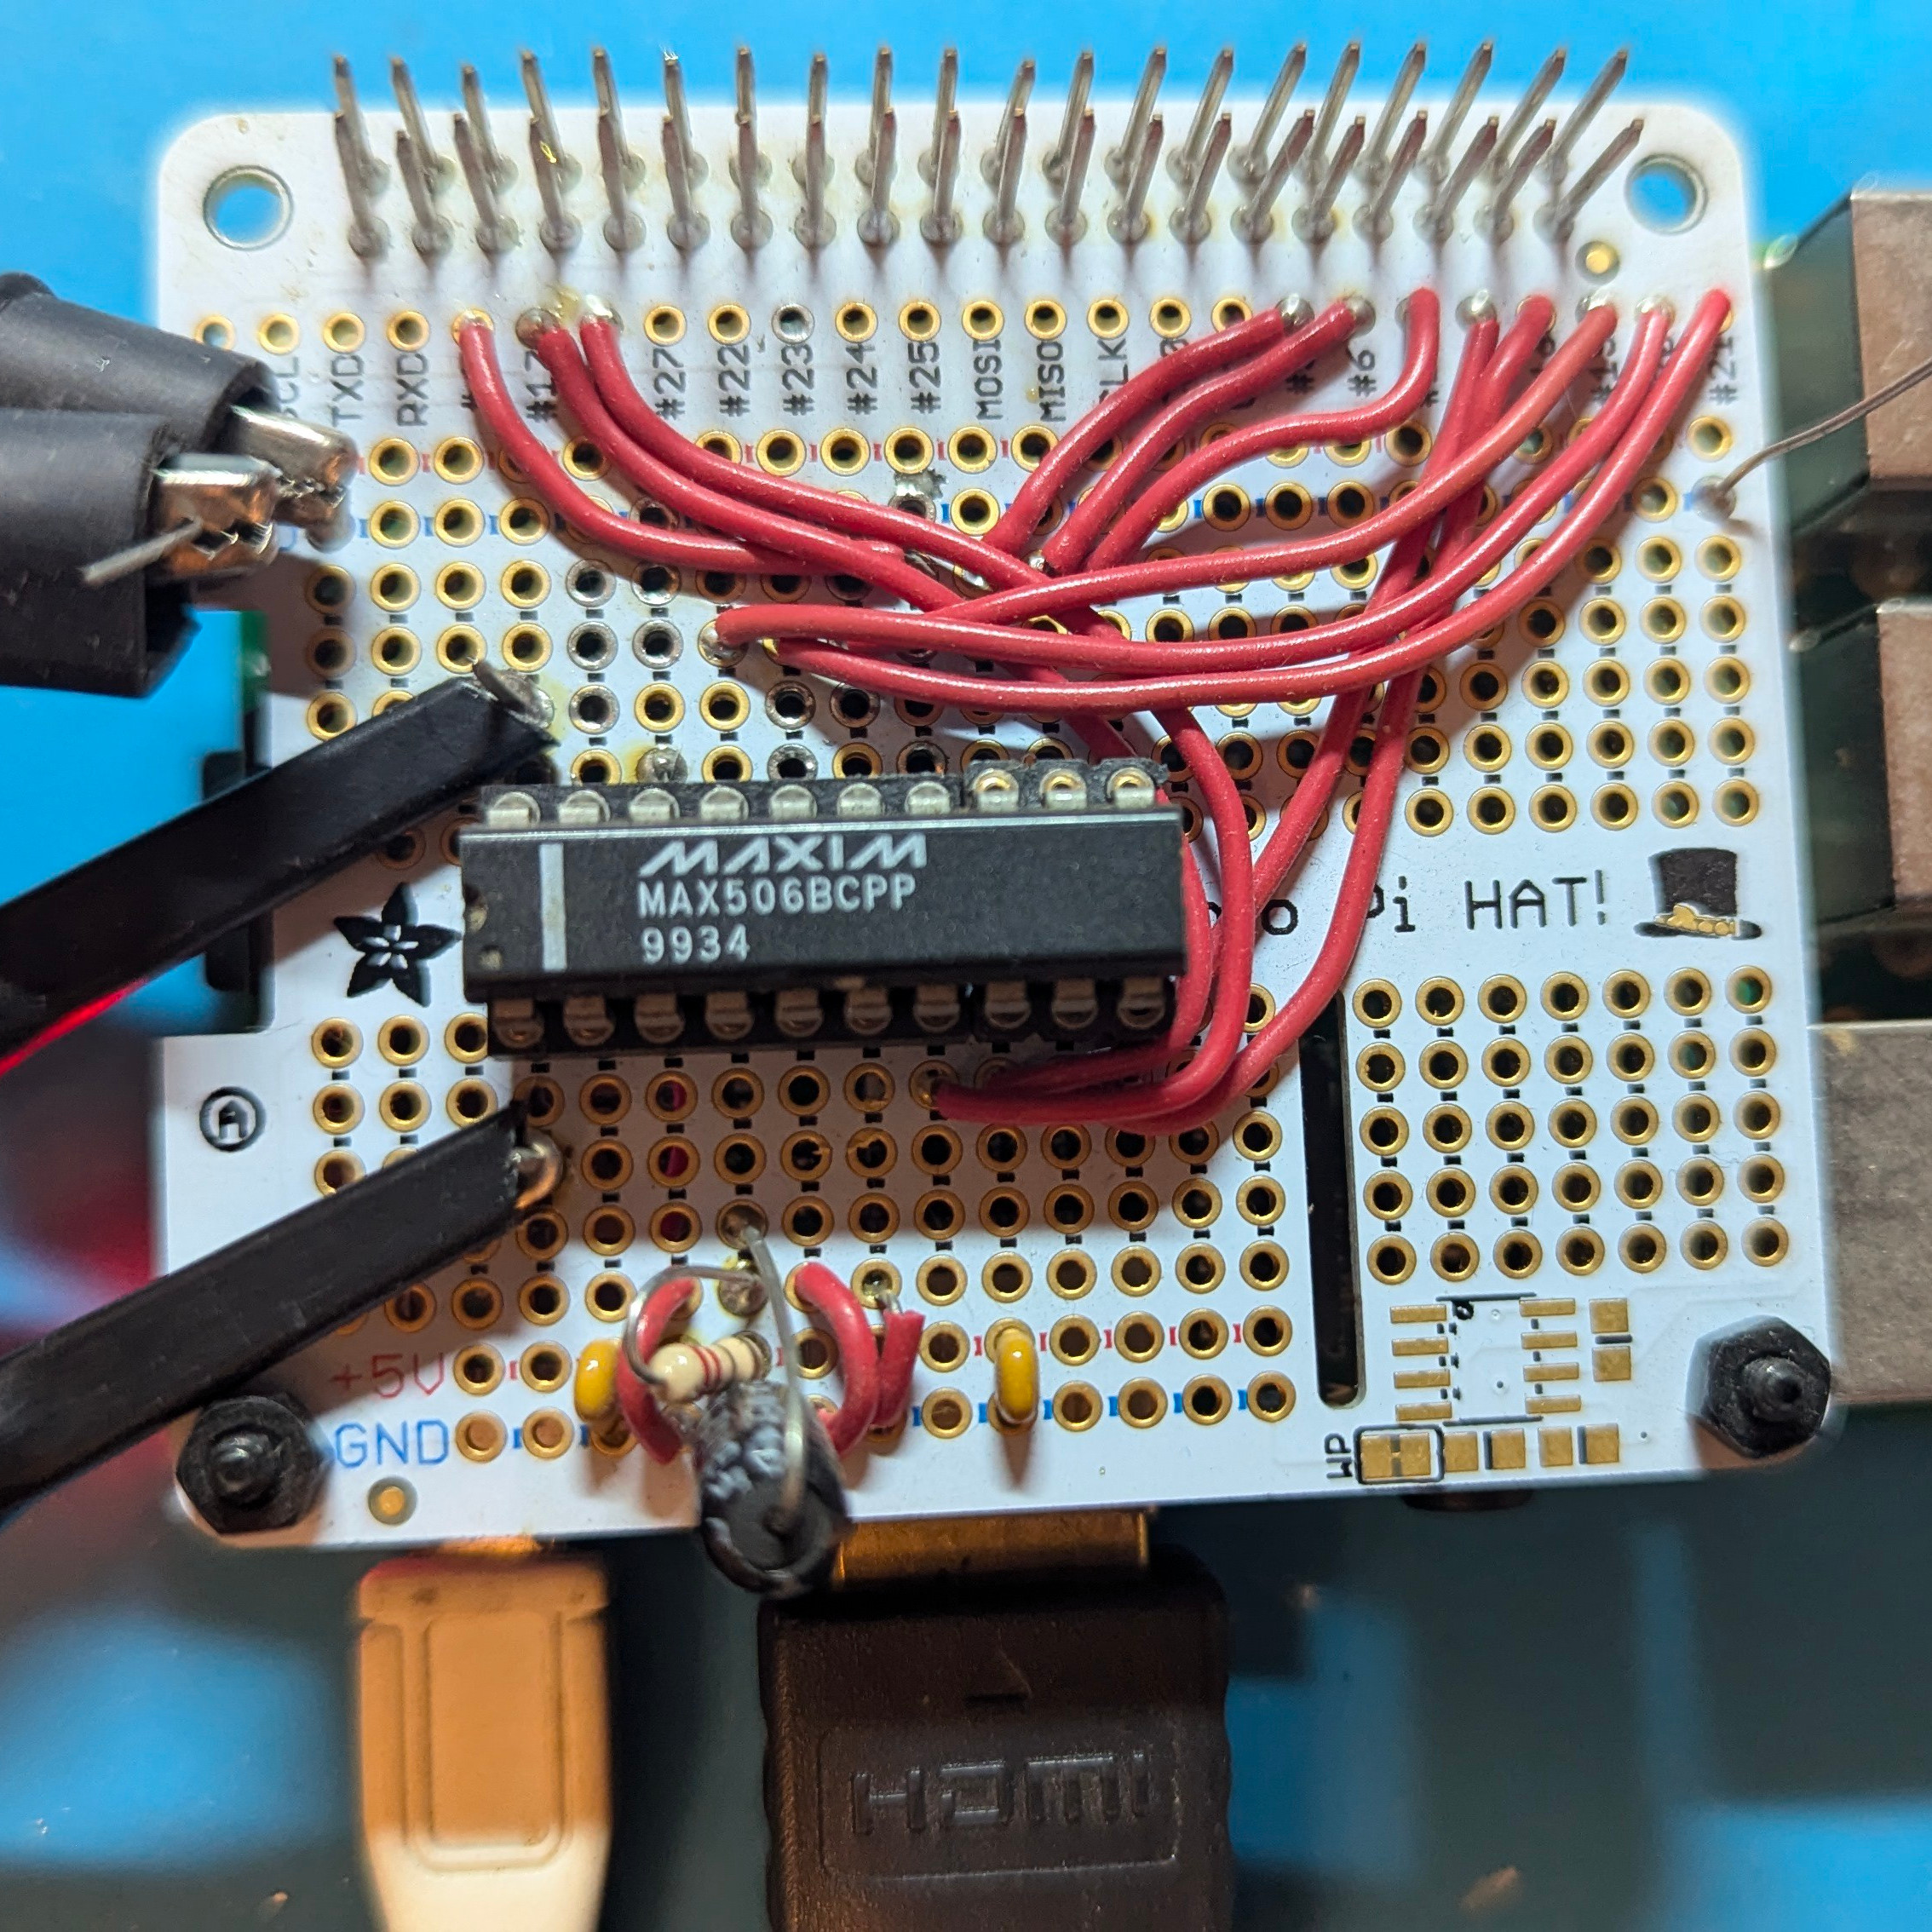
Originally, [Aaron] attempted to generate the necessary signals directly from the Pi’s PWM outputs by doing a little bit of RC filtering on the outputs, but was repulsed by the smeary results. The solution? An old but perfectly serviceable 8-bit MAX506 DAC now handles crisping up the visuals with high-quality analog outputs. Code is available on the project’s GitHub repository.
There isn’t any score-keeping or sound, but one thing that it has over the original Pong is a round ball. The ball in the original Pong game was square, but mainly because cost was a concern during design and generating a round ball would have ballooned the part count.
In many ways, Pong itself is a great inspiration for the Tiny Games Challenge, because the simplicity of its gameplay was likely a big part of its success.
Everyone knows that you can never purchase enough projects off EBay, lest boredom might inadvertently strike. That’s why [Anthony Kouttron] got his mitts on an Agilent DSO-X 2014A digital oscilloscope that was being sold as defective and not booting, effectively just for parts. When [Anthony] received the unit, this turned out to be very much the case, with the front looking like it got dragged over the tarmac prior to having the stuffing beaten out of its knobs with a hammer. Fortunately, repairing the broken encoder and the plastic enclosure was easy enough, but the scope didn’t want to boot when powered on. How bad was the damage?
As [Anthony] describes in the article, issues with this range of Agilent DSOs are well-known, with for example the PSU liking to fry the primary side due to soft power button leaving it powered 24/7 with no cooling. The other is corrupted NAND storage, which he confirmed after figuring out the UART interface on the PCB with the ST SPEAr600 ARM-based SoC. Seeing the sad Flash block decompression error from the Windows CE said enough.
This led him down the rabbithole of finding the WinCE firmware images (nuked by Keysight, backed up on his site) for this scope, along with the InfiniiVision scope application. The former is loaded via the bootloader in binary YMODEM mode, followed by installing InfiniiVision via a USB stick. An alternate method is explained in the SPEAr600 datasheet, in the form of USB BootROM, which can also be reached via the bootloader with some effort.
As for the cause of the NAND corruption, it’s speculated that the scope writes to the same section of NAND Flash on boot, with the SPEAr600’s Flash controller documentation not mentioning wear leveling. Whether that’s true or not, at least it can be fixed with some effort even without replacing the NAND Flash IC.
While we generally prefer to bring our readers as much information about a project as possible, sometimes we just have to go with what we see. That generally happens with new projects and work in progress, but it can also happen with old projects. Sometimes very old indeed, as is the case with this digital sampling unit for analog oscilloscopes, circa 1979.
We’ve got precious little to go on with this one other than the bit of eye candy in the video tour below and its description. Luckily, we’ve had a few private conversations with its maker, [Mitsuru Yamada], over the years, enough to piece together a little of the back story here — with apologies for any wrong assumptions, of course.
Built when he was only 19, this sampler was an attempt to build something that couldn’t be bought, at least not for a reasonable price. With no inexpensive monolithic analog-to-digital converters on the market, he decided to roll his own. A few years back he recreated the core of that with his all-discrete successive approximation ADC.
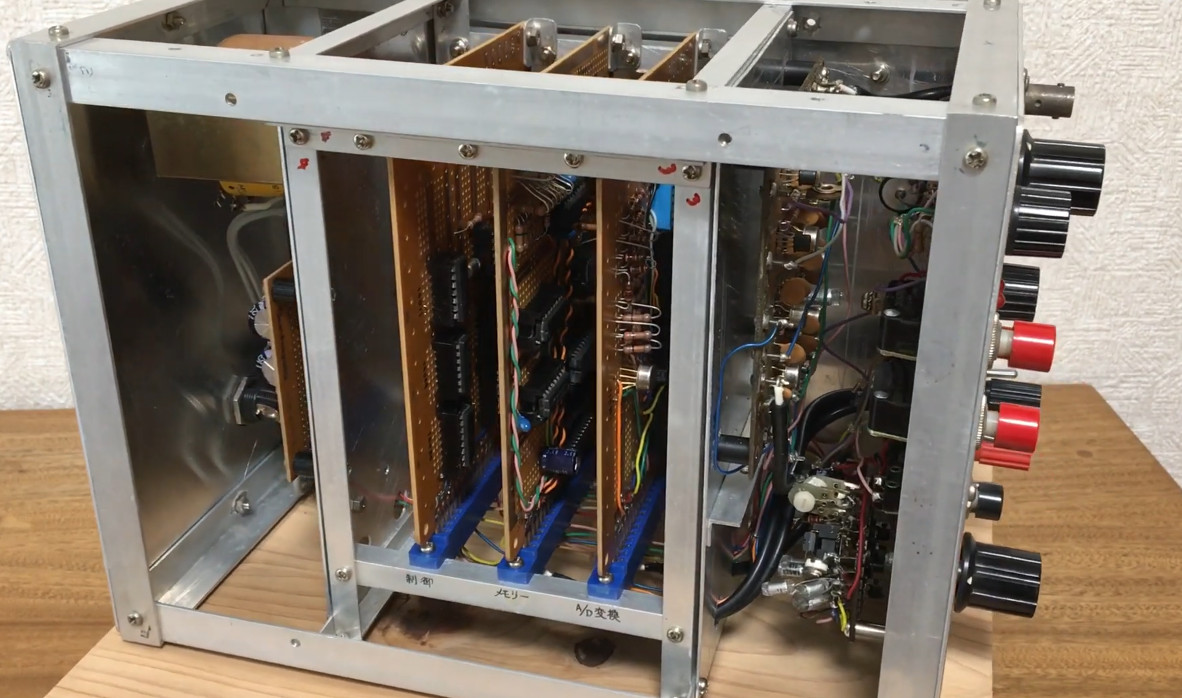
The sampler shown below has an 8-bit SAR ADC using discrete CMOS logic and enough NMOS memory to store 256 samples. You can see the ADC and memory cards in the homebrew card cage made from aluminum angle stock. The front panel has a ton of controls and sports a wide-range attenuator, DC offset, and trigger circuit with both manual and automatic settings.
It’s an impressive build, especially for a 19-year-old with presumably limited resources. We’ve reached out to [Yamada-san] in the hope that he’ll be able to provide more details on what’s under the hood and if this still works after all these years. We’ll pass along whatever we get, but in the meantime, enjoy.
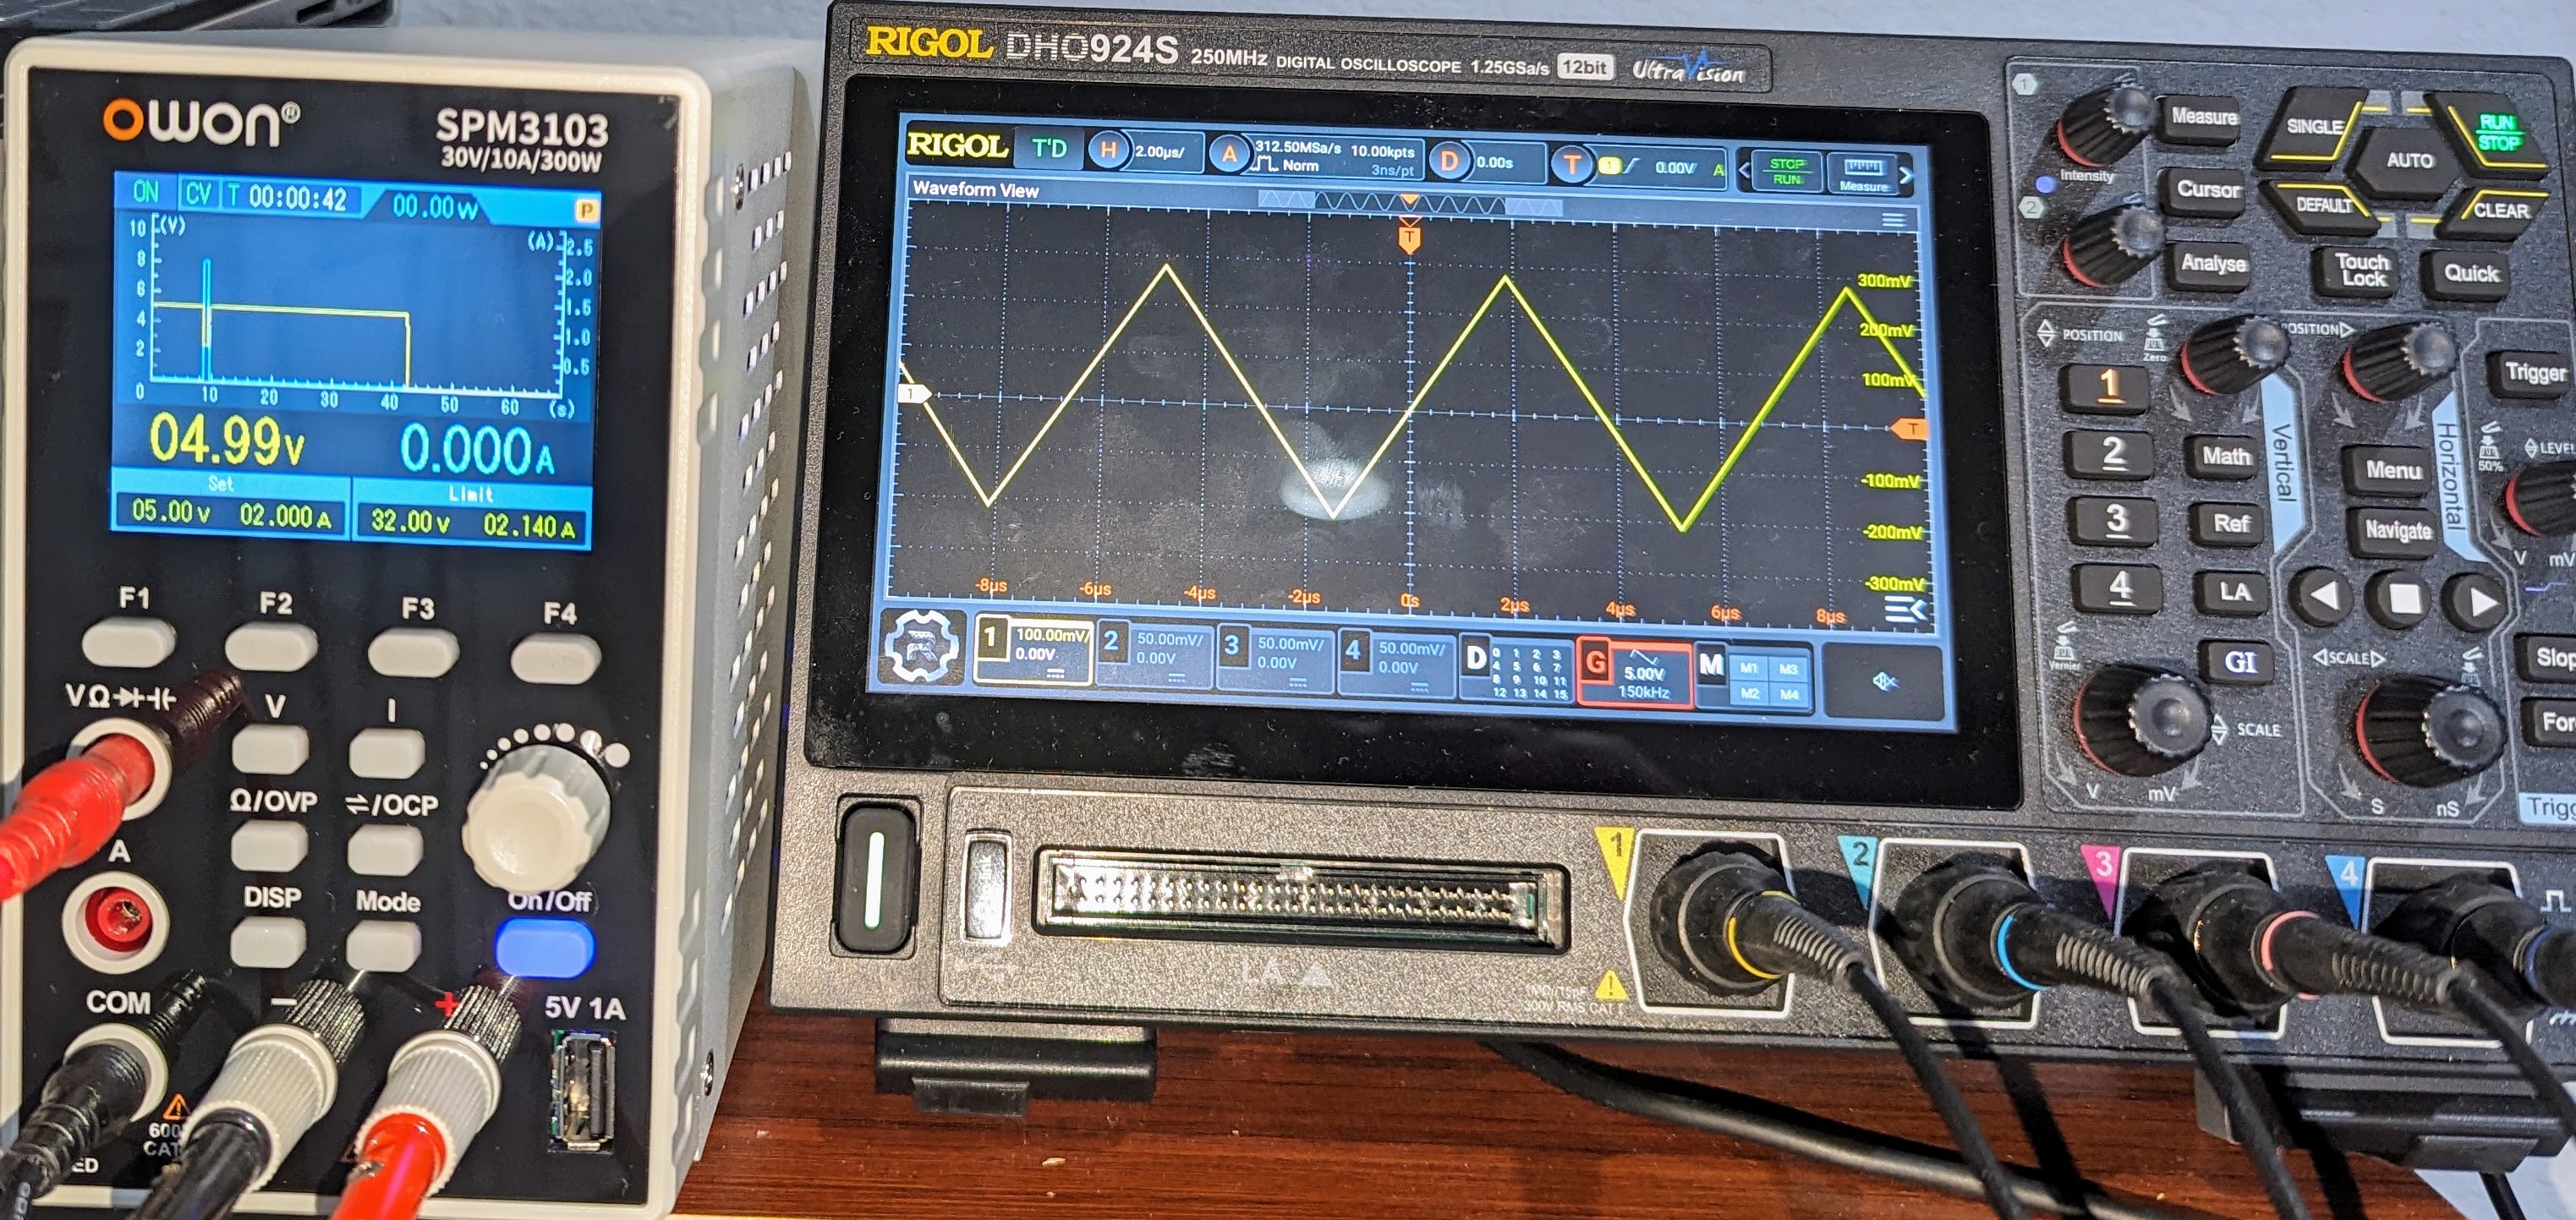
Ever wanted to see how well your oscilloscope adheres to its stated capabilities? What if you buy a new scope and need a quick way to test it lest one of its channels its broken, like [Paul Wasserman] had happen to him? Now you only need a Pi Pico and a few extra components to make a scope test board with a large variety of signals it can output, thanks to [Paul]’s Sig Gen Pi Pico firmware.
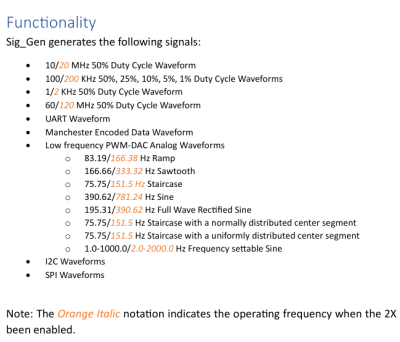
Despite the name it’s not a signal generator as we know it, as it’s not flexible in the signals it generates. Instead, it creates a dozen signals at more or less the same time — from square waves of various frequencies and duty cycles, to a PWM-driven DAC driving eight different waveforms, to Manchester-encoded data I2C/SPI/UART transfers for all your protocol decoder testing.
It’s seriously impressive how many features [Paul] has fit into a single firmware. Thanks to his work, whenever you have some test equipment in need of being tested, just grab your Pico and a few passive components.
A dip meter is basically a coil of wire that, when you excite it, you can use to tell if something inside that coil is resonating along. This lets you measure unknown radio circuits to figure out their resonant frequency, for instance. This week, we featured a clever way to make a dip meter with a nanoVNA, which is an odd hack simply because a dip meter used to be a common spare-parts DIY device, while a vector network analyzer used to cost more than a house.
Times have changed, and for the better. Nowadays, any radio amateur can pick up a VNA for less than the cost of all but the cheesiest of walkie talkies, putting formerly exotic test equipment in the hands of untrained mortals. But what good is a fancy-pants tool if you don’t know how to use it? Our own Jenny List faced exactly this problem when she picked up a nanoVNA, and her first steps are worth following along with if you find yourself in her shoes.
All of this reminded me of an excellent series by Mike Szczys, “Scope Noob”, where he chronicled his forays into learning how to use an oscilloscope by running all of the basic functions by working through a bunch of test measurements that he already knew the answer to.
It strikes me that we could use something like this for nearly every piece of measuring equipment. Something more than just an instruction manual that walks you through what all the dials do. Something that takes you through a bunch of example projects and shows you how to use the tool in question through a handful of projects. Because these days, access to many formerly exotic pieces of measuring gear has enabled many folks to have gear they never would have had before – and all that’s missing is knowing how to drive them.
This article is part of the Hackaday.com newsletter, delivered every seven days for each of the last 200+ weeks. It also includes our favorite articles from the last seven days that you can see on the web version of the newsletter.
Want this type of article to hit your inbox every Friday morning? You should sign up!
Imagine an electronics lab. If you grew up in the age of tubes, you might envision a room full of heavy large equipment. Even if you grew up in the latter part of the last century, your idea might be a fairly large workbench with giant boxes full of blinking lights. These days, you can do everything in one little box connected to a PC. Somehow, though, it doesn’t quite feel right. Besides, you might be using your computer for something else.
I’m fortunate in that I have a good-sized workspace in a separate building. My main bench has an oscilloscope, several power supplies, a function generator, a bench meter, and at least two counters. But I also have an office in the house, and sometimes I just want to do something there, but I don’t have a lot of space. I finally found a very workable solution that fits on a credenza and takes just around 14 inches of linear space.
How?
How can I pack the whole thing in 14 inches? The trick is to use only two boxes, but they need to be devices that can do a lot. The latest generation of oscilloscopes are quite small. My scope of choice is a Rigol DHO900, although there are other similar-sized scopes out there.
If you’ve only seen these in pictures, it is hard to realize how much smaller they are than the usual scopes. They should put a banana in the pictures for scale. The scope is about 10.5″ wide (265 mm and change). It is also razor thin: 3″ or 77 mm. For comparison, that’s about an inch and a half narrower and nearly half the width of a DS1052E, which has a smaller screen and only two channels.
A lot of test gear in a short run.
If you get the scope tricked out, you’ve just crammed a bunch of features into that small space. Of course, you have a scope and a spectrum analyzer. You can use the thing as a voltmeter, but it isn’t the primary meter on the bench. If you spend a few extra dollars, you can also get a function generator and logic analyzer built-in. Tip: the scope doesn’t come with the logic analyzer probes, and they are pricey. However, you can find clones of them in the usual places that are very inexpensive and work fine.
There are plenty of reviews of this and similar scopes around, so I won’t talk anymore about it. The biggest problem is where to park all the probes. Continue reading “The Short Workbench”→
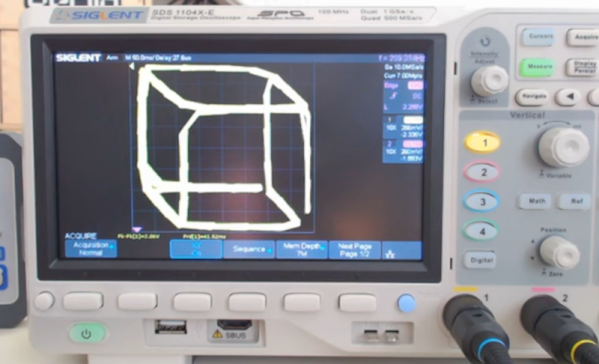
Drawing on an oscilloscope’s XY mode isn’t a new idea. However, if you’ve ever wanted to give it a go, you’d be hard-pressed to find more information than the nearly hour-and-a-half video about the topic from [Low Byte Productions]. You can check out the video below.
If you prefer to jump straight into the code, there’s a GitHub page. While the code is specific to the STM32, you can apply the ideas to anything.

 Originally, [Aaron] attempted to generate the necessary signals directly from the Pi’s PWM outputs by doing a little bit of RC filtering on the outputs, but was repulsed by the smeary results. The solution? An old but perfectly serviceable 8-bit MAX506 DAC now handles crisping up the visuals with high-quality analog outputs. Code is available on the project’s GitHub repository.


 Despite the name it’s not a signal generator as we know it, as it’s not flexible in the signals it generates. Instead, it creates a dozen signals at more or less the same time — from square waves of various frequencies and duty cycles, to a PWM-driven DAC driving eight different waveforms, to Manchester-encoded data I2C/SPI/UART transfers for all your protocol decoder testing.