Digital Clock Goes With The Grain

This good-looking clock appears to be made out of a block of wood with LED digits floating underneath. In reality, it is a block of PLA plastic covered with wood veneer (well, [androkavo] calls it veneer, but we think it might just be a contact paper or vinyl with a wood pattern). It makes for a striking effect, and we can think of other projects that might make use of the technique, especially since the wood surface looks much more finished than the usual 3D-printed part.

You can see a video of the clock in operation below. The clock circuit itself is nothing exceptional. Just a MAX7218 LED driver and a display along with an STM32 ARM processor. The clock has a DHT22 temperature and humidity sensor, as well as a speaker for an alarm.

Continue reading “Digital Clock Goes With The Grain”

Customize Your Ratios With A 3D-Printed Gearbox

Small DC motors are easy to find — you can harvest dozens from old printers and copiers. You might even get a few with decent gearboxes too. But will you get exactly the motor with exactly the gearing your project needs? Unlikely, but you can always just print a gearbox to get exactly what you need.

There’s nothing fancy about [fortzero]’s gearboxes. The motors are junk bin specials, and the gears are all simple spur gears 3D-printed from PLA. There are four gears in the train, each with a 2:1 reduction, giving a 16:1 overall ratio. The gears ride on brass shafts that are press-fit into the housing, and there’s not a bearing in sight — just a few washers to keep the gears spaced apart and plenty of grease. Despite the simplicity, the gearboxes turned out to be pretty capable, lifting a 3.5 kg load. The design files are available and should make it easy for you to get just the ratio you want for the motor you have.

Of course more complicated gearboxes are possible with a 3D printer, including a split-harmonic planetary gear, or a strain wave gear using a timing belt. No 3D printer? No problem! Just build a LEGO gearbox.

Continue reading “Customize Your Ratios With A 3D-Printed Gearbox”

Let’s Prototype! This Filament End Needs 80 Decibels

Reaching the end of a spool of filament when 3D printing is inevitable. The result ranges from minor annoyance to ruined print. Recently, I needed to print a number of large jobs that used just over half a spool of plastic each. Unwilling to start every print with a fresh spool (and shelve a 60% used one afterward), I had a problem to solve. What my 3D printer needed was filament monitor, or at least that’s what I thought.

After reviewing some projects and aftermarket options, I ended up making my own. Like most prototypes, it wasn’t an instant success, but that’s fine. One of the goals of prototyping is not only to validate that the problems you’re solving are the same ones you think exist, but also to force other problems and issues you may not have considered to the surface. Failure is only a waste if nothing is learned, and the faster and cheaper that learning happens, the better.

Sensible design steps also help minimize waste, so I started by looking at what kind of solutions already existed.

Continue reading “Let’s Prototype! This Filament End Needs 80 Decibels”

Fail Of The Week: Upcycling Failed 3D Prints

Is it possible to recycle failed 3D prints? As it turns out, it is — as long as your definition of “recycle” is somewhat flexible. After all, the world only needs so many coasters.

To be fair, [Devin]’s experiment is more about the upcycling side of the recycling equation, but it was certainly worth undertaking. 3D printing has hardly been reduced to practice, and anyone who spends any time printing knows that it’s easy to mess up. [Devin]’s process starts when the colorful contents of a bin full of failed prints are crushed with a hammer. Spread out onto a properly prepared (and never to be used again for cookies) baking sheet and cooked in the oven at low heat, the plastic chunks slowly melt into a thin, even sheet.

[Devin]’s goal was to cast them into a usable object, so he tried to make a bowl. He tried reheating discs of the material using an inverted metal bowl as a form but he found that the plastic didn’t soften evenly, resulting in Dali-esque bowls with thin spots and holes. He then flipped the bowl and tried to let the material sag into the form; that worked a little better but it still wasn’t the win he was looking for.

In the end, all [Devin] really ended up with is some objets d’art and a couple of leaky bowls. What else could he have done with the plastic? Would he have been better off vacuum forming the bowls or perhaps even pressure forming them? Or does the upcycling make no sense when you can theoretically make your own filament? Let us know in the comments how you would improve this process.

Continue reading “Fail Of The Week: Upcycling Failed 3D Prints”

Monstrous Suit Of Power Armor 3D Printed Over 140 Days

fallout-armour-3d-printed-no-helmet[hirocreations] printed an entire suit of enormous Fallout power armor on his Monoprice Maker Select 3D printer, which took some 140 days and over 120 pounds of IC3D PLA filament. Happily, [hirocreations] was able to arrange a sponsorship with IC3D for the build – who would be crazy enough to use so much filament over so long for an entire 7+ foot tall suit, right? Over those 140 days, the belts on the printer needed to be replaced twice but it otherwise chugged right along.

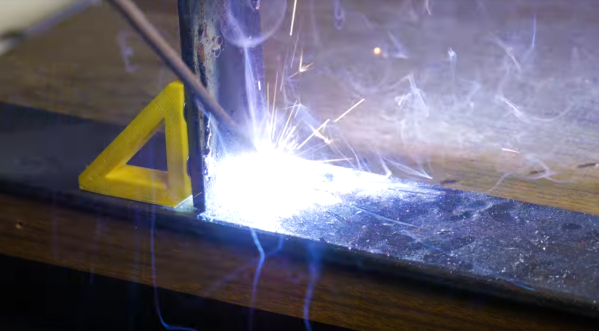
Most of the parts were printed at 0.46 mm layer height. Individual parts were welded (melted) together using what is essentially a soldering iron with a flat tip; many parts were too thin for any kind of joints or fixtures to be practical. Parts were smoothed with drywall spackle, lots of filler primer, and painted. Some of the parts – like the chest armor – are mounted on a frame made from PVC tubing. [hirocreations] may have gone through 120 pounds of filament, but the end result doesn’t weigh that much; the suit itself weighs in at 85-90 lbs, the rest of it went to support material, skirts, and print failures.

It was known from the start that weight could become a serious issue, so [hirocreations] went for a very light infill (10%) and 3-4 perimeter layers; he also extruded at a high temperature (~230C) which he said seemed to provide a very strong layer bond with the settings and filament he was using. So far, he says it’s taken some very hard knocks and nothing has broken or cracked. He has a short video series documenting the assembly, and you can see some of the raw armor parts before any finishing in one of the videos, embedded below.

Continue reading “Monstrous Suit Of Power Armor 3D Printed Over 140 Days”

Fail Of The Week: How NOT To Smooth A 3D Print

Many of the Fail Of The Week stories we feature here are pretty minor in the grand scheme of things. At worse, gears are ground, bits are broken, or the Magic Blue Smoke is released. This attempt to smooth a 3D print released far more than a puff of blue smoke, and was nearly a disaster of insurance adjuster or medical examiner proportions.

Luckily, [Maxloader] and his wife escaped serious injury, and their house came out mostly unscathed. The misadventure started with a 3D printed Mario statue. [Maxloader] had read acetone vapor can smooth a 3D print, and that warming the acetone speeds the process. Fortunately, his wife saw the looming danger and wisely suggested keeping a fire blanket handy, because [Max] decided to speed the process even more by putting a lid on the pot. It’s not clear exactly what happened in the pot – did the trapped acetone vapors burp the lid off and find a path to the cooktop burner? Whatever it was, the results were pretty spectacular and were captured on a security camera. The action starts at 1:13 in the video below. The fire blanket came in handy, buying [Max] a few seconds to open the window and send the whole flaming mess outside. Crisis averted, except for nearly setting the yard on fire.

What are we to learn from [Maxloader]’s nearly epic fail? First, acetone and open flame do not mix. If you want to heat acetone, do it outside and use an electric heat source. Second, a fire extinguisher is standard household equipment. Every house needs at least one, and doubly so when there’s a 3D printer present. And third, it’s best to know your filaments – the dearly departed Mario print was in PLA, which is best smoothed with tetrahydrofuran, not acetone.

Anything else? Feel free to flame away in the comments.

Continue reading “Fail Of The Week: How NOT To Smooth A 3D Print”

A Trove Of 3D Printer Filament Test Data

We’re not sure what a typical weekend at [Walter]’s house is like, but we can probably safely assume that any activity taking place is at minimum accompanied by the hum of a 3D printer somewhere in the background.

Those of us who 3D print have had our experiences with bad rolls of filament. Anything from filament that warps when it shouldn’t to actual wood splinters mixed in somewhere in the manufacturing process clogging up our nozzles. There are lots of workarounds, but the best one is to not buy bad filament in the first place. To this end [Walter] has spent many hours cataloging the results of the different filaments that have made it through his shop.

We really enjoyed his comparison of twleve different yellow filaments printed side by side with the same settings on the same printer. You can really see the difference high dimensional tolerance, the right colorant mix, and good virgin plastic stock makes to the quality of the final print. Also, how transparent different brands of transparent actually are as well as the weight of spools from different brands (So you can weigh your spool to see how much is left).

The part we really liked was his list every filament he’s experienced in: PLA, ABS, PETG, Flexible, Nylon, Metal, Wood, and Other. This was a massive effort, and while his review is naturally subjective, it’s still nice to have someone else’s experience to rely on when figuring out where to spend your next thirty dollars.