With a long history of nearly universal hate for their products, you’d think printer manufacturers would by now have found ways to back off from the policies that only seem to keep aggravating customers. But rather than make it a financially wiser decision to throw out a printer and buy a new one than to buy new ink cartridges or toners, manufacturers keep coming up with new and devious ways to piss customers off. Case in point: Hewlett-Packard now seems to be bricking printers with third-party ink cartridges. Reports from users say that a new error message has popped up on screens of printers with non-HP cartridges installed warning that further use of the printer has been blocked. Previously, printers just warned about potential quality issues from non-HP consumables, but now they’re essentially bricked until you cough up the money for legit HP cartridges. Users who have contacted HP support say that they were told the change occurred because of a recent firmware update sent to the printer, so that’s comforting.
[Tom Verbeure] recently found himself lamenting the need to take screen grabs from an Advantest R3273 spectrum analyzer with a phone camera, as the older gear requires you to either grab tables of data over an expensive GPIB interface card, or print them to paper. Then he realized, why not make a simple printer port add-on that looks like a printer, but sends the data over USB as a serial stream?
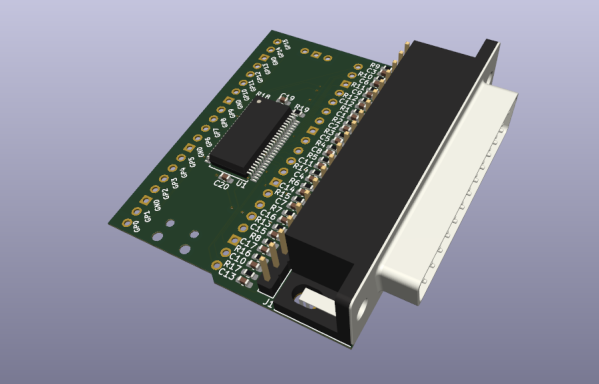
On the hardware side, the custom PCB (KiCAD project) is based on the Raspberry Pi Pico. Obvious form factor issues aside ([Tom] did revise the PCB to make it smaller) this is a shrewd move, as this is not a critical-path gadget so using the Pico as a USB-to-thing solution is a cost-effective way to get something working with minimal risk. One interesting design point was the use of the 74LVC161284 special function bus interface that handles the 5 V tolerance that the RP2040 lacks, whilst making the project compliant with IEEE-1284 — useful for the fussier instruments.
Using the service manual of the Sharp AP-PK11 copier/printer as a reference, [Tom] again, shows how to correctly use the chip, minimizing the design effort and scope for error. The complete project, with preliminary firmware and everything needed to build this thing, can be found on the project GitHub page. [Tom] does add a warning however that this project is still being worked on so adopters might wish to bear that in mind.
If you don’t own such fancy bench instrumentation, but grabbing screenshots from devices that don’t normally support it, is more your thing, then how about a tool to grab Game Boy screenshots?
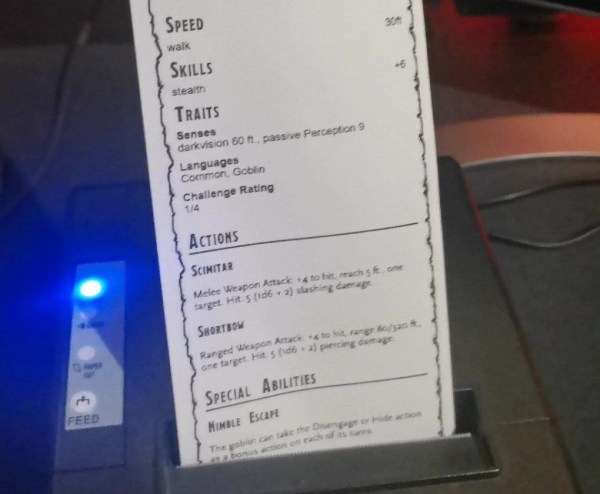
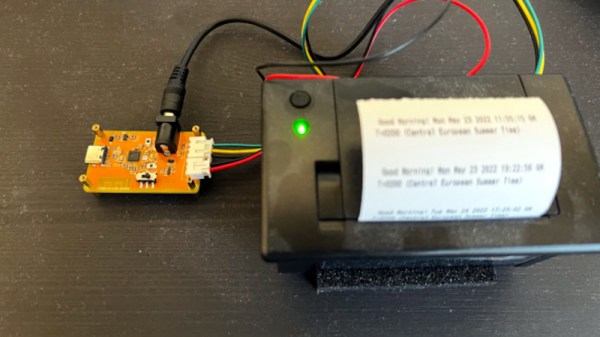
The thermal printer is ubiquitous in today’s world, mostly found whenever we have to get a receipt from somewhere. They’re cheap, fast, and easy to use. Not only that, though, but as [Daniel] found out, they’re also pretty straightforward to re-program and use for other things than a three-foot-long receipt from a drug store. He’s adapted them to serve as a key tool of the dungeon master in his D&D games.
While he has adapted the most common thermal printer standard, the Epson Standard Code, the real fun of this project is in the user interface. He’s made it possible to build templates and other D&D-oriented sheets quickly via HTML, so the dungeon master can print out character sheets, items from the game, maps, or anything else they might possibly need at the time. It’s all highly configurable to whatever needs arise, and the interface works on Mac, Windows, and Linux.
All of the project code is located on Daniel’s GitHub page for anyone looking to try this out. Most thermal printers use this standard too, so cheap ones can easily be found and put to use as long as a roll of thermal paper is available. If the feel of thermal paper is bringing up some childhood nostalgia, it could be because you had the Game Boy Printer as a youth and are looking for ways to recapture that thermal printer magic.
Toner transfer is a commonly-used technique for applying text and images to flat surfaces such as PCBs, but anybody who has considered using the same method on 3D prints will have realized that the heat from the iron would be a problem. [Coverton] has a solution that literally turns the concept on its head, by 3D printing directly onto the transparency sheet.
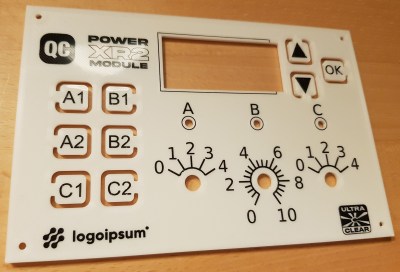
The fine detail is great for intuitive front-panel designs
The method is remarkably straightforward, and could represent a game-changer for hobbyists trying to achieve professional-looking full-color images on their prints.
First, the mirrored image is printed onto a piece of transparency film with a laser printer. Then, once the 3D printer has laid down the first layer of the object, you align the transparency over it and tape it down so it doesn’t move around. The plastic that’s been deposited already is then removed, and a little water is placed on the center of the bed. Using a paper towel, the transparency gets smoothed out until the bubbles are pushed off to the edges.
Another few pieces of tape hold the transparency down on all corners, and the hotend height is adjusted to take into account the transparency thickness. From there, the print can continue on as normal. When finished, the image should be fused with the plastic. If it’s hard to visualize, check out the video after the break for a step-by-step guide.
There are, of course, some caveats. Aligning the transfer and the print looks a little fiddly at the moment, the transparency material used (obviously) has to be rated for use in laser printers, and it only works on flat surfaces. But on the other hand, there will be some readers who already have everything they need to try this out at home right now — and we’d love to see the results!
We’ve covered some other ways to get color and images onto 3D prints in the past, such as this hydrographic technique or by using an inkjet printhead, but [Coverton]’s idea looks much simpler than either of those. If you’re interested in toner transfer for less heat-sensitive materials, then check out this guide from a few years back, or see what other Hackaday readers have been doing on wood or brass.
One of the peripherals of most desire for a microcomputer-obsessed youth in the 1980s was a printer, probably a dot-matrix device. In the decades since, printers have passed into being almost a piece of discardable junk as cheap inkjets can be found in any garage sale. That’s not to say that there’s not plenty of fun to be had hacking older types though, and there are plenty of small thermal printers out there to play with. [Tanmoydutta] has provided a platform that may help, in the form of an ESP32-C3-based serial printer controller.
On board is a level shifter for the 5 volt printer electronics and all the appropriate connectors for the printer, as well as the ESP and onboard USB interface. It’s a networked print server, but one which is entirely and completely hackable. We think the printer in question is this one sold by Adafruit.
So this board makes easier a whole host of printer-related projects, and should you try it you will no doubt finding yourself ankle-deep in little curly pieces of paper. This printer’s not the only one in town though, don’t forget the cheap Bluetooth printers!
As the digital photographic revolution took off, and everyone bought a shiny new film-less camera, there was a brief fad for photo printers. The idea was you’d have the same prints you’d always had from film, but the media for these printers would invariably cost a fortune so consumers moved on pretty quickly.
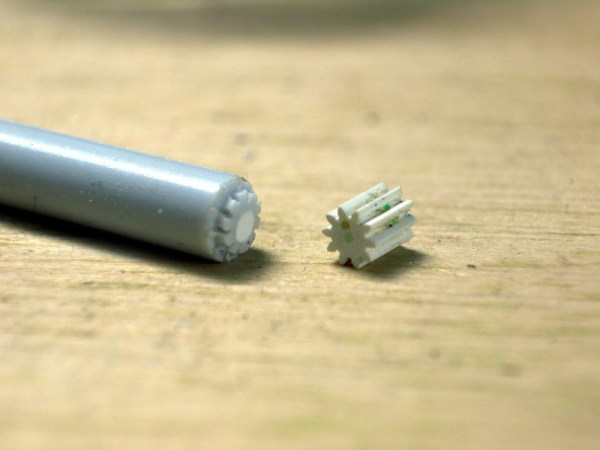
Now the pop up in second-hand stores and the like, which is how [Amen] acquired a Canon Selphy 740. It didn’t work, and on investigation it was found that a particularly tiny plastic gear had failed. Most people would have tossed the printer in the trash, but they instead opted to CNC-machine a new gear. It’s not everyday you tackle a job this small, so it makes for an interesting tale.
While the first instinct might be to reach reach for a CAD package, [Amen] instead wrote a script to create the raw GCode. The machining is done with a 0.2 mm bit ground to the desired profile. The result: a gear that gets the printer working again. It’s a dye-sublimation printer that leaves a negative image in the cartridge, allowing negative prints to be made with a bit of cartridge rewinding. And for those who might have ended up with a Selphy of their own, there’s a further post about using cheaper aftermarket cartridges.
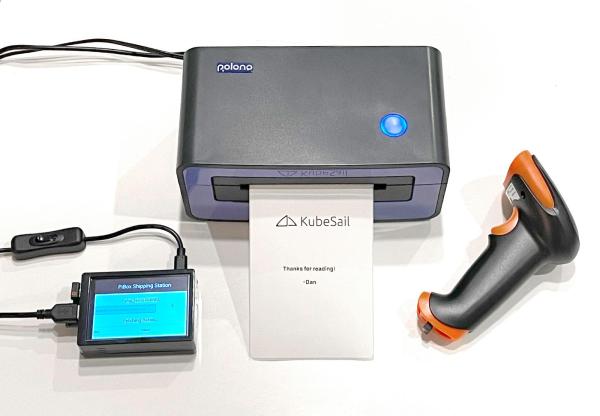
When you think of the small machines that print the sticky labels on packages, you might not expect to find a complex printer with its own programming language (ZPL). However, [Dan Pastusek] was looking around online and found a small label printer on everyone’s favorite online warehouse for a great price that suggested it supported ZPL. Unfortunately, [Dan] had big dreams for creating a Raspberry Pi-based print station and found the drivers packaged for this particular printer were not ARM compatible. Not quite content to leave it there, he began to chip away at the layers until he had a working driver.
ZPL, at its core, is just a language describing ASCII commands transmitted over a serial connection. So while the printer showed up as an endpoint, it wasn’t working as the filters (the part of the driver that knows how to convert from a PNG to ZPL) was x86 only. On Linux, printer drivers also have a PPD file that describes what a printer can handle in paper size and other settings. The PPD file for the little printer gave the first clue. In the ShortNickName field, it identifies itself as HPRT N41, which is a popular HP printer. So this little printer must be a clone of a printer in that family. Notably, they don’t support ZPL. Instead, the HPRT series support TSPL, another printer language developed by TSC.
This presented a problem as the shipping service that provided the labels that [Dan] was using offered labels in three formats: PNG, PDF, and ZPL. Currently, it does seem like there’s a TSPL to ZPL converter out there for use, so rather than write his own, he took a shortcut and wrote a rasterizer instead. Initially, he tried to use some sample code that he found, and while he got something to come out of the printer, it was blank. So the next test was to save the raw TSPL output from a filer and cat directly to the serial port. This worked amazingly. Next, he wrote a converter to take a PNG and convert them into the bitmap format the TSPL has. The converter is in Javascript as it runs as part of the webserver that manages the print station. Could it be faster in a different language? Sure. But a different language wouldn’t make the printer any faster.
With the addition of a wireless barcode scanner, it’s satisfying to see the print station up and running. Here at Hackaday, we’re no stranger to seeing folks take apart printers to peel back the software and physical layers that make them up.