Reverse Engineering: Trash Printer Gives Up Its Control Panel Secrets

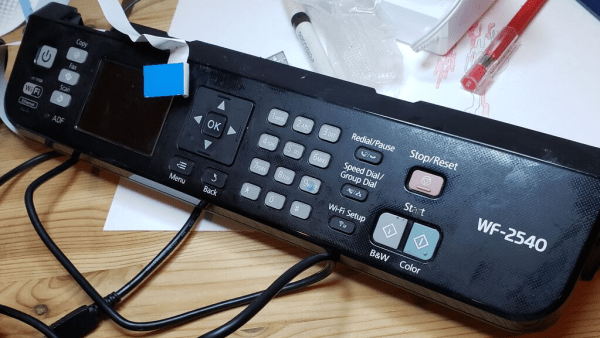
Many of us hardware-oriented types find it hard to walk past a lonely-looking discarded item of consumer electronics without thinking “If only I could lug that back to the car and take it home to play with” and [phooky] from NYC Resistor is no stranger to this sentiment. An old Epson WF-2540 inkjet printer was disassembled for its important ‘nutrients,’ you know, the good stuff like funky motors, encoders and switches. But what do you do with the control panel? After all, they’re usually very specific to the needs of the device they control, and don’t usually offer up much scope for reuse.

The RP2040 PIO is quite capable of pushing out those LCD pixels

[phooky] doesn’t usually bother with them, but this time decided to have a crack at it for fun. Inside, nothing out of the ordinary, with a large single-sided PCB for the key switches and LEDs, and a small PCB hosting the LCD display. The easy part was to figure out how the keyboard scanning was done, which turned out to be pretty simple, it just uses some 74-series shift register devices to scan the columns and clock out the row lines. A Raspberry Pi Pico module was pressed into service to scan the keyboard and enable a keyboard map to be created, by pure brute-force. No need to trace the circuit.

Things got interesting when [phooky] started looking into the LCD interface, based on the Epson E02A46EA chip (good luck finding a datasheet for that one!) and quickly realised that documentation simply wasn’t available, and it would be necessary to do things the hard way. Poking around the lines from the main CPU (an Epson E01A9CA , whatever that is) the display clock was identified, as well as some control signals, and three lines for the RGB channels. By throwing a Saleae data capture into some ROM exploring software, the display configuration was determined to be a standard 320×120 unit.

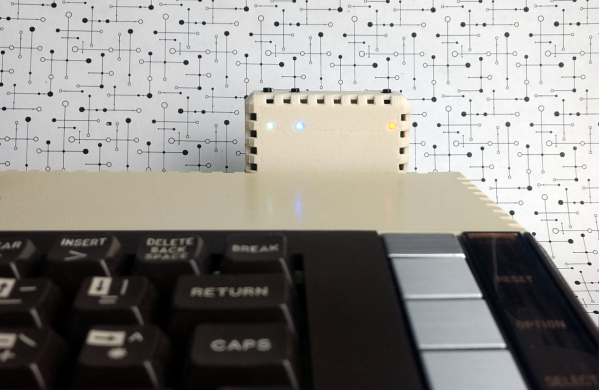
The PIO unit of the RP2040 was used to generate the video waveforms and push the pixels out to the LCD controller, allowing the RP2040 board to be wired inside the case permanently, converting the control panel into a USB device ready for action!

Want to know a little more about reverse engineering junk (or not) items and repurposing them to your will? Checkout this hacking piece from a couple of weeks back. For something a little more advanced, you could try your hand at a spot of car ECU hacking.

Thanks [Perry] for the tip!

Belt-drive 3D-printer extruder

Back-to-Back Belts Drive Filament In This Unique Extruder Design

It’s hard to say when inspiration will strike, or what form it’ll take. But we do know that when you get that itch, it’s a good idea to scratch it, because you might just end up with something like this cool new design for a 3D printer extruder as a result.

Clearly, the world is not screaming out for new extruder designs. In fact, the traditional spring-loaded, toothed drive wheel on a stepper really does the job of feeding filament into a printer’s hot end just fine, all things considered. But [Jón Schone], aka Proper Printing on YouTube, got the idea for his belt-drive extruder from seeing how filament manufacturers handle their products. His design is a scaled-down version of that, and uses a pair of very small timing belts that run on closely spaced gears. The gears synchronize the movement of the two belts, with the filament riding in the very narrow space between the belts. It’s a simple design, with the elasticity of the belt material eliminating the need for spring pre-loading of the drive gears.

Simple in design, but not the easiest execution. The video below tells [Jón]’s tale of printing woe, from using a viscous specialty SLA resin that was really intended for a temperature-controlled printer, to build tank damage. The completed extruder was also a bit too big to mount directly on the test printer, so that took some finagling too. But at the end of the day, the idea works, and it looks pretty cool doing it.

As for potential advantages of the new design, we suppose that remains to be seen. It does seem like it would eliminate drive gear eccentricity, which we’ve seen cause print quality issues before.

Continue reading “Back-to-Back Belts Drive Filament In This Unique Extruder Design”

Coding A Custom Driver For The Adafruit Mini Thermal Printer

Thermal printers are cool… or, uh, warm actually. They use heat to make images, so they never need ink and they print on receipt rolls. The thermal printer available from Adafruit is a particularly tasty example, as it comes fully documented for the budding hacker. [Ed] is one such person, who set about writing his own driver to use the hardware with Linux on a Raspberry Pi.

The project came about as [Ed] didn’t like the halftone output from the standard Adafruit CUPS driver. Thus, a dithering-capable driver was needed instead. The first step of the project was to get dithering working via running such an algorithm into a custom driver, as well as to vary the heating time of the print head to gain greyscale capability. From there, the driver was integrated with CUPS and could be used with the Linux lp command. Finally, measures to deal with the paper running out were coded in as well.

It’s a fun dive into the nitty-gritty of talking to printers at the low level, something that few of us think about when printing concert tickets in a rush. There’s a lot that goes on to get a page to print successfully, and [Ed]’s work leaves us more respect for everything that goes on to get an image on the paper. The driver is available for keen tinkerers over at Github.

Meanwhile, consider a thermal printer for all your banner-printing needs.

A 3D Printer With An Electromagnetic Tool Changer

The versatility of 3D printers is simply amazing. Capable of producing a wide variety of prototypes, miscellaneous parts, artwork, and even other 3D printers, it’s an excellent addition to any shop or makerspace. The smaller, more inexpensive printers might do one type of printing well with a single tool, but if you really want to take a 3D printer’s versatility up to the next level you may want to try one with an automatic tool changing system like this one which uses magnets.

This 3D printer from [Will Hardy] uses an electromagnet to attach the tool to the printer. The arm is able to move to the tool storage area and quickly deposit and attach various tools as it runs through the prints. A failsafe mechanism keeps the tool from falling off of the head of the printer in case of a power outage, and several other design features were included to allow others to tweak this design to their own particular needs, such as enclosing the printer and increasing or decreasing the working area of the Core-XY printer as needed.

While the project looks like it works exceptionally well, [Will] notes that it is still in the prototyping phase and needs work on the software in order to refine its operation and make it suitable for more general-purpose uses. It’s an excellent design though and shows promise. It also reminds us of this other tool-changing system we featured a few months ago, albeit with a less electromagnetic twist.

Continue reading “A 3D Printer With An Electromagnetic Tool Changer”

Robotic Melodica Student Is Enthusiastic But Terrible

Anyone who has through the process of learning to play a musical instrument for the first time, or listening to someone attempting to do so will know that it can be a rather painful and frustrating experience. [Alessandro Perini] apparently couldn’t get enough of the sound of a first-time musician, so he created a robot to play the melodica badly for hours on end, as demonstrated in the video after the break.

The project is appropriately named “AI’ve just started to learn to play”, and attempts to copy every melody it hears in real-time. The robot consists of the cartridge carriage from an old printer, mounted on a wooden frame to hold the melodica. The original carriage used a DC motor with an encoder for accurate movement, but since position accuracy was not desirable, [Alessandro] ditched the encoder. Two small trolley wheels are mounted on the cartridge holder to push down on the melodica’s key. A bistable solenoid valve controls airflow to the melodica from an air compressor. The DC motor and solenoid valve is controlled by an Arduino via a pair of LM298 motor drivers.

A host computer running software written in Cycling ’74 MAX listens to the melody it’s trying to imitate, and send serial commands to the Arduino to move the carriage and open the solenoid to try and match the notes. Of course, it keeps hitting a series of wrong notes in the process. The Arduino code and build instructions have been published, but the main Max software is only described briefly. [Alessandro] demonstrated the robot at a local festival, where it played YouTube tutorial snippets and jammed with a local band for a full 24 hours. You have to respect that level of endurance.

If listening to less error-prone electronically controlled instruments is more to your taste, listen to this building-sized pipe organ play MIDI files.

Continue reading “Robotic Melodica Student Is Enthusiastic But Terrible”

Modern Network Adapter For Retro Computers

Universal Serial Bus, or USB, is so ingrained in modern computing that it’s hard to imagine a time without it. That time did exist, though, and it was a wild west of connector types, standards, and interfacing methods. One of the more interesting interfaces of the time was the SIO system found in 8-bit Atari computers which ended up sharing a lot of the features of modern USB, and its adaptability is displayed in this modern project which brings WiFi, Bluetooth, USB, and SD card slots to any old Atari with an SIO port.

The project is called FujiNet and it uses the lightweight protocol of SIO to add a number of modern features to the 8-bit machine. It’s based on an ESP32, and the chip performs the functions of a network adapter by bridging WiFi and Bluetooth to the Atari. It does this by simulating drives that would have potentially been used on the Atari in its time, such as a floppy disk drive, an RS232 interface, or a modem, and translating them to the modern wireless communication protocols. It even has the ability to emulate a printer by taking the output of the print job from the Atari and converting it to PDF within the device itself.

Not only does this bring a lot of functionality to the Atari, which you may be able to use to view sites like retro.hackaday.com, but the FujiNet is housed in a period-appropriate 3D-printed case that matches the look and feel of the original Atari. If you need a more generic solution for your retrocomputing networking adventures that isn’t limited to SIO, we recommend grabbing a Raspberry Pi to handle that.

Thanks to [Gavin] for the tip!

Print With Plasma!

Over the years there have been a variety of methods for a computer to commit its thoughts to paper. Be it a daisy wheel, a dot matrix, a laser, or an inkjet, we’ve all cursed at a recalcitrant printer. There’s another type of printer that maybe we don’t think of quite as often but is workhorse in a million cash registers and parking ticket machines: the thermal printer. These mechanisms can be readily found as surplus items and have made their way into more than one project here over the years. [HomoFaciens] has taken thermal printing a step further by building a plasma printer from scratch that makes use of the thermal paper.

A thermal printer does its job as its name suggests, by burning the image into the paper. It may not deliver the best quality print, but scores on not needing ink ribbons, cartridges, or toner. This DIY version uses an off-the-shelf battery-powered plasma lighter to do the job, mounted on a 3D printed XY printer mechanism driven by two stepper motors. Behind the scenes is an Arduino Uno, which receives its instructions via USB from a command-line program on a Linux box. It’s admitted that this is hardly the pinnacle of printing technology, but it does at least make for a fascinating project. You can see it in action in the video below the break.

This isn’t [HomoFaciens]’ first printer, we’re instantly reminded of this ink drop printer from a few years ago.

Continue reading “Print With Plasma!”