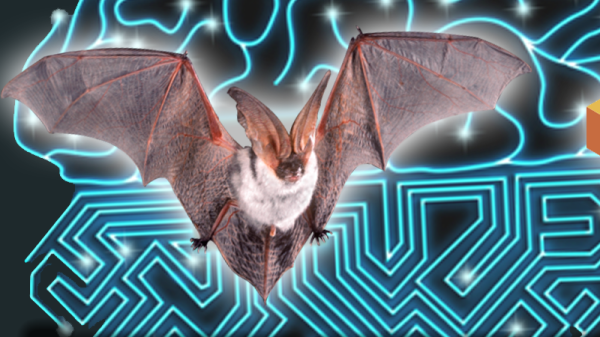
There’s a new and very detailed video tutorial about the Raspberry Pi available from the Australian firm Core Electronics. There are 30 videos and 5 chapters in total. A few of the introduction videos are short, but the detail videos range from 3 to 16 minutes.
The instructor [Michael] starts out at the very beginning — loading NOOBS on the Pi — and then moves on to Python, shell scripting, and building GUI applications with TkInter. It also covers using Particle Pi for IoT applications that integrate with IFTTT.
We do realize that most people reading Hackaday have probably used a Raspberry Pi at least once or twice. However, we also know that we all get asked to recommend material for beginners, or — in some cases — we are using material to teach classes in schools or hackerspaces.
[153Armstrong] did a short post on how easy it is to generate waveforms using Python. We agree it is simple, but actually, it isn’t so much Python per se, it is some pretty cool libraries (SciPy, in particular) that do all the hard work. That may be splitting hairs, but it is worth nothing that SciPy (pronounced “Sigh Pie”) also does other handy tricks like Fourier transforms, too. You can see a video of his results, below.
The code is simple and one of the commenters pointed out an even more efficient way to write the data to a WAV file. The basic idea is to create an array of samples in a buffer using some features of SciPy’s NumPy component.
[James West] has a young Doctor Who fan in the house and wanted to build something that could be played with without worrying about it being bumped and scratched. So, instead of creating a replica, [James] built a simple remote controlled K9 toy for his young fan.
K9 was a companion of the fourth Doctor (played by Tom Baker) in the classic Doctor Who series. He also appeared in several spin-offs. A robotic dog with the infinite knowledge of the TARDIS at hand, as well as a laser, K9 became a favorite among Who fans, especially younger children. [James] wanted his version of K9 to be able to be controlled by a remote control and be able to play sounds from the TV show.
Using some hand-cut acrylic, [James] built K9’s body, then started on plans for the motion control and brains. [James] selected the Raspberry Pi Zero for the controller board, a Speaker pHat for the audio, a couple of motors to move K9 around, and a motor controller. K9 is controlled by a WiiMote and has a button on his back to start pairing with the WiiMote (K9 answers with “Affirmative” when the pairing is successful.) When it came to the head, [James] was a little overwhelmed by trying to make the head in acrylic, so he got some foam board and used that instead. A red LED in the head lights up through translucent red acrylic.
It’s a great little project and [James] has put the Python code up on Github for anyone interested. We’ve had a couple of robot dog projects on the site over the years, like this one and this one.
Since the beginning of the Internet people have been controlling robots over it, peering at grainy gifs of faraway rec rooms as the robot trundles around. RunMyRobot.com has taken that idea and brought it fully into the teens. These robots use wifi or mobile connections, are 3D printed, and run Python.
The site aims to provide everything to anyone who wants to participate. If you’re just an anonymous visitor, you can still play with the robots, but anyone can also play with the same one, and sometimes a whole bunch of visitors create a cacophony of commands that makes it not fun—but you can always move to a different robot. Logged-in members of the site have the option to take over a robot and not allow anyone else to use it.
If you want to build a robot and add it to the site, the creators show how to do that as well, with a Github code repository and 3D-printable designs available for download, as well as YouTube instructions on how to build either the printed robot or one made with off-the shelf parts. They’re also looking for patrons to help with development, with the first item on their list being a mobile app.
A Raspberry Pi kicking around one’s workbench is a project waiting to happen — if they remain unused long enough to be considered a ‘spare.’ If you find you’ve been pining after an Alexa or your own personal J.A.R.V.I.S., [Novaspirit Tech] might be able to help you out — provided you have a USB mic and speaker handy — with an accessible tutorial for setting up Google Assistant on your Pi.
A quick run-through on enabling a fresh API client on Google’s cloud platform, [Novaspirit] jumps over to the Raspbian console to start updating Python and a few other dependencies. Note: this is being conducted in the latest version of Raspbian, so be sure to update before you get underway with all of your sudos.
Once [Novaspirit] gets that sorted, he sets up an environment to run Google Assistant on the Pi, authenticates the process, and gets it running after offering a couple troubleshooting tips. [Novaspirit] has plans to expand on this further in the near future with some home automation implementation, but this is a great jumping-off point if you’ve been looking for a way to break into some high-tech home deliciousness — or something more stripped-down — for yourself. Check out the video version of the tutorial after the break if you like watching videos of guys typing away at the command line.
Voice-based assistants are becoming more common on devices these days. Siri is known for being particularly good at responding to natural language and snarky responses. In comparison, Google’s Assistant is only capable of the most obvious commands, and this writer isn’t even sure Microsoft’s Cortana can understand English at all. So it makes sense then, if you want voice control for your PC, to choose Siri as your weapon of choice. [Sanjeet] is here to help, enabling Siri to control a PC through Python.
The first step is hooking up the iPhone’s Notes app to a Gmail account. [Sanjeet] suggests using a separate account for security reasons, as you’ll need to place the username and password in a Python script. The Python script checks the Gmail account every second, looking for new Notes from the iPhone. Then, it’s as simple as telling Siri to make a Note (for example, “Siri, Note shutdown”) and the Python script can then pick up the command, and act accordingly.
Python is the Arduino of software projects. It has a critical mass of libraries for anything from facial recognition and neural networks to robotics and remote sensing. And just like Arduino, I have yet to find the killer IDE for Python. Perhaps I just haven’t tried the right one yet, but it could be that I’m just doing Python wrong.
For Years I’ve Been IDLE
IDLE with interactive shell that has highlighting and code completion
I’m a Linux-only type of a guy so using IDLE for Python is a natural fit. It’s in the repositories for super quick and easy install and there’s basically zero configuration to be done. Generally speaking my preferred development environment is text editor and command line compiler. IDLE is just one step above that. You get a separate window for the shell and each Python file you’re working on. Have IDLE run your code and it saves the file, then launches it in the shell window.
For me, there are two important features of IDLE’s shell. The first is that it keeps an interactive session open after you run your Python code. This means that any globals that your script uses are still available, and that you can experiment with your code by calling functions (and classes, etc) in real time. The second desirable feature is that while using this interactive shell, IDLE supports code completion and docstring support (it gives you hints for what parameters a function accepts/requires).
But simplicity has a tough time scaling. I’m working on larger and larger projects spread over many files and the individual nature of IDLE editor windows and lack of robust navigation has me looking to move forward.
The Contenders
I’ve tried perhaps a half-dozen different Python IDEs now, spending the most time on two of them: Geany and Atom. Both are easy to install on Linux and provide the more advanced features I want for larger projects: better navigation, cross-file code completion (and warnings), variable type and scope indication.
The look of Geany brings to mind an “IDE 1.0” layout style and theme. It’s the familiar three-pane layout that places symbols to the left, code to the right, and status along the bottom. When you run your program it launches in an interactive terminal, which I like, but you lose all IDE features at this point, which I despise. There is no code completion, and no syntax highlighting.
I have been using Atom much more than Geany and have grown to like it enough to stick with it for now. I’d call Atom the “IDE 2.0” layout. It launches with a dark theme and everything is a tab.
Atom has symbol view that isn’t shown all the time. CTRL-R brings it up and it uses a search style but you can also scroll through all symbols
Atom depends heavily on packages (plugins that anyone may write). The package management is good, and the packages I’ve tried have been superb. I’m using autocomplete-python and tabs-to-spaces, but again I come up short when it comes to running Python files. I’ve tried platformio-ide-terminal, script, and runner plugins. The first brings up a terminal as a bottom pane but doesn’t automatically run the file in that terminal. Script also uses a bottom pane but I can’t get it to run interactively. I’m currently using runner which has an okay display but is not interactive. I’ve resorted to using a “fake” python file in my projects as a workaround for commands and tests I would normally run in the interactive shell.
Tell Us How You Python
It’s entirely possible I’ve just been using Python wrong all these years and that tinkering with your code in an interactive shell is a poor choose of development processes.
What do you prefer for your Python development? Does an interactive shell matter to you? Did you start with IDLE and move to a more mature IDE. Which IDE did you end up with and what kind of compromises did you make during that change. Let us know in the comments below.