Dig Into The Apple Device Design Guide

Millions of people worldwide have just added new Apple gadgets to their lives thanks to the annual end of December consumerism event. Those who are also Hackaday readers are likely devising cool projects incorporating their new toys. This is a good time to remind everybody that Apple publishes information useful for such endeavors: the Accessory Design Guidelines for Apple Devices (PDF).
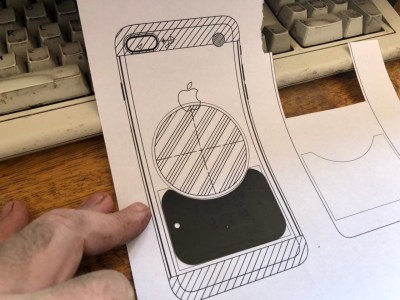
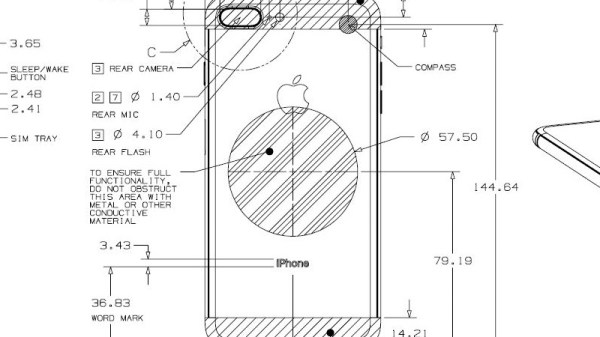
This comes to our attention because [Pablo] referenced it to modify an air vent magnet mount. The metal parts of a magnetic mount interferes with wireless charging. [Pablo] looked in Apple’s design guide and found exactly where he needed to cut the metal plate in order to avoid blocking the wireless charging coil of his iPhone 8 Plus. What could have been a tedious reverse-engineering project was greatly simplified by Reading The… Fine… Manual.

Apple has earned its reputation for hacker unfriendliness with nonstandard fasteners and liberal use of glue. And that’s even before we start talking about their digital barriers. But if your project doesn’t involve voiding the warranty, their design guide eliminates tedious dimension measuring so you can focus on the fun parts.
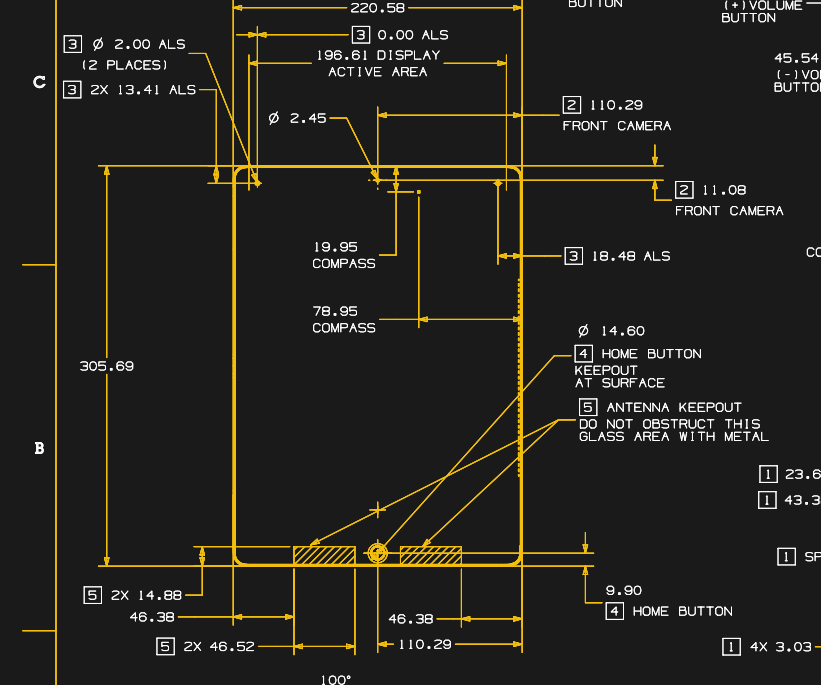
Dimensioned drawing of Apple iPad Pro

This guide is packed full of dimensioned drawings. A cursory review shows that they look pretty good and aren’t terrible at all. Button, connector, camera, and other external locations make this an indispensable tool for anyone planning to mill or print an interface for any of Apple’s hardware.

So let’s see those projects! Maybe a better M&M sorter. Perhaps a time-lapse machine. Or cure your car’s Tesla envy and put a well-integrated iPad into the dashboard.

Instrument Packed Pedal Keeps Track Of Cyclist’s Power

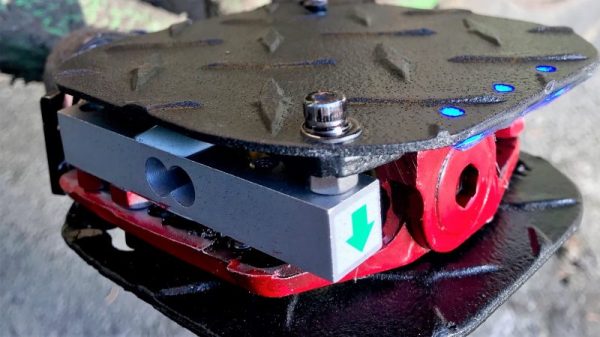
Exactly how much work is required to pedal a bike? There are plenty of ways to measure the power generated by a cyclist, but a lot of them such as heavily instrumented bottom brackets and crank arms, can be far too expensive for casual use. But for $30 in parts you can build this power-measuring bike pedal. and find out just how hard you’re stoking.

Of course it’s not just the parts but knowing what to do with them, and [rabbitcreek] has put a lot of thought and engineering into this power pedal. The main business of measuring the force applied to the crank falls to a pair of micro load cells connected in parallel. A Wemos, an HX711 load-cell amp, a small LiPo pack and charging module, a Qi wireless charger, a Hall sensor, a ruggedized power switch, and some Neopixels round out the BOM. Everything is carefully stuffed into very little space in a modified mountain bike pedal and potted in epoxy for all-weather use. The Hall sensor keeps tracks of the RPMs while the strain gauges measure the force applied to the pedal, and the numbers from a ride can be downloaded later.

We recall a similar effort using a crank studded with strain gauges. But this one is impressive because everything fits in a tidy package. And the diamond plate is a nice touch.

Embedding Wireless Charging Into Your Laptop

Wireless charger in chromebook

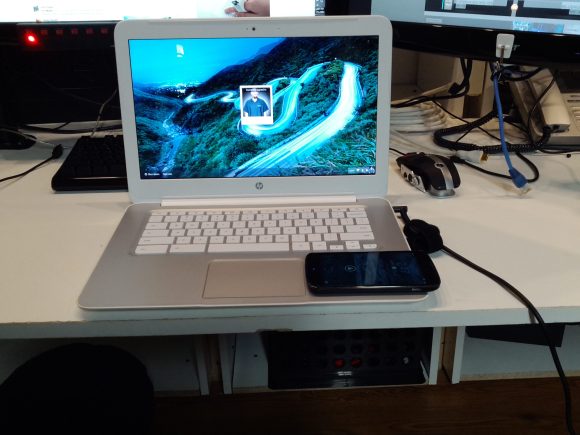
Looking for a project to do [Jason Clark] thought it might be fun to integrate a spare wireless Qi charger into his HP Chromebook 14.

He started by cracking open the Qi charger — it’s held together by adhesive and four phillips screws hiding under the feet pads — all in all, not that difficult to do. Once the plastic is off, the circuit and coil are actually quite small making it an ideal choice for hacking into various things. We’ve seen them stuffed into Nook’s, a heart, salvaged for a phone hack…

Anyway, the next step was opening up the Chromebook. The Qi charger requires 5V at 2A to work, which luckily, is the USB 3.0 spec — of which he has two ports in the Chromebook. He identified the 5V supply on the board and soldered in the wires directly —  Let there be power!

While the coil and board are fairly small, there’s not that much space underneath the Chromebook’s skin, so [Jason] lengthened the coil wires and located it separately, just below the keyboard. He closed everything up, crossed his fingers and turned the power on. Success!

It’d be cool to do something similar with an RFID reader — then you could have your laptop locked unless you have your RFID ring with you!

Stuff Wireless Charging Into A Nook’s Crannies

Qi receiver for NookMany technologies that come about for one type of product make us want to extend it to other things. For instance, we’d like the ability to remotely unlock our front door when it’s raining or our hands are full. Once [MS3FGX] experienced Qi wireless charging with his Nexus 5, he wanted the ability to wirelessly charge all the things. The first gadget on the list was his Nook Simple Touch eReader, which he successfully retrofit with a Qi receiver.
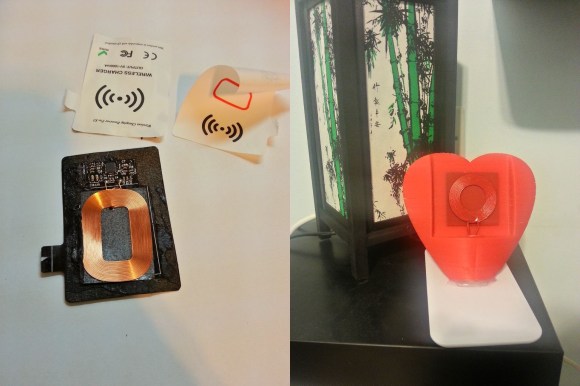
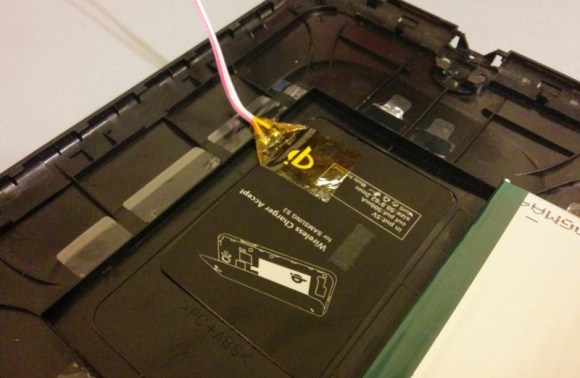
Space is at a premium inside of most modern technology. As it turns out, there is a burgeoning market for shoving inductive charging receivers into things. [MS3FGX] decided to try a Qi receiver meant for a Samsung S3, and it actually fits very well behind the battery. He glued it down and then cut a channel in the battery tray for the wires.

[MS3FGX] went full hack with this one and wired it to the Nook’s USB port on the inside. He would have preferred a thinner wire, but used some from a 40-pin IDE cable with little trouble. After the operation was complete, he put it on the Qi pad and it started charging right away. To his delight, the battery increased 20% after an hour. And yes, he can still charge the Nook the traditional way without any issues.

If you want to add wireless charging to any phone cheaply and easily, we’ve got you covered.

Wireless Charging… Have A Heart

wireless heart charger

[Gal Naim] recently finished off an awesome Valentine’s day present for special someone. It’s a wireless charging heart for your phone!

He already had the Qi wireless charger but wasn’t much of a fan as it “looks so boring”. So he took it apart to salvage the charging circuit for his new project. As luck would have it, the Qi is very simple on the inside — all he had to do was lengthen the power wires to the coil. He then designed his heart in SolidWorks — Don’t forget to check out our 3D Printering tutorials on this — and printed it out in a nice candy apple red. To maximize the charging current he’s left the inductive loop on the outside so it can be as close to the phone as possible — he spray painted it red and it actually looks pretty cool!

The next step was adding the wireless charging capability to the phone, we’ve covered how to add this to any phone before, but for [Gal] it was as simple as cutting down the Qi Receiver card to fit in the phone.

Continue reading “Wireless Charging… Have A Heart”