For those who grew up with a cell phone in their hand, it might be difficult to imagine a time where the phone wasn’t fully integrated with voicemail. It sounds like a fantastical past, yet at one point a separate machine needed to be attached to the phone to record messages if no one was home to answer. Not only that, but a third device, a cassette tape, was generally needed as a storage device to hold the messages. In many ways we live in a much simpler world now, but in the amateur radio world one group is looking to bring this esoteric technology to the airwaves and [saveitforparts] is demonstrating one as part of a beta test.
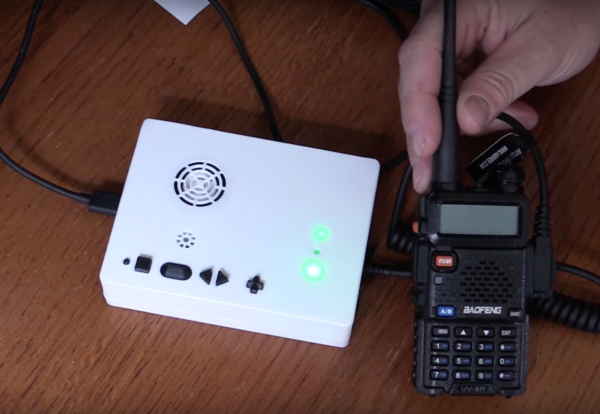
The device is called the Boondock Echo, and while at its core it’s an ESP32 there’s a lot going on behind the scenes. It has an audio interface which is capable of connecting to a radio given the correct patch cable; in this case with a simple Baofeng handheld unit. The answering machine can record any sounds that come in. However, with a network connection the recordings are analyzed with an AI which can transcribe what it hears and even listen for specific call signs, then take actions such as sending emails when it hears triggers like that. Boondock also plans for this device to be capable of responding as well, but [saveitforparts] was not able to get this working during this beta test.
While an answering machine might seem like a step backwards technologically, an answering machine like this, especially when paired with Google Voice-like capabilities from an AI, has a lot of promise for ham radio operators. Even during this test, [saveitforparts] lost a radio and a kind stranger keyed it up when it was found, which was recorded by the Boondock Echo and used to eventually recover the radio. Certainly there are plenty of other applications as well, such as using AI instead of something like an Arduino to do Morse decoding.