NFC Performance: It’s All In The Antenna

NFC tags are a frequent target for experimentation, whether simply by using an app on a mobile phone to interrogate or write to tags, by incorporating them in projects by means of an off-the-shelf module, or by designing a project using them from scratch. Yet they’re not always easy to get right, and can often give disappointing results. This article will attempt to demystify what is probably the most likely avenue for an NFC project to have poor performance, the pickup coil antenna in the reader itself.

A selection of the NFC tags on my desk

The tags contain chips that are energised through the RF field that provides enough power for them to start up, at which point they can communicate with a host computer for whatever their purpose is.

“NFC” stands for “Near Field Communication”, in which data can be exchanged between physically proximate devices without their being physically connected.  Both reader and tag achieve this through an antenna, which takes the form of a flat coil and a capacitor that together make a resonant tuned circuit. The reader sends out pulses of RF which is maintained once an answer is received from a card, and thus communication can be established until the card is out of the reader’s range. Continue reading “NFC Performance: It’s All In The Antenna”

Add Mycelium To Your Mesh Networks

In many parts of the world, days after a good rainfall, it’s fairly common to see various species of mushrooms popping up out of the ground. These mysterious organisms aren’t the whole story, though. The living being is a vast network of hidden fibers, called mycelium, spreading through the ground and into any other organic material it can colonize. Its air of mystery and its vast reach are the inspiration for entire Star Trek shows and, of course, projects like this LoRa-based mesh network called Mycelium.

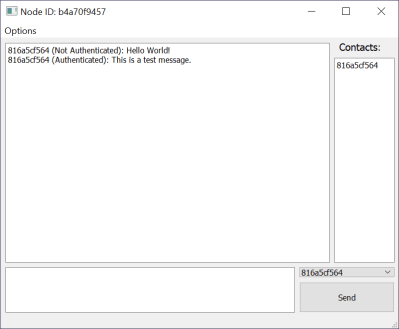
Mycelium is the invention of [Catamine] and includes many novel features compared to more typical mesh networks. For one, it is intended to be used in low power applications to give users the ability to send messages over a distributed network rather than a centralized network like a cell phone service provider. For another, the messages are able to be encrypted and authenticated, which is not currently possible with other mesh networks such as APRS. The idea is that a large network of people with nothing more complicated than an ESP32, an antenna, and this software would be able to communicate securely in situations where a centralized network is not available, whether that is from something like a natural disaster or from a governmental organization disabling the Internet during a political upheval.

The mesh network is currently in active development, and while messages can not yet be sent, the network is able to recognize nodes and maintain a keybase. There are certainly plenty of instances where something like this would be useful as we’ve seen before from other (non-encrypted) LoRa-based network solutions which are built around similar principles.

Thanks to [dearuserhron] for the tip!

Front view of vintage radio, with small screen inset into tuner.

Vintage Radio Gets Internet Upgrade

There’s nothing quite like vintage hardware, and the way it looks and works is something that can be worth celebrating. [Old Tech. New Spec] did that with his loving modification of a 1964 Dansette portable radio, bringing it into the modern era by giving it the ability to play Internet radio stations while keeping all the original controls and appearance. As he says, you’d hardly know it has been modified unless you turned it on.

Internet radio station logos scrolling across small LCD screen
A full color LCD behind a convex lens matches the radio’s aesthetic.

A real centerpiece of this conversion is that the inner part of the tuning dial has been replaced with a full color LCD display that shows, among other things, the logo of whatever Internet radio station is currently playing. The combination of LCD and convex lens looks fantastic, and blends beautifully into the aesthetic.

Inside the device is a Raspberry Pi, some simple Python scripts, and a Pirate Audio board. Together, they handle the job of audio streaming and output, displaying album art, and accepting inputs for playback controls. A large power bank ensures the result remains portable, and as usual with vintage hardware, there’s no worry about fitting everything inside. Watch it in action in the video embedded below. (And if the name of the audio board got you excited, but you’re disappointed to discover there’s no actual pirate broadcasting happening? Well, the Raspberry Pi can do that, too.)

Continue reading “Vintage Radio Gets Internet Upgrade”

Shortwave Radio Picks Up Sideband

With the push to having most of a radio receiver as part of a PC, it might seem odd to have a standalone communication receiver, but [OM0ET] reviews the latest one he picked up, an ATS25. Inside isn’t much: a battery, a speaker, an encoder, and a Si4732 that provides the RF muscle.

It appears the receiver is pretty broadband which could be a problem. [OM0ET] suggests adding selectivity in the antenna or adding an extra board to use as a bandpass filter.

Continue reading “Shortwave Radio Picks Up Sideband”

Detect Lightning Strikes With An Arduino

Lightning is a powerful and seemingly mysterious force of nature, capable of releasing huge amounts of energy over relatively short times and striking almost at random. Lightning obeys the laws of physics just like anything else, though, and with a little bit of technology some of its mysteries can be unraveled. For one, it only takes a small radio receiver to detect lightning strikes, and [mircemk] shows us exactly how to do that.

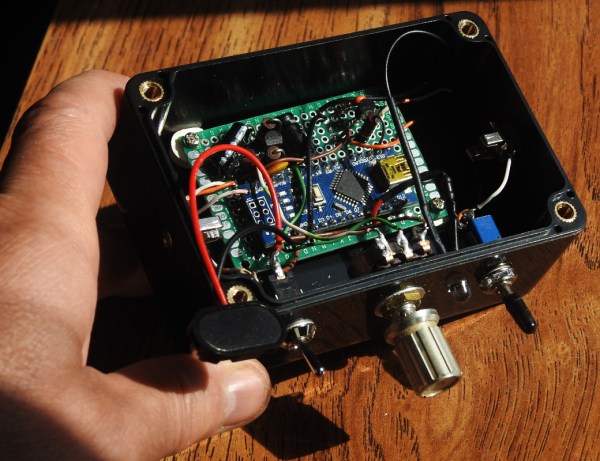
When lightning flashes, it also lights up an incredibly wide spectrum of radio spectrum as well. This build uses an AM radio built into a small integrated circuit to detect some of those radio waves. An Arduino Nano receives the signal from the TA7642 IC and lights up a series of LEDs as it detects strikes in closer and closer proximity to the detector. A white LED flashes when a strike is detected, and some analog circuitry supports an analog galvanometer which moves during lightning strikes as well.

While this project isn’t the first lightning detector we’ve ever seen, it does have significantly more sensitivity than most other homemade offerings. Something like this would be a helpful tool to have for lifeguards at a pool or for a work crew that is often outside, but we also think it’s pretty cool just to have around for its own sake, and three of them networked together would make triangulation of strikes possible too.

Continue reading “Detect Lightning Strikes With An Arduino”

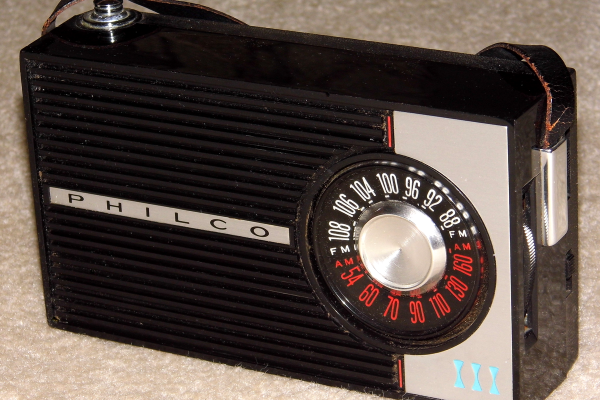
Regen Receiver With Few Parts

We like regenerative receivers. They perform well and they are dead simple to create. Example? [Radio abUse] modified a few existing designs and built a one-transistor receiver. Well, one transistor if you don’t count the dozens that are probably on the audio amplifier IC, but we won’t quibble. You can watch a video about the simple receiver — which looks good on a neatly done universal board — below.

The coil of #22 wire dominates the visual layout, and we imagine winding it might have been the most time-consuming part of the project. The layout would work with a single-sided PCB and would be a great board to produce by hand if you were inclined to develop that skill.

Regenerative receivers work by holding an amplifier just shy of oscillating at a certain frequency. This provides extremely high gain at a particular frequency which allows just a single stage to really pull in signals.

We were a little sad to find out there was a plan to tear the radio down to build something else. But, we suppose, that’s progress. We’d be tempted to make a module out of the audio amplifier and then keep the RF section intact. But, then again, we have a lot of partial projects like that gathering dust on the shelf, so maybe that’s not such a great idea.

While regenerative receivers aren’t the most common architecture today, they still have their place. The inventor, Edwin Armstrong, developed quite a bit of radio tech that we still use today.

Cable Modem Turned Spectrum Analyzer

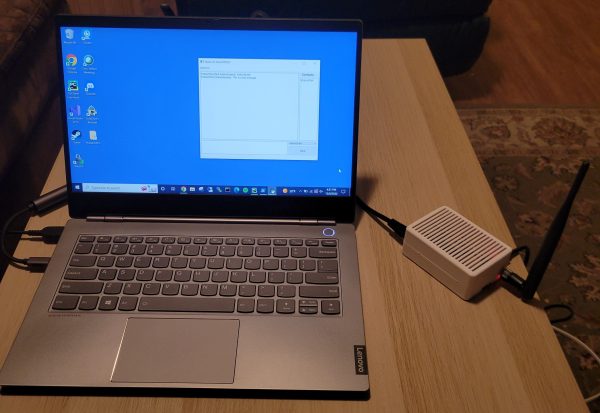
Hopefully by now most of us know better than to rent a modem from an internet service provider. Buying your own and using it is almost always an easy way to save some money, but even then these pieces of equipment won’t last forever. If you’re sitting on an older cable modem and thinking about tossing it in the garbage, there might be a way to repurpose it before it goes to the great workbench in the sky. [kc9umr] has a way of turning these devices into capable spectrum analyzers.

The spectrum analyzer feature is a crucial component of cable modems to help take advantage of the wide piece of spectrum that is available to them on the cable lines. With some of them it’s possible to access this feature directly by pointing a browser at it, but apparently some of them have a patch from the cable companies to limit access. By finding one that hasn’t had this patch applied it’s possible to access the spectrum analyzer, and once [kc9umr] attached some adapters and an antenna to his cable modem he was able to demonstrate it to great effect.

While it’s somewhat down to luck as to whether or not any given modem will grant access to this feature, for the ones that do it seems like a powerful and cheap tool. It’s agnostic to platform, so any computer on the network can access it easily, and compared to an RTL-SDR it has a wider range. There are some limitations, but for the price it can’t be beat which will cost under $50 in parts unless you happen to need two inputs like this analyzer .

Thanks to [Ezra] for the tip!