Emergency Neighbourhood Communications Courtesy Of HELPER

For many people, phone and Internet connectivity are omnipresent and always available. It’s possible to upload selfies from a Chinese subway, and search for restaurant reviews in most highway towns, all thanks to modern cellular connectivity. However, in emergencies, we’re not always so lucky. If towers fail or user demand grows too large, things can collapse all too quickly. It’s in these situations that HELPER aims to flourish.

HELPER stands for Heterogeneous Efficient Low Power Radio. It’s a radio system designed to operate in the absence of any infrastructure, creating a pop-up network to serve community needs in disaster areas. Users can share information about available resources, like water, gasoline and food, while emergency workers can coordinate their response and direct aid to those who need it.

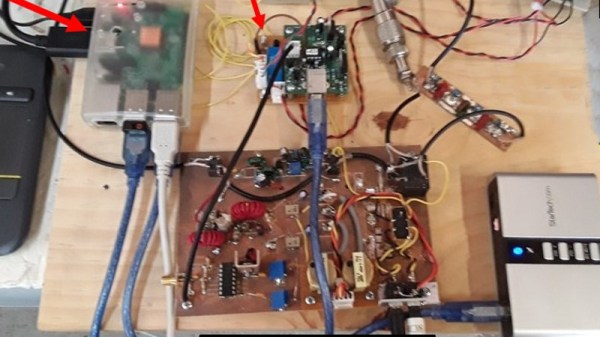
It’s a system built around commonly available parts. Raspberry Pis run the back end software and communicate with individuals over WiFi, with LoRa radios handling the longer-range communication from node to node. Combining this communication ability with GPS location and stored map data allows users to more easily find resources and assistance when things go wrong. The journal article is freely available for those wishing to learn more about the project.

It’s a project which aims to keep people safe when conventional networks go down. The key is to remember that once disaster strikes, it’s usually too late to start distributing radio hardware – emergency gear should be in place well before things start to go south. Of course, there’s also the government side of the equation – in the USA, the Emergency Broadcast System is a great example of emergency communications done right. Video after the break.

Continue reading “Emergency Neighbourhood Communications Courtesy Of HELPER”

Making A 1940s Radio Digital With Nixies

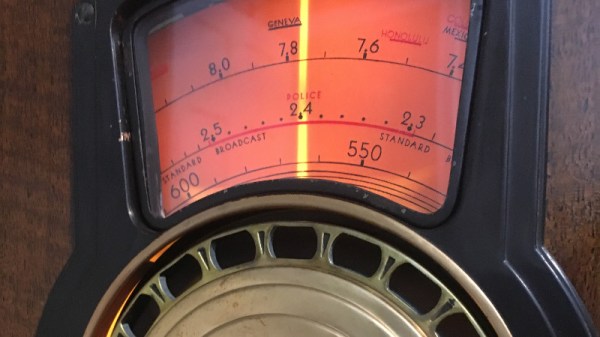
Classix Philly One Oh Seven Nine is your home for Philly soul right at the top of the dial. That phrase, ‘top of the dial’ doesn’t mean much these days because we all have radios with a digital display and seek buttons. There was a time when radios actually had dials, but [glasslinger] is in a class all by himself. He’s adding a digital display to a 1940s radio, and he’s doing it with Nixie tubes.

The circuitry for the digital display for this AM radio requires getting the frequency the radio is tuned to. This is done by counting the oscillator frequency, then subtracting the IF. [glasslinger] is doing this with an Arduino (hey, it’s a legitimate engineering choice) and a 4040 12-bit binary counter as a pre-scaler. The Arduino does the math and then drives a few 74141 Nixie drivers, which then display the frequency of the receiver in beautiful glass tubes. Add in a single neon bulb for the thousands digit, and you have a four-digit display that will tell you the frequency you’re tuned to on an old AM radio.

The rest of the build consists of fixing up an old radio and gluing the veneer down again with modern glues that will last another seventy years. The finished cabinet was sanded, a bezel for the display was added, and since [glasslinger] has the equipment, he made a new, long neon tube to light up with the volume of the radio. And you thought a cat’s eye detector was cool.

This build is a tour de force, and something that is so incredibly modern but at the same time built on vintage technology. If you’ve got an hour and a half, we highly recommend checking out the build video below.

Continue reading “Making A 1940s Radio Digital With Nixies”

Building A Magnetic Loop Antenna

Antennas come in many shapes and sizes, with a variety of characteristics making them more or less suitable for various applications. The average hacker with only a middling exposure to RF may be familiar with trace antennas, yagis and dipoles, but there’s a whole load more out there. [Eric Sorensen] is going down the path less travelled, undertaking the build of a self-tuning magnetic loop antenna. 

[Eric]’s build is designed to operate at 100W on the 20 meter band, and this influences the specifications of the antenna. Particularly critical in the magnetic loop design is the voltage across the tuning capacitor; in this design, it comes out at approximately 4 kilovolts. This necessitates the careful choice of parts that can handle these voltages. In this case, a vacuum variable capacitor is used, rated to a peak current of 57 amps and a peak voltage of 5 kilovolts.

The magnetic loop design leads to antenna which is tuned to a very narrow frequency range, giving good selectivity. However, it also requires retuning quite often in order to stay on-band. [Eric] is implementing a self-tuning system to solve this, with a controller using a motor to actuate the tuning capacitor to maintain the antenna at its proper operating point.

If you’re unfamiliar with magnetic loop builds, [Eric]’s project serves as a great introduction to both the electrical and mechanical considerations inherent in such a design. We’ve seen even more obscure designs though – like these antennas applied with advanced spray techniques.


This SDR Uses A Tube

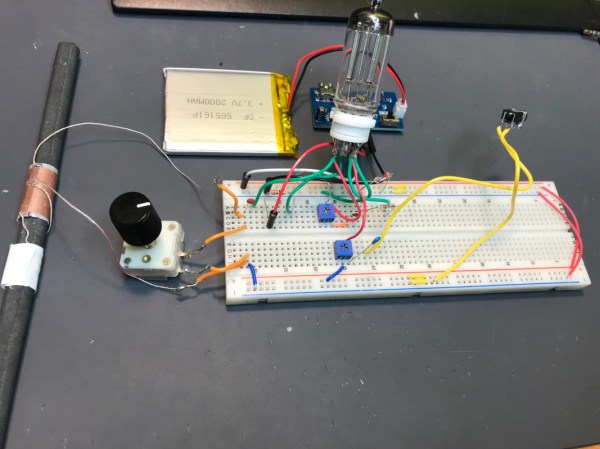
When you think of a software defined radio (SDR) setup, maybe you imagine an IC or two, maybe feeding a computer. You probably don’t think of a vacuum tube. [Mirko Pavleski] built a one-tube shortwave SDR using some instructions from [Burkhard Kainka] which are in German, but Google Translate is good enough if you want to duplicate his feat. You can see a video of [Mirko’s] creation, below.

The build was an experiment to see if a tube receiver could be stable enough to receive digital shortwave radio broadcasts. To avoid AC line hum, the radio is battery operated and while the original uses an EL95 tube, [Mirko] used an EF80.

Continue reading “This SDR Uses A Tube”

MIT IAP Tackles Radio

MIT is well known for rigorous courses, but they also have a special four-week term at the start of each year called the IAP — Independent Activities Period. This year, the MIT Radio Society had several interesting presentations on both the history and application of radio. You weren’t there? No problem, as the nine lecture were all recorded for you to watch at your leisure. You can see one of the nine, below.

These aren’t some five minute quicky videos, either. They are basically live captures that run anywhere from an hour to almost two hours in length. The topics are a great mix including radio history, software-defined radio, propagation, radio astronomy, RADAR, and even 5G.

You might have to pick and choose. Some of the lectures are suitable for just about anyone. Some assume a bit more radio expertise in electronics or math. Still, they are all worth at least a cursory skim to see if you want to really sit and watch in detail. The only nitpick is that some presenters used a laser pointer that doesn’t show up on the inset slide graphics in the video. That makes sense because the inset slides are not really in the room, but it can make it a little difficult to understand what the speaker is pointing to on a crowded slide.

Of course, if you want to dive deep and you need more background, MIT — along with many other institutions — will let you use their learning material for free. We were especially fans of the circuits class but there are many others including just raw materials from OCW.

Continue reading “MIT IAP Tackles Radio”

Google Assistant, Now Available On Ham Radio

Depending on who you talk to, Google Assistant is either a tool capable of quickly and clearly answering audio queries in natural langauge, or a noisier and less useful version of Wolfram Alpha. [William Franzin] decided it would be particularly cool to make the service available over ham radio – and that’s exactly what he did.

[William] got the idea for this project after first playing with the Internet Radio Linking Project, a system which uses VoIP technologies to link radio networks over the internet. Already having an IRLP node, it seemed only natural to make it into a gateway to the wider internet through integration with Google Assistant. Early work involved activating the assistant via DTMF tones, but [William] didn’t stop there – through the use of Picovoice, it became possible to use the system with the custom wakeword “Bumblebee”.

[William]’s project could prove particularly useful for when he’s out of cell coverage, but needs a little information like a weather report or a piece of trivia to settle an argument round the campfire. Additionally, it’s even possible to control the IRLP node through voice commands, too.

If you’re just getting started with ham radio, check out this build to get you started for under $100. Video after the break.

Continue reading “Google Assistant, Now Available On Ham Radio”

Radio Gets Ridiculous

There were plenty of great talks at this year’s Supercon, but we really liked the title of Dominic Spill’s talk: Ridiculous Radios. Let’s face it, it is one thing to make a radio or a computer or a drone the way you are supposed to. It is another thing altogether to make one out of things you shouldn’t be using. That’s [Dominic’s] approach. In a quick 30 minutes, he shows you two receivers and two transmitters. What makes them ridiculous? Consider one of the receivers. It is a software defined radio (SDR). How many bits should an SDR have? How about one bit? Ridiculous? Then you are getting the idea.

Dominic is pretty adept at taking a normal microcontroller and bending it to do strange RF things and the results are really entertaining. The breadboard SDR, for example, is a microcontroller with three components: an antenna, a diode, and a resistor. That’s it. If you missed the talk at Supercon, you can see the newly published video below, along with more highlights from Dominic’s talk.

Continue reading “Radio Gets Ridiculous”