Using Open Source To Train Your Dog

An open-source canine training research tool was just been released by [Walker Arce] and [Jeffrey Stevens] at the University of Nebraska — Lincoln’s Canine Cognition and Human Interaction Lab (C-CHIL).

We didn’t realize that dog training research techniques were so high-tech. Operant conditioning, as opposed to Pavlovian, gives a positive reward, in this case dog treats, to reinforce a desired behavior. Traditionally operant conditioning involved dispensing the treat manually and some devices do exist using wireless remote controls, but they are still manually operated and can give inconsistent results (too many or too few treats). There weren’t any existing methods available to automate this process, so this team decided to rectify the situation.

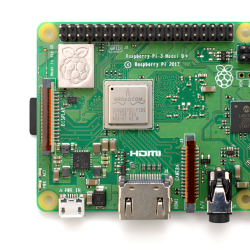
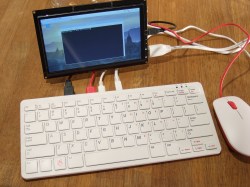
They took a commercial treat dispenser and retro-fitted it with an interface board that taps into the dispenser’s IR sensors to detect that the hopper is moving and treats were actually dispensed. The interface board connects to a Raspberry Pi which serves as a full-featured platform to run the tests. In this demonstration it connects to an HDMI monitor, detecting touches from the dog’s nose to correlate with events onscreen. Future researchers won’t have to reinvent the wheel, just redesign the test itself, because [Walker] and [Jeffrey] have released all the firmware and hardware as open-source on the lab’s GitHub repository.

In the short video clip below, watch the dog as he gets a treat when he taps the white dot with his snout. If you look closely, at one point the dog briefly moves the mouse pointer as well. We predict by next year the C-CHIL researchers will have this fellow drawing pictures and playing checkers.

Continue reading “Using Open Source To Train Your Dog”

Cluster Deck Packs Four Pis Into One Portable Package

Parallel computing is a fair complex subject, and something many of us only have limited hands-on experience with. But breaking up tasks into smaller chunks and shuffling them around between different processors, or even entirely different computers, is arguably the future of software development. Looking to get ahead of the game, many people put together their own affordable home clusters to help them learn the ropes.

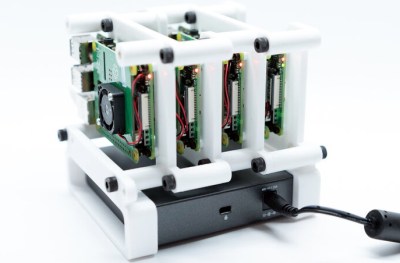
As part of his work with decentralized cryptocurrency, [Jay Doscher] recently found himself in need of a small research cluster. He determined that the Raspberry Pi 4 would give him the best bang for his buck, so he started work on a small self-contained cluster that could handle four of the single board computers. As we’ve come to expect given his existing body of work, the final result is compact, elegant, and well documented for anyone wishing to follow in his footsteps.

The core unit would make a great desktop cluster.

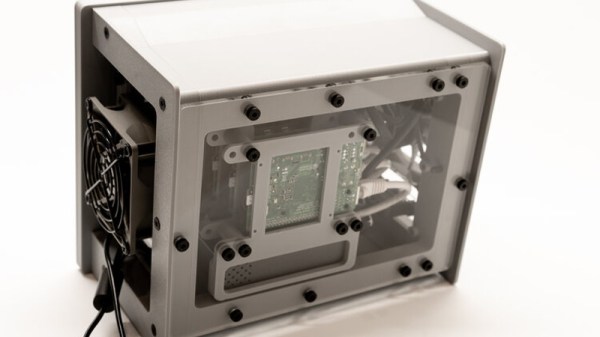
Outwardly the cluster looks quite a bit like the Mil-Plastic that he developed a few months back, complete with the same ten inch Pimoroni IPS LCD. But the internal design of the 3D printed case has been adjusted to fit four Pis with a unique staggered mounting arrangement that makes a unit considerably more compact than others we’ve seen in the past. In fact, even if you didn’t want to build the whole Cluster Deck as [Jay] calls it, just printing out the “core” itself would be a great way to put together a tidy Pi cluster for your own experimentation.

Thanks to the Power over Ethernet HAT, [Jay] only needed to run a short Ethernet cable between each Pi and the TP-Link five port switch. This largely eliminates the tangle of wires we usually associate with these little Pi clusters, which not only looks a lot cleaner, but makes it easier for the dual Noctua 80 mm to get cool air circulated inside the enclosure. Ultimately, the final product doesn’t really look like a cluster of Raspberry Pis at all. But then, we imagine that was sort of the point.

Of course, a couple of Pis and a network switch is all you really need to play around with parallel computing on everyone’s favorite Linux board. How far you take the concept after that is entirely up to you.

New Raspberry Pi 4 Compute Module: So Long SO-DIMM, Hello PCIe!

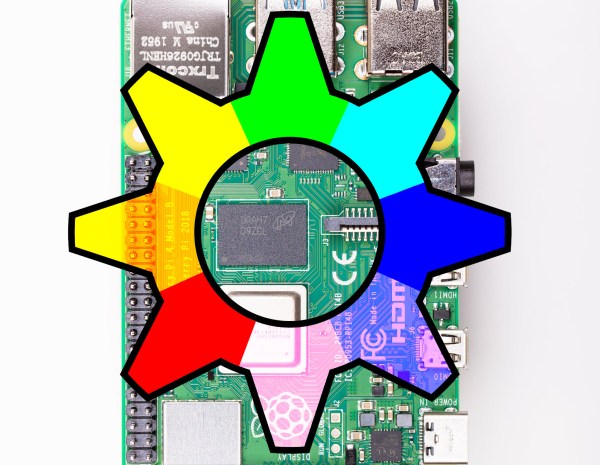
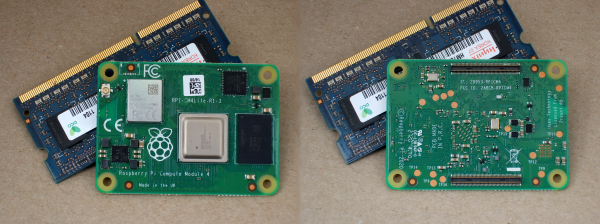
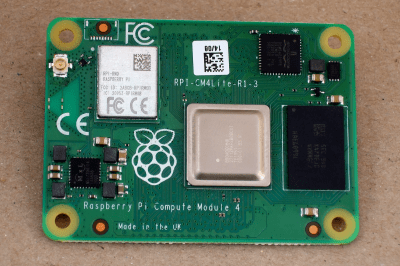
The brand new Raspberry Pi Compute Module 4 (CM4) was just released! Surprised? Nope, and we’re not either — the Raspberry Pi Foundation had hinted that it was going to release a compute module for the 4-series for a long while.

The form factor got a total overhaul, but there’s bigger changes in this little beastie than are visible at first glance, and we’re going to walk you through most of them. The foremost bonuses are the easy implementation of PCIe and NVMe, making it possible to get data in and out of SSDs ridiculously fast. Combined with optional WiFi/Bluetooth and easily designed Gigabit Ethernet, the CM4 is a connectivity monster.

One of the classic want-to-build-it-with-a-Pi projects is the ultra-fast home NAS. The CM4 makes this finally possible.

If you don’t know the compute modules, they are stripped-down versions of what you probably think of as a Raspberry Pi, which is officially known as the “Model B” form-factor. Aimed at commercial applications, the compute modules lack many of the creature comforts of their bigger siblings, but they trade those for flexibility in design and allow for some extra functionality.

The compute modules aren’t exactly beginner friendly, but we’re positively impressed by how far Team Raspberry has been able to make this module accessible to the intermediate hacker. Most of this is down to the open design of the IO Breakout board that also got released today. With completely open KiCAD design files, if you can edit and order a PCB, and then reflow-solder what arrives in the mail, you can design for the CM4. The benefit is a lighter, cheaper, and yet significantly more customizable platform that packs the power of the Raspberry Pi 4 into a low-profile 40 mm x 55 mm package.

So let’s see what’s new, and then look a little bit into what is necessary to incorporate a compute module into your own design.

Continue reading “New Raspberry Pi 4 Compute Module: So Long SO-DIMM, Hello PCIe!”

HALWOP Recreates Retro Style With The Raspberry Pi

Modern computers are incredible feats of engineering, but there are many that still yearn for the simpler times. When keyboards clacked and a desktop computer quite literally dominated the top of your desk. There’s a whole community of folks who scratch that itch by restoring vintage computers, but not everyone has the time, money, or skill for such pursuits. Plus, even the most lovingly cared for Apple II isn’t going to help you watch YouTube.

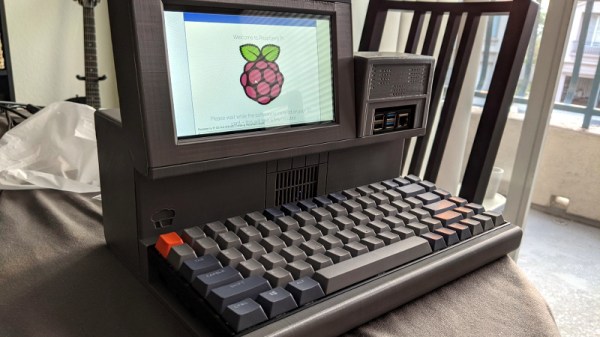
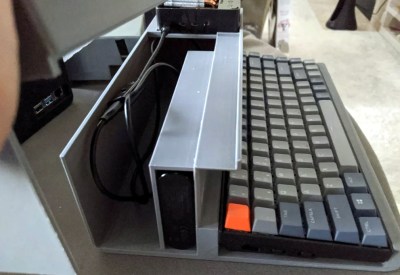
Those who wish to recreate the look and feel of a vintage computer with modern internals will certainly be interested in the HALWOP by [Maz_Baz]. While its 3D printed case isn’t a replica of any one computer, it does draw inspiration from iconic machines like the Apple Lisa and IBM XT. It’s an amalgamation of design ideas that seemed like a good idea circa 1982 or so, with plenty of 90° angles and air vents to go around.

Considering the size of the Raspberry Pi 4 that powers the HALWOP, most of the case is just hollow plastic. But of course, the whole idea depends on it being almost comically large. On the plus side, [Maz_Baz] says you can use one of those empty compartments to hold a Anker PowerCore 26800 battery pack. At least in theory that makes it a “luggable” computer, though good luck trying to move it around.

In addition to the Pi 4 and battery pack, the HALWOP also uses a seven-inch touch LCD and Keychron K2 Bluetooth mechanical keyboard. Since everything is so modular, assembly is about as simple as it gets. Outside of the USB cables that power everything, you just need a long enough ribbon cable to connect the LCD to the Pi.

We know the purists don’t like the idea of a “retro” computer based on the Raspberry Pi, but of course, such projects aren’t about maintaining historical accuracy. They are a way to bridge the gap between modern technology and the unique aesthetics of a bygone era. Designs like the HALWOP allow a new generation to experience a taste of what computing was like in the early days, without giving up the ground that’s been gained in the intervening years.

An Elegant Modular Enclosure System For The Raspberry Pi 4

[NODE] has been experimenting with Raspberry Pi servers and mini computers for a long time, and knows all too well how the wiring can quickly turn into a rat’s nest. His latest creation is  the Mini Server version 3, a modular enclosure system for the Raspberry Pi 4, is designed to turn it into practical computing box.

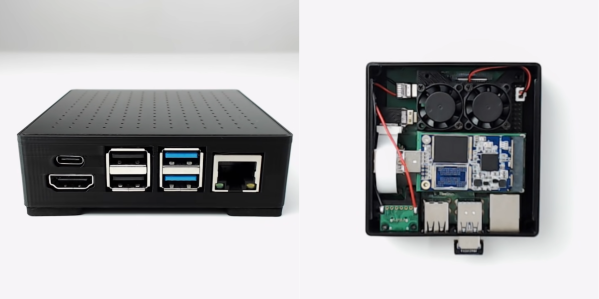
The basic enclosure is a 92 mm x 92 mm x 26 mm 3D printed frame with a custom PCB top cover. One of the main goals was to collect all the major connectors on one side and make the micro SD slot easily accessible. To do this [NODE] created a set of custom PCB adaptors to route the USB-C and an HDMI port to the same side as the other USB ports, and move the micro SD slot to the bottom of the enclosure. A low profile adaptor was also designed to connect a mSATA SSD to one of the USB 3 ports, and there is space inside the enclosure for one or two cooling fans. Unlike previous version of the mini server, no hardware modifications are required on the Pi itself.

The only downside that we can see is that it doesn’t allow external access to the GPIO ports, but the entire project is open source specifically to allow people to make their own modifications.

[NODE] is a big fan of turning Raspberry Pis into custom computing devices, ranging from small terminal devices and pocket servers, to complete laptops.

IOT Pinball Puts Oktoberfest Fun On Tap

We don’t really miss going out to bars all that much, unless you’re talking about the one downtown with all the pinball machines. Don’t get us wrong — pinball emulators have gotten crazy good, and you can find exact digital replicas of most machines to play on your phone or whatever. But it just doesn’t compare to the thrill of playing a real cabinet.

Don’t despair, because for the next couple of weeks, you can queue up to play on a real Oktoberfest pinball machine that’s sitting in Espoo, Finland. The controls are hooked up to a Raspberry Pi 4 through a custom HAT, along with a camera pointed at the playfield and another focused on the backglass screen. The game development/video streaming company Surrogate is hosting a tournament over the internet, and will be giving prizes to the top ten high rollers.

We usually have to wait until the holiday season to come across these remote-reality gaming opportunities. Having played it several times now, we recommend spamming the flippers until you get a feel for the lag. Also, just holding the flippers up while the ball is in the upper half of the playfield will catch a lot of balls that you might otherwise lose due to flipper lag, and sometimes they end up back in front of the launcher to shoot again. After the break, check out a brief but amusing video of setting up the cameras and Pi that includes a taste of the Oktoberfest music.

The tournament runs until the end of August, which should be enough time for somebody to set up CV and a keyboard to play this automatically. Need inspiration? Here’s an open-source pinball machine that can play itself.

Continue reading “IOT Pinball Puts Oktoberfest Fun On Tap”

RadioGlobe Takes The World Of Internet Radio For A Spin

There’s no denying that the reach and variety of internet radio is super cool. The problem is that none of the available interfaces really give the enormity of the thing the justice it deserves. We long for a more physical and satisfying interface for tuning in stations from around the globe, and [Jude] has made just the thing.

RadioGlobe lets the user tune in over 2000 stations from around the world by spinning a real globe. It works by using two absolute rotary encoders that each have a whopping 1024 positions available. One encoder is stuck into the South Pole, and it reads the lines of longitude as the user spins the globe.

The other encoder is on the left side of the globe, and reads whatever latitude is focused in the reticle. Both encoder are connected to a Raspberry Pi 4, though if you want to replicate this open-source project using the incredibly detailed instructions, he says a Raspberry Pi 3 B+ will work, too.

In the base there’s an LCD that shows the coordinates, the city, and the station ID. Other stations in the area are tune-able with the jog wheel on the base. There’s also an RGB LED that blinks red while the station is being tuned in, and turns green when it’s done. We totally dig the clean and minimalist look of this build — especially the surprise transparent bottom panel that lets you see all the guts.

There are three videos after the  break – a short demo that gives you the gist of how it works, a longer demonstration, and a nice explanation of absolute rotary encoders. Those are just the tip of the iceberg, because [Jude] kept a daily vlog of the build.

Maybe you just long for a web radio that dials in vintage appeal. This antique internet radio has a lot of features, but you wouldn’t know it from the outside.

Continue reading “RadioGlobe Takes The World Of Internet Radio For A Spin”