Beautiful Pi-Powered Cocktail Machine

Science fiction has long had the idea that a good drink should just appear from a sliding panel in a wall. Bartending is to be the preserve of robots and AIs – manual control is for the past, and in an effort to continue our progress to towards that sci-fi future, Reddit user [HighwingZ] has built a beautiful machine that mixes and serves drinks.
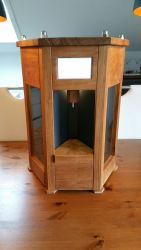
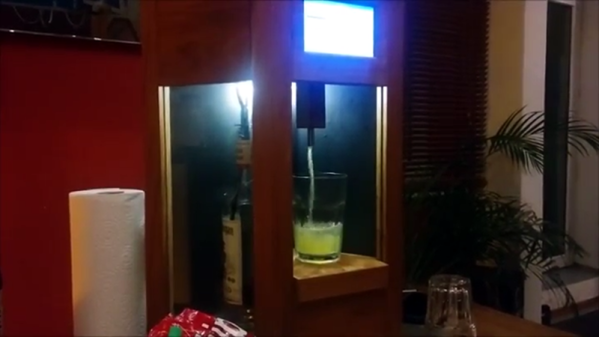
Instead of a sliding wall panel, [HighwingZ] has built a hexagonal container. Five of the six sides contain bottles to fill the drink with, the last panel contains the spigot and a spot for the glass. The machine works by weighing the liquid that gets poured into the glass using a load cell connected to a HX711 load cell amplifier. An aquarium pump is used to push air into whichever bottle has been selected via some magnetic valves which forces the liquid up its tube and into the glass. A simple touch screen UI is used so the user can select which drink and how much of it gets poured. All of this is connected to a Raspberry Pi to control it all.

The whole thing is built into a great looking wooden showcase with see-through sides, so you can see the bottles to be used to make the drinks. [HighwingZ] put the Python code that controls everything on github for anyone wanting to make their own. There are a few cocktail making hacks on the site, like this one, or this one if you need some inspiration.

Continue reading “Beautiful Pi-Powered Cocktail Machine”

The Better RetroPie Handheld

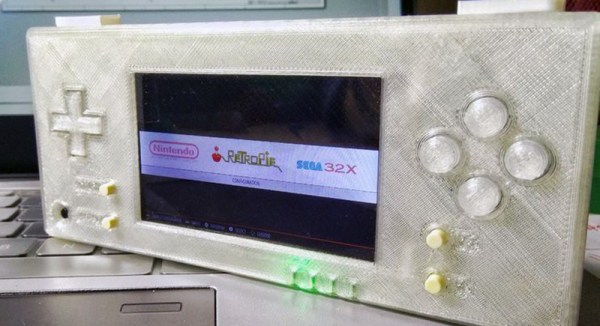
The Raspberry Pi has become the best video game console on the planet. With RetroPi, anyone can play Super Mario 3, Doctor Mario, and even Doki Doki Panic. Adafruit’s PiGRRL Zero and [Wermy]’s reconfabulation of an old brick Game Boy to house a Raspi Zero and display have made the Raspberry Pi portable, along with all those retro games we love so dearly.

There’s a problem with these builds, though. They only use the Raspberry Pi Zero, and with that the limitations on emulation performance, and the Raspi 3 is far too big for a portable console. What’s the solution? It’s the greatest homebrew console ever created. For this year’s Hackaday Prize, [DeanChu] is building the Retro-CM3. It’s a retro handheld with a 3D printed enclosure, that’s powered by the Raspberry Pi Compute Module 3. Stand back, folks. We have a winner that will top the Raspberry Pi and 3D printing subreddits.

The key feature for this build is, of course, the raw processing power of the Raspberry Pi Compute Module 3. This is a Raspberry Pi 3 with 4 GB of eMMC stuffed onto a board that fits into an SODIMM socket. The pins on this device give you access to the GPIOs and the DSI connector. All you really need to turn this into an amazing vintage emulation console is a breakout board with a few buttons, power supply, and a display.

The extra components for this build include a 3.2 inch LCD using the DPI interface. There’s a speaker, and a 2000mAh battery. The real tricky part here is the custom PCB, breaking out the DPI pins on the Compute Module, adding a small speaker, and throwing a small STM32 to read the buttons. It’s an entire system, ready to be housed in a 3D printed enclosure.

This is, simply, the best Raspberry Pi portable you’ll ever see, at least until we get a Rasberry Pi Zero with the capabilities of the Pi 3. It’s an excellent use of the very small Compute Module, and one of the most polished Hackaday Prize entries we’ve seen thus far.

Filter Your Pi And Be A Responsible Pirate

At this point it’s pretty well-known that you can tack a long wire to the Raspberry Pi’s GPIO, install some software, and you’ve got yourself the worlds easiest pirate FM radio station. We say that it’s a “pirate” station because, despite being ridiculously easy to do, broadcasting on these frequencies without a license is illegal. Even if you had a license, the Raspberry Pi with a dangling bit of wire will be spewing out all kinds of unintentional noise, making it a no-go for any legitimate purposes.

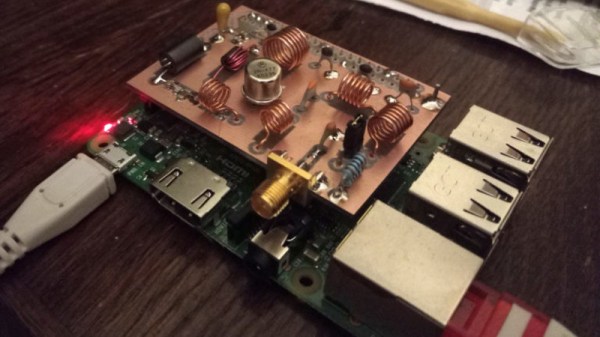
Unfiltered output of Pi broadcasting on 107.3 MHz

In an effort to address that issue, [Naich] has written up a couple posts on his blog which not only discuss why the Pi is such a poor transmitter, but shows how you can build a filter to help improve the situation. You’ll still be a lawless pirate if you’re transmitting on FM stations with your Pi, but you won’t be a filthy lawless pirate.

In the first post, [Naich] shows us exactly what’s coming out of the wire antenna when the Pi is broadcasting some tunes on the default 107.3 MHz, and it ain’t pretty. The Pi is blasting out signals up and down the spectrum from 50 MHz to 800 MHz, and incredibly, these harmonics are in some cases stronger than the intentional broadcast. Definitely not an ideal transmitter.

[Naich] then goes on to show how you can build a DIY filter “hat” for the Pi that not only cuts down a lot of the undesirable chatter, but even boosts the intended signal a bit. The design is surprisingly simple, only costs a few bucks in components, and conveniently is powered directly from the Pi’s GPIO. It even gives you a proper antenna jack instead of a bare wire wound around a header pin.

We’ve seen plenty of projects utilizing the Raspberry Pi FM transmission hack, and while this mod still doesn’t make it perfect, it’s always nice to see an awesome hack made even better.

Yellow Robot Wheels Rolling Out

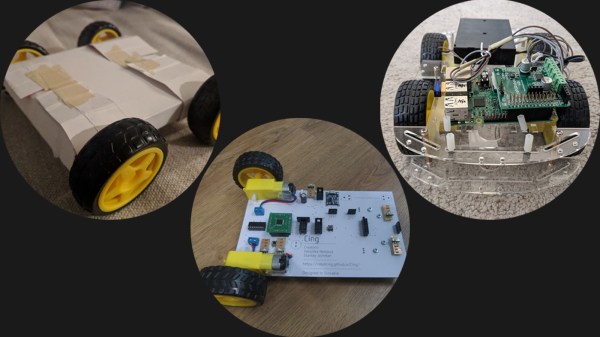
Small wheeled robots are great for exploring robotics and it’s easier than ever to get started, thanks to growing availability and affordability of basic components. One such component is a small motorized wheel assembly commonly shown when searching for “robot wheel”: a small DC motor mounted in a gearbox to drive a single plastic wheel (inevitably yellow) on which a thin rubber tire has been mounted for traction. Many projects have employed these little motor + gearbox + wheel modules, such as these three entries for 2018 Hackaday Prize:

BoxBotics takes the idea of an affordable entry point and runs with it: build robot chassis for these wheels out of cardboard boxes. (Maybe even the exact box that shipped the yellow wheels.) Cardboard is cheap and easy to work with, making cardboard projects approachable to any creative mind. There will be an audience for something like a Nintendo Labo for robotics, and maybe BoxBotics will grow into that offering.

Cing also intends to make a friendly entry point for robotics and they offer a different chassis solution. Instead of cardboard, they use a circuit board. The yellow gearbox is mounted directly to the main circuit board making it into the physical spine, along with its copper traces serving as the spinal cord of the robot. While less amenable to mechanical creativity than BoxBotics, Cing’s swappable modules might be a better fit for those interested in exploring electronics.

ROS Starter Robot caters to those who wish to go far beyond simple “make it move” level of robot intelligence. It aims to lower the barrier to enter the world of ROS (robot operating system) which has historically been the domain of very capable (but also very expensive) research-oriented robots. This project could become the bridge for aspiring roboticists who wish to grow beyond hobbyist level software but can’t justify the cost typical of research level hardware.

All three of these projects take the same simple motorized wheel and build very different ideas on top of them. This is exactly the diversity of ideas we want to motivate with the Hackaday Prize and we hope to see great progress on all prize contestants in the month ahead.

This Is How The Fonz Would Play MP3s

Here at Hackaday, we love to see old hardware treated with respect. A lovingly restored radio or TV that’s part of our electronic heritage is a joy to behold, and while we understand the desire to stream media from a funky retro case, it really grates when someone throws away the original guts to make room for new electronics.

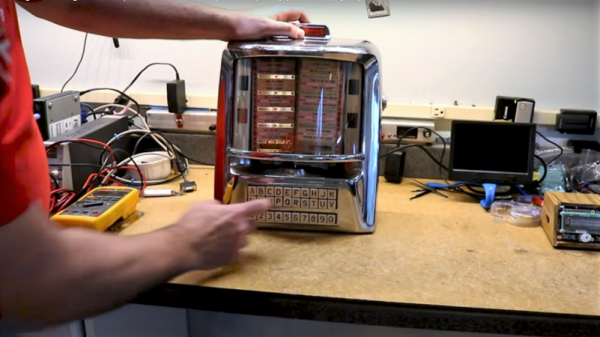
Luckily, this Seeburg jukebox wall remote repurposing is not one of those projects. [Scott M. Baker] seems to have an appreciation for the finer things, and when he scored this classic piece of Mid-Century Americana, he knew just what to do. These remotes were situated around diners and other hangouts in the 50s and 60s and allowed patrons to cue up some music without ever leaving their seats. They were real money makers back in the day, and companies put a lot of effort into making them robust and reliable.

[Scott]’s first video below shows the teardown of this unit; you can practically smell the old transformer and motor windings. His goal in the second video was to use the remote to control his Raspberry Pi jukebox; he wisely decided to leave everything intact and use the original electromechanically generated pulses to make selections. His analysis led to a nicely executed shield for his Pi which conditions the pulses and imitates coin drops; happily, the coin mechanism still works too, so you can still drop a quarter for a tune.

The remote is working well now, but [Scott] still needs to finish up a few odds and ends to bring this one home. But we love the look and the respect for tradition here, as we did when this juke got a Raspberry Pi upgrade to imitate a missing wall remote.

Continue reading “This Is How The Fonz Would Play MP3s”

An Amiga 500 For The 21st Century

There was a period in the late 1980s when the home computer to own did not come with an Apple logo and was not an IBM, Compaq, or any of the other clones, but instead sported a Commodore logo. The Amiga 500 was an all-in-one console-style cased machine that maybe wasn’t quite the computing powerhouse you might have wished it to be, but gave you enough of the capabilities of the more accomplished 16-bit machines of the day to be an object of desire while also having a games catalogue second to none.

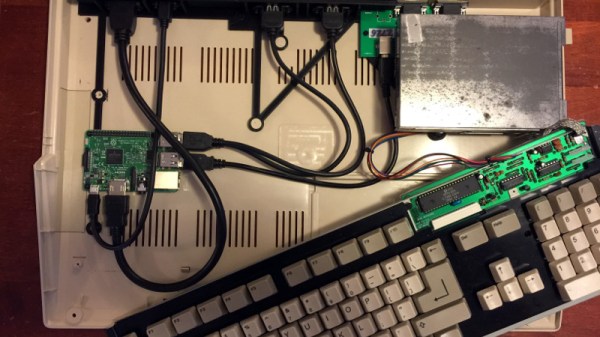
A500s have survived in reasonable numbers, but inevitably working A500s haven’t. Fortunately there are decent emulators, and it was for one of these that [intric8] has produced an extremely well-done installation of a Raspberry Pi 3 in an Amiga case. The intention has been throughout to avoid modification or damage to the Amiga case, and eventually to have all Amiga internal peripherals including the floppy drive in a fully working condition.

The result has a Tynemouth Software USB adaptor for the Amiga keyboard, and a set of nicely designed 3D printed backplates to bring the extended Raspberry Pi ports to the back of the case. The floppy isn’t yet interfaced and there isn’t a socket for the quadrature mouse, but otherwise it’s a very tidy build. He might be interested in one of the several USB to quadrature interfaces we’ve featured over the years.

You might ask why so much effort should be put in for an emulation of an A500, and in a sense you’d be right to do so. The Pi will run the emulator from any case or none. But if you happen to have a spare A500 case, why not give this one a go!

3D Printed Raspberry Pi NAS With Dual Drive Bays

While it might not pack the computational punch you’d usually be looking for in a server platform, you can’t beat how cheap the Raspberry Pi is. As such, it’s at the heart of many a home LAN, serving up files as a network attached storage (NAS) device. But the biggest problem with using the Pi in a NAS is that it doesn’t have any onboard hard drive interface, forcing you to use USB. Not only is this much slower, but doesn’t leave you a lot of options for cleanly hooking up your drives.

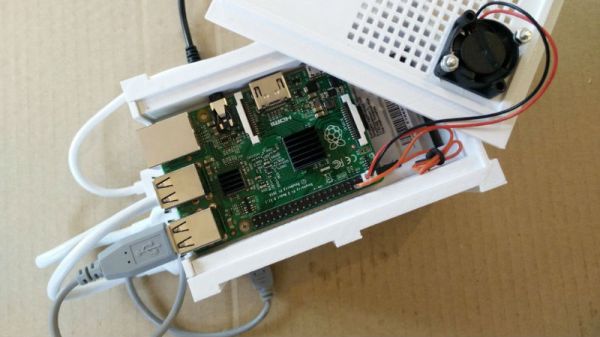
This 3D printable NAS enclosure designed by [Paul-Louis Ageneau] helps address the issue by integrating two drive bays which can accommodate 2.25 inch laptop hard disk drives and their associated IB-AC6033-U3 USB adapters. The drives simply slide into the “rails” designed into the case without the need for additional hardware. There’s even space in the bottom of the case for a USB hub to connect the drives, and a fan on the top of the case to help keep the whole stack cool. It still isn’t perfect, but it’s compact and doesn’t look half bad.

The design is especially impressive as it doesn’t require any supports, an admirable goal to shoot for whenever designing for 3D printing. As an added bonus, the entire case is designed in OpenSCAD and licensed under the GPL v3; making modification easy if you want to tweak it for your specific purposes.

This certainly isn’t the strongest Raspberry Pi enclosure we’ve ever seen, that title would have to go to the ammo case that does double duty as a media streamer, but looks like it would make a great home for that new 3 B+ you’ve got on order.