Supercon 2023 – Going Into Deep Logic Waters With The Pico’s PIO And The Pi’s SMI

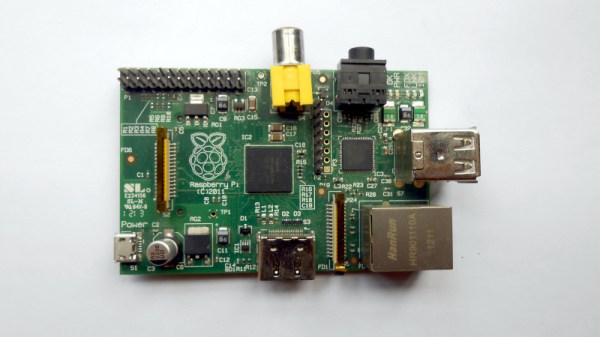
The Raspberry Pi has been around for over a decade now in various forms, and we’ve become plenty familiar with the Pi Pico in the last three years as well. Still, these devices have a great deal of potential if you know where to look. If you wade beyond the official datasheets, you might even find more than you expected.

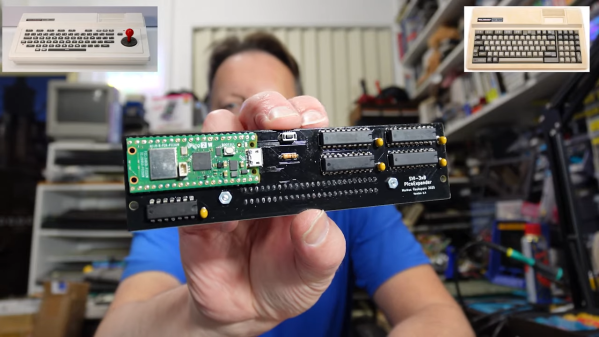
Kumar is presently a software engineer with Google, having previously worked for Analog Devices earlier in his career. But more than that, Kumar has been doing a deep dive into maxing out the capabilities of the Raspberry Pi and the Pi Pico, and shared some great findings in an excellent talk at the 2023 Hackaday Supercon.

Continue reading “Supercon 2023 – Going Into Deep Logic Waters With The Pico’s PIO And The Pi’s SMI”

Broadcast TV Simulator Keeps The Nostalgia Flowing

Watch out, Gen X-ers — there’s a nostalgia overload heading your way, courtesy of this over-the-air TV simulator. And it has us feeling a little Saturday morning cartoon-ish, or maybe even a bit Afterschool Special.

[Shane C Mason]’s “FieldStation42” build centers around a period-correct color TV, and rightly so — a modern TV would be jarring here, and replacing the CRT in this irreplaceable TV would be unthinkable. Programming comes via painstakingly collected sitcoms, dramas, news broadcasts, and specials, all digitized and stored on disk and organized by the original networks the programs came from. Python running on a Raspberry Pi does the heavy lifting here, developing a schedule of programs for the week that makes sense for the time of day — morning news and talk, afternoon soaps, the usual family hour and prime time offerings, and finally [Carson] rounding out the day, because that’s all we had for late night.

As for switching between stations, rather than risk damaging the old TV, [Shane] really upped his nostalgia game and found an old antenna rotator control box. These were used to steer the directional antenna toward different transmitters back in the day, especially in fringe areas like the one he grew up in. He added a set of contacts to the knob and a Pi Pico, which talks to the main Pi and controls which “channel” is being viewed. He also added an effect of fading and noise in the video and audio between channels, simulating the antenna moving. The video below shows it in action.

For those who missed the Golden Age of TV, relax; as [Shane] correctly surmises after going through this whole project, Golden Ages only exist in your mind. Things were certainly different with 70s mass media, a fact which this build captures neatly, but that doesn’t mean they were better. Other than Saturday mornings, of course — those were objectively better in every way.

Continue reading “Broadcast TV Simulator Keeps The Nostalgia Flowing”

MicroLab reactor setup

Little Pharma On The Prairie

Let’s get the obvious out of the way first — in his DEFCON 32 presentation, [Dr. Mixæl Laufer] shared quite a bit of information on how individuals can make and distribute various controlled substances. This cuts out pharmaceutical makers, who have a history of price-gouging and discontinuing recipes that hurt their bottom line. We predict that the comment section will be incendiary, so if your best argument is, “People are going to make bad drugs, so no one should get to have this,” please disconnect your keyboard now. You would not like the responses anyway.

Let’s talk about the device instead of policy because this is an article about an incredible machine that a team of hackers made on their own time and dime. The reactor is a motorized mixing vessel made from a couple of nested Mason jars, surrounded by a water layer fed by hot and cold reservoirs and cycled with water pumps. Your ingredients come from three syringes and three stepper-motor pumps for accurate control. The brains reside inside a printable case with a touchscreen for programming, interaction, and alerts.

It costs around $300 USD to build a MicroLab, and to keep it as accessible as possible, it can be assembled without soldering. Most of the cost goes to a Raspberry Pi and three peristaltic pumps, but if you shop around for the rest of the parts, you can deflate that price tag significantly. The steps are logical, broken up like book chapters, and have many clear pictures and diagrams. If you want to get fancy, there is room to improvise and personalize. We saw many opportunities where someone could swap out components, like power supplies, for something they had lying in a bin or forego the 3D printing for laser-cut boards. The printed pump holders spell “HACK” when you disassemble them, but we would have gone with extruded aluminum to save on filament.

Several times [⁨Mixæl] brings up the point that you do not have to be a chemist to operate this any more than you have to be a mechanic to drive a car. Some of us learned about SMILES (Simplified Molecular Input Line Entry System) from this video, and with that elementary level of chemistry, we feel confident that we could follow a recipe, but maybe for something simple first. We would love to see a starter recipe that combines three sodas at precise ratios to form a color that matches a color swatch, so we know the machine is working correctly; a “calibration cocktail,” if you will.

If you want something else to tickle your chemistry itch, check out our Big Chemistry series or learn how big labs do automated chemistry.

Continue reading “Little Pharma On The Prairie”

Raspberry Pi RP2350-E9 Erratum Redefined As Input Mode Leakage Current

Although initially defined as an issue with GPIO inputs when configured with the internal pull-downs enabled, erratum RP2350-E9 has recently been redefined in the datasheet (page 1341) as a case of increased leakage current. As it is now understood since we previously reported, the issue occurs when a GPIO (0 – 47) is configured as input, the input buffer is enabled, and the pad voltage is somewhere between logic LOW and HIGH. In that case leakage current can be as high as 120 µA with IOVDD = 3.3 V. This leakage current is too much for the internal pull-up to overcome, ergo the need for an external pull-down: 8.2 kΩ or less, per the erratum. Disabling the input buffer will stop the leakage current, but reading the input requires re-enabling the buffer.

GPIO Pad leakage for IOVDD=3.3 V (Credit: Raspberry Pi)

The upshot of this issue is that for input applications, the internal pull-downs are useless, and since PIO applications cannot toggle pad controls, the input buffer toggling workaround is not an option. ADC usage requires one to clear the GPIO input enable. In general any circuit that relies on floating pins or an internal pull-down resistor will be affected.

Although this should mean that the affected A2 stepping of the RP2350 MCU can still be used for applications where this is not an issue, and external pull-downs can be used as a ‘fix’ at the cost of extra power usage, it makes what should have been a drop-in replacement a troubled chip at best. At this point there have still been no definite statements from Raspberry Pi regarding a new (B0) stepping, leaving RP MCU users with the choice between the less flashy RP2040 and the buggy RP2350 for the foreseeable future.

Header: Thomas Amberg, CC BY-SA 2.0.

Raspberry Pi Becomes Secure VPN Router

OpenWRT is a powerful piece of open-source software that can turn plenty of computers into highly configurable and capable routers. That amount of versatility comes at a cost, though; OpenWRT can be difficult to configure outside of the most generic use cases. [Paul] generally agrees with this sentiment and his latest project seeks to solve a single use case for routing network traffic, with a Raspberry Pi configured to act as a secure VPN-enabled router configurable with a smartphone.

The project is called PiFi and, while it’s a much more straightforward piece of software to configure, at its core it is still running OpenWRT. The smartphone app allows most users to abstract away most of the things about OpenWRT that can be tricky while power users can still get under the hood if they need to. There’s built-in support for Wireguard-based VPNs as well which will automatically route all traffic through your VPN of choice. And, since no Pi router is complete without some amount of ad blocking, this router can also take care of removing most ads as well in a similar way that the popular Pi-hole does. More details can be found on the project’s GitHub page.

This router has a few other tricks up its sleeve as well. There’s network-attached storage (NAS) built in , with the ability to use the free space on the Pi’s microSD card or a USB flash drive. It also has support for Ethernet and AC1300 wireless adapters which generally have much higher speeds than the built-in WiFi on a Raspberry Pi. It would be a great way to build a guest network, a secure WiFi hotspot when traveling, or possibly even as a home router provided that the home isn’t too big or the limited coverage problem can be solved in some other way. If you’re looking for something that packs a little more punch for your home, take a look at this guide to building a pfSense router from the ground up.

The Worsening Raspberry Pi RP2350 E9 Erratum Situation

There’s currently a significant amount of confusion around the full extent of the GPIO hardware issue in the Raspberry Pi RP2350 microcontroller, with [Ian] over at [Dangerous Prototypes] of Bus Pirate fame mentioning that deliveries of the RP2350-based Bus Pirate 5XL and 6 have been put on hold while the issue is further being investigated. Recorded in the MCU’s datasheet as erratum RP2350-E9, it was originally reported as only being related to the use of internal pull-downs, but [Ian] has since demonstrated in the primary issue ticket on GitHub that the same soft latching behavior on GPIO pins occurs also without pull-downs enabled.

Ian from Dangerous Prototypes demonstrating the RP2350-E9 issue in a Bus Pirate prototype without pull-ups.

When we first reported on this hardware bug in the RP2350’s A2 (and likely preceding) stepping there was still a lot of confusion about what this issue meant, but so far we have seen the Bus Pirate delay and projects like [Agustín Gimenez Bernad]’s LogicAnalyzer have opted for taking the RP2350 port out back. There are also indications that the ADC and PIO peripherals are affected by this issue, with workarounds only partially able to circumvent the hardware issue.

In the case of the Bus Pirate a potential workaround is the addition of 4.7 kOhm external pull-downs, but at the cost of 0.7 mA continuous load on the GPIO when pulled high and part of that when pulled low. It’s an ugly hack, but at the very least it might save existing boards. It also shows how serious a bug this is.

Meanwhile there are lively discussions about the issue on the Raspberry Pi forums, both on the E9 erratum as well as the question of when there will be a new stepping. The official statement by Raspberry Pi is still that ‘they are investigating’. Presumably there will be a Bx stepping at some point, but for now it is clear that the RP2350’s A2 stepping is probably best avoided.

VR Headset With HDMI Input Invites A New Kind Of Cyberdeck

Meta’s Quest VR headset recently got the ability to accept and display video over USB-C, and it’s started some gears turning in folks’ heads. [Ian Hamilton] put together a quick concept machine consisting of a Raspberry Pi 400 that uses a VR headset as its monitor, which sure seems like the bones of a new breed of cyberdeck.

With passthrough on, one still sees the outside world.

The computer-in-a-keyboard nature of the Pi 400 means that little more than a mouse and the VR headset are needed to get a functional computing environment. Well, that and some cables and adapters.

What’s compelling about this is that the VR headset is much more than just a glorified monitor. In the VR environment, the external video source (in this case, the Raspberry Pi) is displayed in a window just like any other application. Pass-through can also be turned on, so that the headset’s external cameras display one’s surroundings as background. This means there’s no loss of environmental awareness while using the rig.

[Note: the following has been updated for clarity and after some hands-on testing] Video over USB-C is technically DisplayPort altmode, and both the video source and the USB-C cable have to support it. In [Ian]’s case, the Raspberry Pi 400 outputs HDMI and he uses a Shadowcast 2 capture card to accept HDMI on one end and outputs video over USB-C on the other.

Here’s how it works: the Quest has a single USB-C port on the side, and an app (somewhat oddly named “Meta Quest HDMI link”) running on the headset takes care of accepting video over USB and displaying it in a window within the headset. The video signal expected is UVC (or USB Video Class), which is what most USB webcams and other video devices output. (There’s another way to do video over USB-C which is technically DisplayPort altmode, and both the video source and the USB-C cable have to support it. That is not what’s being used here; the Quest does not support this format. Neither is it accepting HDMI directly.) In [Ian]’s case, the Raspberry Pi 400 outputs HDMI and he uses a Shadowcast 2 capture card to accept HDMI on one end and output UVC video on the other, which is then fed into the Quest over a USB-C cable.

As a concept it’s an interesting one for sure. Perhaps we’ll see decks of this nature in our next cyberdeck contest?