Robot Arm From Recyclables

A robot assistant would make the lives of many much easier. Luckily, it’s possible to make one of your own with few fancy materials. The [circuito.io] team demonstrates this by building a robot arm out of recyclables!

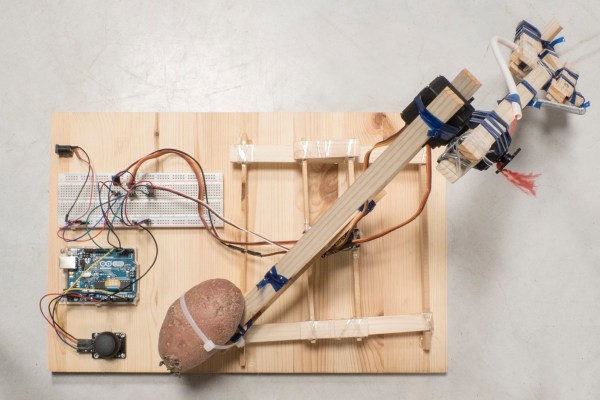
With the exception of the electronics — an Arduino, a trio of servo motors, and a joystick — the arm is made almost completely out of salvaged recyclables: scrap wood, a plastic bottle, bits of plastic string and a spring. Oh, and — demonstrating yet another use for those multi-talented tubers — a potato acts as a counterweight.
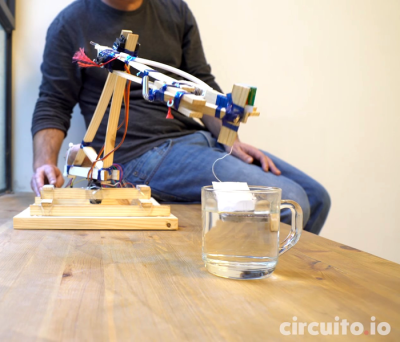
Instead of using screws or glue, these hackers used string made from a plastic bottle as a form of heat shrink wrap to bind the parts of the arm together. The gripper has only one pivoting claw for greater strength, and the spring snaps it open once released. Behold: your tea-bag dunking assistant.

Continue reading “Robot Arm From Recyclables”

A Truly Classy Metal-Framed Mini CNC

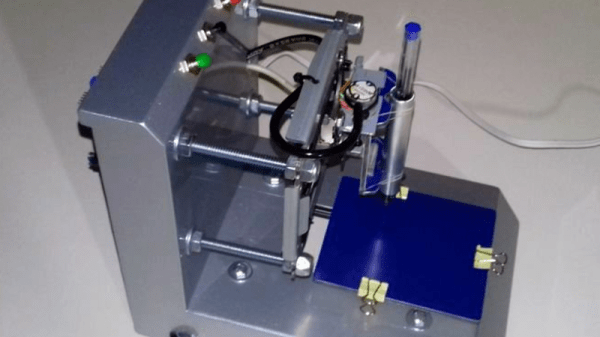
We’ve seen a number of DVD- and CDROM-based small CNC machines here, but few are as simply beautiful as this one by [julioberaldi] over on Instructables (translated from Portuguese here).

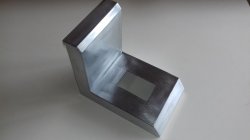
fbis2gciv0ajsdxWe’ll cut to the chase; it’s the frame. Cut from steel sheet scraps with a hacksaw, and welded or soldered together with “bar solder”. It looks like a lot of sanding, painting, and polishing went on. The result is something we’d be proud to have on our desk.

For now, it simply draws with a pen. But watch the video, embedded below, and you’ll see that it runs exceptionally smoothly. If we’re reading the Instructable right, the next step is to turn this into a CNC cutter. We can’t wait to see where the project goes from here.

Continue reading “A Truly Classy Metal-Framed Mini CNC”

Fail Of The Week: Upcycling Failed 3D Prints

Is it possible to recycle failed 3D prints? As it turns out, it is — as long as your definition of “recycle” is somewhat flexible. After all, the world only needs so many coasters.

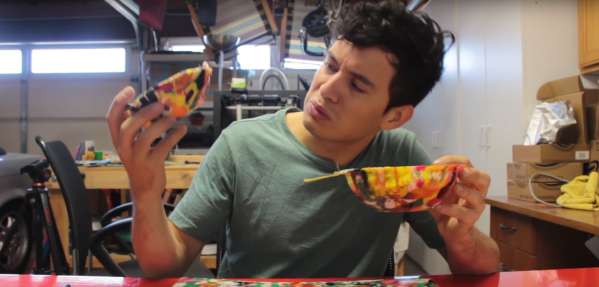
To be fair, [Devin]’s experiment is more about the upcycling side of the recycling equation, but it was certainly worth undertaking. 3D printing has hardly been reduced to practice, and anyone who spends any time printing knows that it’s easy to mess up. [Devin]’s process starts when the colorful contents of a bin full of failed prints are crushed with a hammer. Spread out onto a properly prepared (and never to be used again for cookies) baking sheet and cooked in the oven at low heat, the plastic chunks slowly melt into a thin, even sheet.

[Devin]’s goal was to cast them into a usable object, so he tried to make a bowl. He tried reheating discs of the material using an inverted metal bowl as a form but he found that the plastic didn’t soften evenly, resulting in Dali-esque bowls with thin spots and holes. He then flipped the bowl and tried to let the material sag into the form; that worked a little better but it still wasn’t the win he was looking for.

In the end, all [Devin] really ended up with is some objets d’art and a couple of leaky bowls. What else could he have done with the plastic? Would he have been better off vacuum forming the bowls or perhaps even pressure forming them? Or does the upcycling make no sense when you can theoretically make your own filament? Let us know in the comments how you would improve this process.

Continue reading “Fail Of The Week: Upcycling Failed 3D Prints”

Adding Recycling Codes To 3D Prints

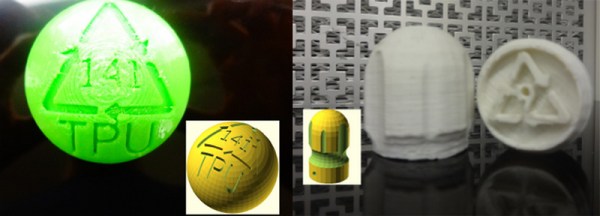
Every little plastic bauble you interact with has some sort of recycling code on it somewhere. Now that we’re producing plastic 3D printed parts at home, it would be a good idea to agree on how to recycle all those parts, and [Joshua Pearce]’s lab at Michigan Tech has the answer; since we’re printing these objects, we can just print the recycling code right in the object.

The US system of plastic recycling codes is particularly ill-suited for identifying what kind of plastic the object in question is made of; there are only seven codes, while China’s system of plastic identification uses 140 identification codes. This system for labeling 3D printed parts borrows heavily from the Chinese system, assigning ABS as ‘9’, PLA as ’92’, and HIPS as ‘108’.

With agreed upon recycling codes, the only thing left to do is to label every print with the correct recycling code. That’s an easy task with a few OpenSCAD scripts – the paper shows off a wrench made out of HIPS labeled with the correct code, and an ABS drill bit handle sporting a number nine. 3D printing opens up a few interesting manufacturing techniques, and the research team shows this off with a PLA vase with a recycle code lithophane embedded in the first few layers.

Plastic Mallet

Turning Plastic Milk Jugs Into A Useful Tool

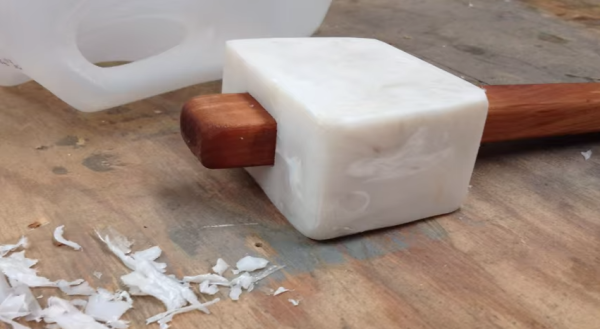
[Peter] obviously enjoys getting to work in his wood shop. He also likes turning things into other things. With his latest project, he combines his two hobbies by turning plastic milk jugs into a plastic joiner’s mallet.

[Peter] started out by collecting and “processing” the milk jugs. Milk jugs are commonly made with HDPE. HDPE is a petroleum-based plastic with a high strength-to-density ratio. It’s easy to recycle, which makes it perfect for this type of project. We’ve even seen this stuff recycled into 3D printer filament in the past. The “processing” routine actually just consists of cutting apart the jugs with a razor blade. [Peter] mentions in the past that he’s used a blender to do this with much success, but he’s unfortunately been banned from using the blender.

Next, all of the plastic pieces are piled up on a metal try to placed into a small toaster oven. They are melted into one relatively flat, solid chunk. This process is performed three times. The final step was to pile all three chunks on top of each other and melt them into one massive chunk of plastic.

While waiting for the plastic to melt together, [Peter] got to work on the handle. He put his woodworking skills to good use by carving out a nice wooden handle from a piece of cherry wood.  The handle was carefully shaped and sanded with a variety of tools. It is finished with some linseed oil for a nice professional look.

When the plastic was mostly melted together, [Peter] had to get to work quickly while the plastic was still soft. He pried the plastic off of the metal tray and stuffed it into a rectangular mold he made from some fiber board. He used a heat gun to soften the plastic as needed while he crammed it all into the mold. With the mold suitably stuffed, he closed it up and clamped it all shut.

Once the plastic cooled, [Peter] had to cut it into the correct shape and size. He took the solid chunk of plastic to his band saw to cut all the appropriate angles. He then used both a drill press and a chisel to cut the rectangular mounting hole for the handle. The plastic piece was then shaped into its final form using a belt sander. All that [Peter] had left to do was slide it up and only the handle. The shape of the handle and mounting hole prevent the plastic piece from flying off of the top of the handle. Check out the video below to see the whole process. Continue reading “Turning Plastic Milk Jugs Into A Useful Tool”

Quadcopter Built From Recycled Motherboards

A quadcopter built from a motherboard

[Eric] has figured out a great way to build quadcopters out of recycled computer motherboards. Multicopters come in all shapes and sizes these days. As we mentioned in the last issue of Droning On, they can be bought or built-in a multitude of materials as well. Drones have been built using materials as varied as wood, PVC pipe, carbon fiber, and aluminum.

One of the more common commercial materials is G10 fiberglass sheet. It’s stiff, strong, and relatively light. Printed circuit boards are generally made of FR-4 fiberglass, G10’s flame resistant cousin. It’s no wonder [Eric] had quadcopters in his eyes when he saw a pile of motherboards being thrown out at his university.

[Eric] used a heat gun and a lot of patience to get all the components off the motherboard. With a bit of care, most of the components can be saved for future hardware hacks. This is one step that’s best performed outside. Hot melting plastics, metals, and resin fumes aren’t the greatest things to inhale.

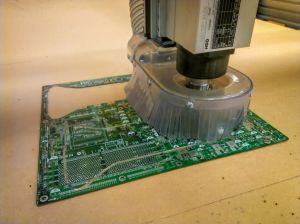
Computer motherboards being cut on a shopbotClean PCBs in hand, [Eric] headed to his local TechShop. He drew his dead cat style frame in SolidWorks and cut it out on a ShopBot. While a high-end CNC cutter is nice, it’s not absolutely necessary. The fiberglass sheets could be cut with a rotary tool or a jigsaw. No matter how you cut it, be sure to wear a mask rated for fiberglass resins and some protective clothing. Fiberglass plate is nasty stuff to cut.

Once the upper and lower frame plates were cut, [Eric] completed his quad frame with some square wooden stock for arms. The final quad is a great flier, and spare parts are easy to source. Nice work on the recycling, [Eric]!

Continue reading “Quadcopter Built From Recycled Motherboards”

BBB #1: The Santa-pede Challenge

Welcome to the first Buy Break Build at hackaday,  sponsored by Adafruit Industries and Make. This challenge will be focusing on dancing Santas, or what is inside them. We’ve seen them everywhere, and may even have one or two in an attic somewhere. These annoying little guys should have enough bits and pieces inside to build some pretty interesting stuff. This time, we want to see a multi-legged walking device. We don’t care if it has 2 legs, 7 legs, or 32 legs, as long as it “walks” using its legs.

Join us after the break for the rules, the prize breakdown, and to find out who the guest judge will be!

Continue reading “BBB #1: The Santa-pede Challenge”