RasPi Garage Door

A Raspberry Pi Garage Door Opener

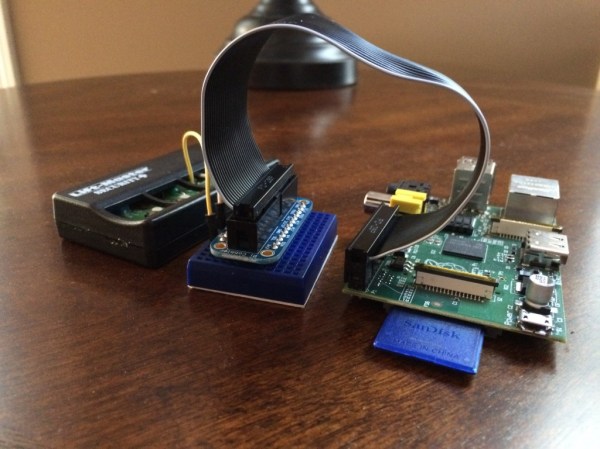
We can never seem to get enough garage door hacks around here. [Tanner’s] project is the most recent entry into this category. He’s managed to hook up a Raspberry Pi to his garage door opener. This greatly extends his range to… well anywhere with an Internet connection.

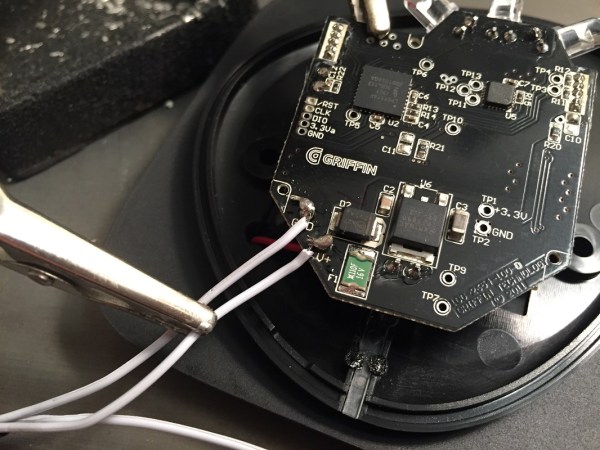
His hack is relatively simple. He started with the garage door opener remote. He removed the momentary switch that was normally used to active the door. He bridged the electrical connection to create a circuit that was always closed. This meant that as long as the remote had power, the switch would be activated. Now all [Tanner] had to do was remove the battery and hook up the power connectors to his Raspberry Pi. Since the remote works on 3.3V and draws little current, he is able to power the remote directly from the Pi. The Pi just has to turn its pin high momentarily to activate the remote.

The ability to toggle the state of your garage door from anywhere in the world also comes with paranoia. [Tanner] wanted to be able to tell if the door is up, down, or stopped somewhere in the middle while he was away from home. He also wanted to use as little equipment as possible. Since he already had an IP camera in the garage, he decided to use computer vision to do the detection.

He printed off two large, black shapes onto ordinary white computer paper. One was taped to the top of the door and one to the bottom. A custom script runs on the Pi that grabs the latest image from the camera and uses OpenCV to detect the shapes. If both shapes are visible, then the script can assume the door is closed. Otherwise, it’s likely open. This makes it easier for [Tanner] to know if the door is opened or closed without having to check the camera himself.

Can’t get enough garage door hacks? Try these on for size. Continue reading “A Raspberry Pi Garage Door Opener”

Calculator Remote with Launchpad

Calculator + MSP430 + IR LED = TV Remote?

Eschewing the store-bought solution, [Stefan] managed to build a TV remote out of an old calculator. The brains of the calculator were discarded and replaced with an MSP430, leaving only the button matrix and enclosure. Rather than look it up, he successfully mapped the matrix manually before getting stumped with the infrared code timings. Some research pointed him to a peculiarity with Samsung IR codes and with help from an open source remote control library he got it working.

When the range was too limited to satisfy him he added a booster circuit and an LED driver which he snapped off the top of an old remote; now it works from 30 feet away. Some electrical tape and hot glue later and it all fit back into the original case.

It cannot take photos or play Super Smash Brothers, but it does what a remote needs to do: browses channels in the guide, control volume, and turn the TV on or off. Considering that all this calculator was built to do was boring basic arithmetic, it is a procrastination-enabling upgrade.

See the video after the break for some smiles.

Continue reading “Calculator + MSP430 + IR LED = TV Remote?”

Gesture Controlled Quadcopter

Controlling A Quadcopter With Gestures

[grassjelly] has been hard at work building a wearable device that uses gestures to control quadcopter motion. The goal of the project is to design a controller that allows the user to intuitively control the motion of a quadcopter. Based on the demonstration video below, we’d say they hit the nail on the head. The controller runs off an Arduino Pro Mini-5v powered by two small coin cell batteries. It contains an accelerometer and an ultrasonic distance sensor.

The controller allows the quadcopter to mimic the orientation of the user’s hand. The user holds their hand out in front of them, parallel to the floor. When the hand is tilted in any direction, the quadcopter copies the motion and will tilt the same way. The amount of pitch and roll is limited by software, likely preventing the user from over-correcting and crashing the machine. The user can also raise or lower their hand to control the altitude of the copter.

[grassjelly] has made all of the code and schematics available via github.

THP Hacker Bio: Hackersbench


hackersbench-contestant-bio-banner

Remote sensing applications that make sense and cents? (sorry, couldn’t help ourselves) That’s what [hackersbench], aka [John Schuch], aka [@JohnS_AZ] is working on as his entry for The Hackaday Prize.

He received a multi-thousand-dollar water bill after having an underground pipe break and leak without knowing it. His idea will help you notice problems like this sooner. But if you actually have a way to capture data about your own water use you also have a tool to help encourage less wasteful water use habits. We wanted to learn more about the hacker who is working on this project. [John’s] answers to our slate of questions are after the break.

Continue reading “THP Hacker Bio: Hackersbench”

Bare Bones Arduino IR Receiver

TV Remote

Old infrared remote controls can be a great way to interface with your projects. One of [AnalysIR’s] latest blog posts goes over the simplest way to create an Arduino based IR receiver, making it easier than ever to put that old remote to good use.

Due to the popularity of their first IR receiver post, the silver bullet IR receiver, [AnalysIR] decided to write a quick post about using IR on the Arduino. The part list consists of one Arduino, two resistors, and one IR emitter. That’s right, an emitter. When an LED (IR or otherwise) is reverse biased it can act as a light sensor. The main difference when using this method is that the IR signal is not inverted as it would normally be when using a more common modulated IR receiver module. All of the Arduino code you need to get up and running is also provided. The main limitation when using this configuration, is that the remote control needs to be very close to the IR emitter in order for it to receive the signal.

What will you control with your old TV remote? It would be interesting to see this circuit hooked up so that a single IR emitter can act both as a transmitter and a receiver. Go ahead and give it a try, then let us know how it went!

Building A Quadcopter With A CNC Mill And A 3D Printer

Quadcopter

Quadcopters are a ton of fun to play with, and even more fun to build. [Vegard] wrote in to tell us about his amazing custom DIY quadcopter frame that uses a commercial flight control system.

Building a quadcopter is the perfect project to embark upon if you want to test out your new CNC mill and 3D printer. The mechanical systems are fairly simple, yet result in something unbelievably rewarding. With a total build time of 30 hours (including Sketchup modeling), the project is very manageable for weekend hackers. [Vegard’s] post includes his build log as well as some hard learned lessons. There are also tons of pictures of the build. Be sure to read to read the end of the post, [Vegard] discusses why to “never trust a quadcopter” and other very useful information. See it in action after the break.

While the project was a great success, it sadly only had about 25 hours of flight-time before a fatal bird-strike resulted in quite a bit of damage. Have any of your quadcopters had a tragic run-in with another flying object? Let us know in the comments.

Continue reading “Building A Quadcopter With A CNC Mill And A 3D Printer”

RPi Control Your Server PSU Over The Internet

remote-server-psu-control-via-RPi

Here’s an interesting use of a Raspberry Pi to control the PSU on a server. [Martin Peres] is going to be away for a few months and still wants access to his PC. This isn’t really all that tough… it’s what SSH is made for. But he also wants lower-level access to the hardware. Specifically he needs to control and get feedback on what the PSU is doing, and even wanted to have access to the serial console without having to go through the computer’s NIC.

The image above shows one part of his solution. This is a custom Ethernet port that connects to his Rasberry Pi header breakout board. Inside the computer the jack is wired to the motherboard power LED to give feedback about the current state of the power supply. It also patches into the green wire on the PSU, which lets him turn on the power by pulling it to ground. After working out the cable routing he developed a web interface that makes it easy to interact with the setup.

As with other hacks along these lines letting an embedded computer run 24/7 is a lot less wasteful than leaving a PC on. That’s a concept we can really get behind.

Continue reading “RPi Control Your Server PSU Over The Internet”