Bullet-proofing Your Car With An Affordable Composite Armor

Remember those actions movies like The Fast and the Furious where cars are constantly getting smashed by fast flying bullets? What would it have taken to protect the vehicles from AK-47s? In [PrepTech]’s three-part DIY composite vehicle armor tutorial, he shows how he was able to make his own bulletproof armor from scratch. Even if you think the whole complete-collapse-of-civilization thing is a little far-fetched, you’ve got to admit that’s pretty cool.

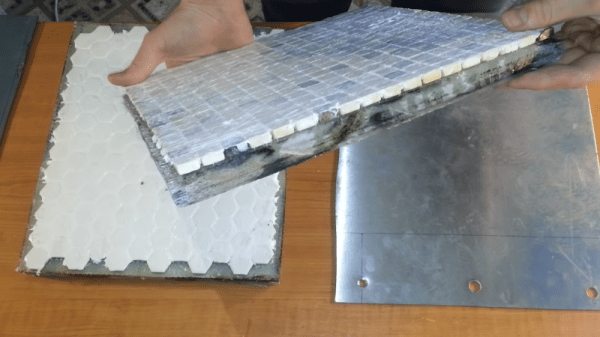
The first part deals with actually building the composite. He uses layers of stainless steel, ceramic mosaic tiles, and fiberglass, as well as epoxy resin in order to build the composite. The resin was chosen for its high three-dimensional cross-linked density, while the fiberglass happened to be the most affordable composite fabric. Given the nature of the tiny shards produced from cutting fiberglass, extreme care must be taken so that the shards don’t end up in your clothes or face afterwards. Wearing a respirator and gloves, as well as a protective outer layer, can help.

After laminating the fabric, it hardens to the point where individual strands become stiff. The next layer – the hard ceramic – works to deform and slow down projectiles, causing it to lose around 40% of its kinetic energy upon impact. He pipes silicone between the tiles to increase the flexibility. Rather than using one large tile, which can only stand one impact, [PrepTech] uses a mosaic of tiles, allowing multiple tiles to be hit without affecting the integrity of surrounding tiles. While industrial armor uses boron or silicon carbide, ceramic is significantly lower cost.

The stainless steel is sourced from a scrap junkyard and cut to fit the dimensions of the other tiles before being epoxied to the rest of the composite. The final result is allowed to sit for a week to allow the epoxy to fully harden before being subject to ballistics tests. The plate was penetrated by a survived shots from a Glock, Škorpion vz. 61, and AK-47, but was penetrated by the Dragunov sniper rifle. Increasing the depth of the stainless steel to at least a centimeter of ballistic grade steel may have helped protect the plate from higher calibers, but [PrepTech] explained that he wasn’t able to obtain the material in his country.

Nevertheless, the lower calibers were still unable to puncture even the steel, so unless you plan on testing out the plate on high caliber weapons, it’s certainly a success for low-cost defense tools.

Continue reading “Bullet-proofing Your Car With An Affordable Composite Armor”

Degassing Epoxy Resin On The (Very) Cheap

Anyone who’s tried to encapsulate something in epoxy resin knows how much of a hassle air bubbles can be. If you’re trying to get a perfectly clear finish, the last thing you want is a bunch of microscopic bubbles frozen in time. The best way to prevent this is to put the parts in a vacuum chamber so all the air works its way out before the epoxy cures, but that’s a considerable investment for a one-off project.

But assuming your parts are small enough, [Jasper Sikken] has a great tip that allows you to construct a simple vacuum chamber for just a few dollars. He shows his homemade chamber off in the video after the break, and we think you’ll agree that the change between before and after is pretty dramatic. The best part is that if you want to build your own version, you only need two parts.

The first one is a airtight container large enough to hold the piece you’re working on. Remember that the larger the chamber is the more time it will take to pump down to a suitable vacuum, so avoid the temptation to use something larger than necessary. [Jasper] used a glass jar with a locking lid, which is not only cheap and readily available, but has a decently large internal volume.

Obviously, the second component is the vacuum pump itself. This might normally be a tall order, but [Jasper] recently found that you can buy small battery-powered gadgets designed for sucking the air out of food containers for as little as $5 USD from the usual import sites. All you need to do is pop a hole in the lid of your container, hold the device over the hole, and watch the magic.

This method is great for anything smaller than a paperweight, but if you’ve got something bigger than that, you’ll need to step up your chamber game. Luckily even larger vacuum chambers can be built cheaply at a pinch.

Continue reading “Degassing Epoxy Resin On The (Very) Cheap”

Creating Lookalike Valves With Resin Casting

Valves (tubes) certainly have a die hard fan base in the electronic community, praised for their warm sound, desirable distortion characteristics and attractive aesthetic. However, sometimes you just want the look of a valve for a prop or a toy, without actually needing the functionality. For those cases, this project from [Ajaxjones] might be just the ticket.

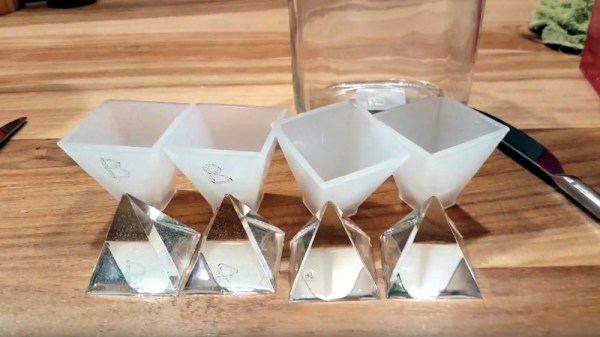
The build consists of taking an existing valve, combining it with a 3D printed base, and using this to create a silicone mould. 3D printed parts and dressmaker’s pins are then used to create the internal parts of the valve, and are inserted into the mould. Clear resin is then degassed, and poured into the mould to create the part. Once cured, the part is removed and the base painted to complete the look. An LED is then installed into a void in the base to give the piece a warm glow as you’d expect.

It’s a simple tutorial to producing high-quality clear plastic parts, and one that should prove useful to many prop builders and cosplayers alike. If you’re wanting to take your resin game to the next level, consider trying some overmolded parts. Video after the break.

Continue reading “Creating Lookalike Valves With Resin Casting”

Stereolithography Goes Big

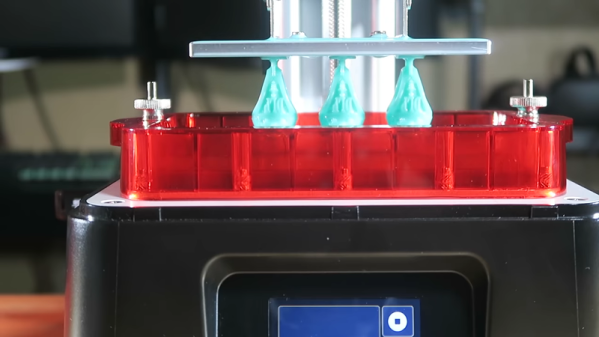
When it comes to hobby-level 3D printing, most of us use plastic filament deposited by a hot end. Nearly all the rest are using stereolithography — projecting light into a photosensitive resin. Filament printers have typical build volumes ranging from 1,000 to 10,000 cubic centimeters and even larger isn’t unusual. By contrast, SLA printers are often much smaller. A 1,200 CC SLA printer is typical and the cheaper printers are sometimes as little as 800 CCs. Perhaps that’s why [3D Printing Nerd] (otherwise known as [Joel]) was excited to get his hands on a Peopoly Phenom which has a build area of over 17,000 CCs. You can see the video review, below.

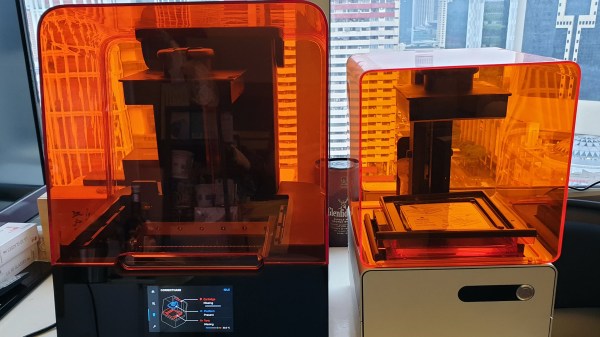
He claims that it is even bigger than a Formilab 3L, although by our math that has a build volume of around 20,000 CCs. On the other hand, the longest dimension on the Peopoly is 40 cm which is 6.5 cm longer than the 3L, so maybe that’s what he means. Either way, the printer is huge. That’s nearly 16 inches which is big even for a filament printer. Regardless of which one is bigger, the Peopoly is certainly much less expensive coming in at around $1,800 versus the 3L’s almost $10,000 price tag.

Continue reading “Stereolithography Goes Big”

When Does Moving To Resin 3D Printing Make Sense?

An Elegoo Mars resin 3D printer, straight to my doorstep for a few hundred bucks. What a time to be alive.

Resin-based 3D printers using digital light processing (DLP) and especially stereolithography (SLA) are getting more common and much more affordable. Prosumer-level options like Formlabs and the Prusa SL1 exist, but more economical printers like the Elegoo Mars, Anycubic Photon, and more can be had for a few hundred bucks. Many printers and resin types can even be ordered directly from Amazon, right at this moment.

Resin prints can look fantastic, so when does it make sense to move to one of these cheap resin printers? To know that, consider the following things:

  • The printing process and output of resin printers is not the same as for filament-based printers. Design considerations, pre-processing, and post-processing are very different.
  • Resin printing has a different workflow, with consumables and hidden costs beyond the price of resin refills.

Things may not be quite where fused deposition modeling (FDM) printers were just a few short years ago when we were extremely impressed with the quality of printer one could get for about $200, but it is undoubtedly far more accessible than ever before. Let’s look at how to inform a decision about whether to take the plunge. Continue reading “When Does Moving To Resin 3D Printing Make Sense?”

Resin Printers Are Now Cheaper, Still Kind Of A Hassle

Your run-of-the-mill desktop 3D printer is based on a technology known as Fused Deposition Modeling (FDM), where the machine squirts out layers of hot plastic that stick to each other. But that’s not the only way to print a Benchy. One of the more exotic alternative techniques uses a photosensitive resin that gets hardened layer by layer. The results are impressive, but historically the printers have been very expensive.

But it looks like that’s finally about to change. The [3D Printing Nerd] recently did a review of the Longer3D Orange 10 which costs about $230, less than many FDM printers. It isn’t alone, either. Monoprice has a $200 resin printer, assuming you can find it in stock.

The resin isn’t cheap and it’s harder to handle than filament. Why is it harder to handle? For one is smells, but more importantly, you aren’t supposed to get it on your skin. The trade off is that the resulting printed parts look fantastic, with fine detail that isn’t readily possible with traditional 3D printing techniques.

Some resin printers use a laser to cure resin at particular coordinates. This printer uses an LCD to produce an image that creates each layer. Because the LCD exposes all the resin at one time, each layer takes a fixed amount of time no matter how big or detailed the layer is. Unfortunately, using these displays means the build area isn’t very large: the manufacturer says it’s 98 by 55 millimeters with a height of up to 140mm. The claimed resolution, though, is 10 microns on the Z-axis and 115 microns on the LCD surface.

Getting the prints out of the printer requires you to remove the uncured resin. In the video, they used a playing card and two alcohol baths. After you remove the uncured resin, you’ll want to do a final curing step. More expensive printers have dedicated curing stations but on this budget printer, you have to cure the parts separately. How? By leaving them out in the sun. Presumably, you could use any suitable UV light source.

There are a few other similar-priced options out there. Sparkmaker, Wanhao (resold by Monoprice). If you’re willing to spend more, Prusa has even thrown their orange hat into the ring. If you were wondering if you could use the LCD in your phone to do this, the answer is sort of.

Continue reading “Resin Printers Are Now Cheaper, Still Kind Of A Hassle”

Making Flexible Overmolded Parts With Urethane Resin

Resin casting videos have taken social media by storm of late. Everything from inlaid driftwood tables to fancy pens are getting the treatment. Pouring some nicely colored epoxy is straightforward enough, but it’s just the tip of the iceberg. [Eric Strebel] has some serious skills in resin casting, and has lately been working on some overmolded electroniics with urethane resin (Youtube link, embedded below).

The build starts with the creation of a silicone mold, using a 3D printed SLA master. The part in question is for a prototype medical device, and requires overmolding, in which a flexible PCB is covered in flexible urethane. Wooden pins are used to allow the flexible PCB to clip into the mold for accurate location, and a small shield is placed over the metal contacts of the PCB to avoid them being covered in silicone.

Initial tests are done with an empty mold to determine the correct material to use, before the actual parts are ready to produce. [Eric] takes great care with the final production, as any mistakes would waste the expensive prototype PCBs provided to him by the client. With the electronics placed in the mold, the resin is degassed and carefully injected, using a syringe to minimise the chance of any air bubbles. With some delicate cleanup by hand, the completed parts are ready for delivery.

It’s a process that covers the basics of overmolding for a prototype part, as well as showing off [Eric]’s skill at producing quality prototype parts. We’ve seen [Eric]’s work before, too – like his discussion of the value of cardboard in product design. Video after the break.

Continue reading “Making Flexible Overmolded Parts With Urethane Resin”