Getting That Neon Sign Look Without All The Hassle

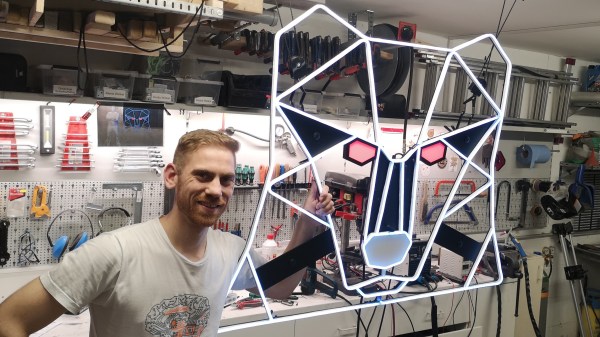
We all love the look of neon signage, but the between the glassblowing equipment, gas cylinders, high voltage, and the associated skill set, it’s not practical for everyone. Luckily, these days there’s a good alternative: “neon” flexible LED strips. This is the approach [Benni] recently took in making a large logo display, and the results speak for themselves.

[Benni] sourced the strips from AliExpress. They’re 8 mm wide and can be cut to length in multiples of 4.2 cm. Inside, there are strips of RGB LEDs, making the displays that much more versatile than actual neon. Covering the LEDs is a silicone diffuser strip that completes the illusion of a neon tube. The flexibility of the strips make them easy to bend into different shapes, but also mean a solid substrate of some sort is required to make them hold their shape. In [Benni]’s case, he used a metal frame to which he glued the strips with cyanoacrylate adhesive. He used zip ties to clamp the strips in place while the glue cured, and the fact that he clipped the tails of the zip ties is a testament to his detail-oriented nature; we would probably have left them on. All of the attention payed off though because the end product looks awesome. The finishing touches are supplied by some 3D-printed bezels carrying acrylic diffuser panels and traditional LED strips for the eyes, plus a DMX LED controller.

We’ve seen [Benni]’s work before, like this slick USB rotary encoder peripheral, and like that time, there’s a video which really shows off the project. Have a look, after the jump.

Continue reading “Getting That Neon Sign Look Without All The Hassle”

A Chrome Extension For Configuring RGB LEDs

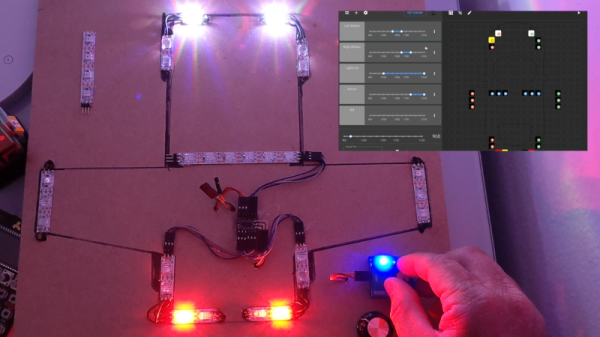
Like pretty much all of us, [Andy Schwarz] loves RGB LEDs. Specifically he likes to put them on RC vehicles, such as navigation lights on airplanes or flashers and headlights on cars. He found himself often rewriting very similar Arduino code for each one of these installations, and eventually decided he could save himself (and all the other hackers in the world) some time by creating a customizable Arduino firmware specifically for driving RGB LEDs.

The software side of this project, which he’s calling BitsyLED, actually comes in two parts. The first is the firmware itself, which is designed to control common RGB LEDs such as the WS2812 or members of the NeoPixel family. It can run on an Arduino Pro Mini with no problems, but [Andy] has also designed his own open hardware control board based on the ATtiny84 that you can build yourself. Currently you need a USBASP to program it, but he’s working on a second version which will add USB support.

With your controller of choice running the BitsyLED firmware, you need something to configure it. For that, [Andy] has developed a Chrome extension which offers a very slick user interface for setting up colors and patterns. The tool even allows you to create a visual representation of your LEDs so you can get an idea of what it’s going to look like when all the hardware is powered up.

RGB LEDs such as the WS2812 are some of the most common components we see in projects today, mainly because they’re so easy to physically interface with a microcontroller. But even though it only takes a couple of wires to control a large number of LEDs, you still need to write the code for it all. BitsyLED takes a lot of the hassle out of that last part, and we’re very interested to see what the hacker community makes of it.

Continue reading “A Chrome Extension For Configuring RGB LEDs”

Bringing A Child’s Play Kitchen To Life

Given how many adults will go out of their way to avoid spending any extended amount of time in the kitchen, it’s pretty amazing how much children love playing in their miniature versions. Especially since they tend to be pretty simple: usually they’re little more than different sized boxes made out of MDF to represent the refrigerator, oven, and microwave. Of course, some kids are fortunate enough to have hackers and makers for parents.

[Brian Lough] wanted to get his two year old daughter her own play kitchen, but wasn’t terribly impressed with anything on the market. So he decided to start with the IKEA Duktig and add in his own personal touches to turn the stark white playset into something that would really get his daughter’s imagination going. With the liberal application of RGB LEDs and microcontrollers, her kitchen is sure to be envy of the sandbox.

Being the class act that he is, [Brian] starts his write-up acknowledging the various IKEA Duktig hacks and modifications that served as inspiration for his own build. Most of the prior art out there relates to making the microwave and oven a bit more exciting with the addition of lights and sounds, which ultimately ended up being the way he approached his daughter’s version as well.

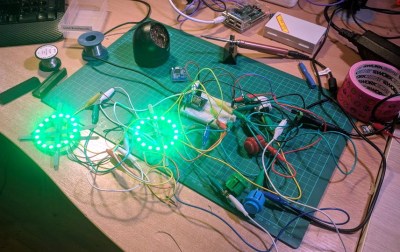
For the oven, [Brian] decided to add some big arcade buttons over the door which would change the color of the RGB LEDs inside. He thought this association would be a good way to help his daughter learn her colors, since she’ll be able to see the oven change color when she presses the corresponding button. He also added a knob to control the intensity of the light, meant to be analogous to the temperature control in a real oven.

The modifications to the microwave are a bit more extensive, including a “timer” made out of a TM1637 LED display in a 3D printed panel complete with a buzzer to indicate when the plastic food has been thoroughly illuminated. [Brian] even made it so the LEDs in the NeoPixel ring light up in a spinning pattern to cast some shadows and simulate movement. He notes that the microwave was actually a bit overwhelming to his daughter at first, but after a couple months of getting used to the functions, she enjoys it as much as the oven.

While hacking a play kitchen might be new territory for him, [Brian] is no stranger to building awesome stuff. We’ve previously seen him put together a YouTube subscriber counter in the style of Tetris, and he even managed to create a gorgeous looking display out of shoelaces of all things.

A Bolt-On I2C Navigation Key For Your Next Project

We often talk about the advantages of modular hardware here at Hackaday; the ability to just order a few parts online, hook them up with some jumper wires, and move onto the software side of things is a monumental time saver when it comes to prototyping. So anytime we see a new module that’s going to save us time and aggravation down the road, we get a bit excited.

Today we present the very slick I2CNavKey developed by [Saimon], a turn-key interface solution for your builds that can’t quite get away with a couple toggle switches. It not only gives you a four-way directional pad with center button, but a rotary “wheel” like on the old iPods. All of which you can access easily and with a minimum of wiring thanks to the wonders of I2C.

But even that might be selling the module short. This isn’t just a couple of buttons on a breakout board, the I2CNavKey is powered by its own PIC16F18345 microcontroller and features three configurable GPIOs with PWM support (perfect for an RGB LED) plus 256 bytes of onboard EEPROM storage.

[Saimon] has released the entire project as open source hardware for your hacking pleasure, but you can also get them as ready-to-use modules on Tindie for $18 USD [Editor’s Note: Because of a typo we originally we left the 1 out of the price]. Whether you’re a paying customer or not, you get access to the project’s absolutely phenomenal documentation, including a nearly 30 page manual that contains everything you’d ever want to know about the I2CNavKey and how to integrate it into your project. If all hardware was documented with this level of dedication, the world would be a much nicer place for folks like us.

If you recognize the name, or perhaps the affinity for neat I2C-connected input devices, it’s probably because you’ve seen his very similar I2C rotary encoder on these pages previously, which was a finalist in our Open Hardware Design Challenge during the 2018 Hackaday Prize.

Can You Live Without The WS2812?

As near as we can tell, the popular WS2812 individually addressable RGB LED was released to the world sometime around the last half of 2013. This wasn’t long ago, or maybe it was an eternity; the ESP8266, the WiFi microcontroller we all know and love was only released a year or so later. If you call these things “Neopixels”, there’s a good reason: Adafruit introduced the WS28212 to the maker community, with no small effort expended on software support, and branding.

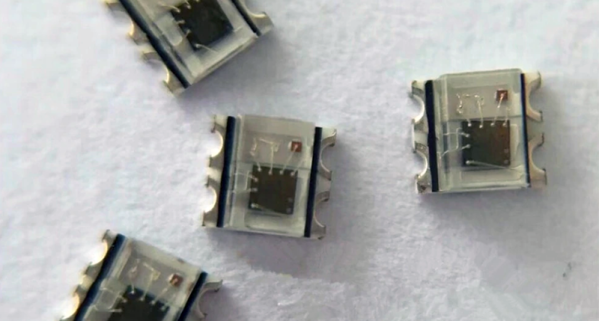
The WS2812 is produced by WorldSemi, who made a name for themselves earlier with LED driver solutions, especially the WS2811, an SOIC chip that would turn a common anode RGB LED into one that’s serially controllable. When they stuffed the brains from the WS2811 into a small package with a few LEDs, they created what is probably the most common programmable LED lighting solution available today.

A lot has changed in the six years that the WS2812 has been on the market. The computer modding scene hasn’t heard the words ‘cold cathode’ in years. Christmas lights are much cooler, and anyone who wants to add blinky to their bling has an easy way to do that.

But in the years since the WS2812 came on the market, there are a lot of follow-up products that do the same thing better. You now have serially addressable LEDs that won’t bring down the rest of the string when they fail. You have RGBW LEDs. There are LEDs with a wider color gamut and more. This is a look at the current state of serially addressable RGB LEDs, and what the future might have in store.

Continue reading “Can You Live Without The WS2812?”

An ESP8266 Sundial For Your Wall

Hackers absolutely love building clocks. Seriously, there are few other devices for which we’ve seen such an incredible number of variations. But while the clocks that hackers build might blink out the time in binary, or write it out in words, they generally don’t feature hands. Apparently in 2019 it’s more reasonable to read binary than know which way the “little hand” is supposed to be pointing.

This ESP8266 powered “shadow clock” from [Dheera Venkatraman] technically keeps that tradition intact, but only just. His clock doesn’t feature physical hands, but it does use a strip of RGB LEDs to cast multi-colored shadows which serve the same function. With his clock, you don’t even have to try and figure out which hand is the big one, since they’re all the same length. Now that’s what we call progress.

Probably the biggest surprise about this clock, beyond how legitimately good it looks hanging on the wall, is how little work it takes to build your own version. That’s because [Dheera] specifically set out to design something that was cheaper and easier to build than what he’d seen previously, and we think he delivered on that goal in a big way. All you need are the 3D printed components, an ESP8266 board, and a strip of 144 WS2812B LEDs.

The software side of the project is similarly simplistic, and all you need to do is plug in your WiFi network credentials to have the ESP pull the current time from NTP. If you were so inclined, his source code would be an excellent base on which to implement additional features such as animations at the top of the hour.

Compared to something like the Bulbdial clock from 2009, it’s incredible how simple some of these projects have become in the last decade. With the tools and components available to hackers and makers today, there’s truly never been a better time to build something amazing.

Fueled By Jealousy, This Smart Lamp Really Shines

As a lover of lava lamps, [Julian Butler] knew when he saw a coworker’s modern LED incarnation of the classic piece of illuminated decor that he had to have one for himself. The only problem was that the Kickstarter for it had long since ended, and they were no longer available. So he did what any good hacker would do: he studied it closely, took a bunch of notes, and built his own version that ended up being even better than the original.

In the three part series on his blog, [Julian] takes us through the design and construction of his take on the Ion Mood Light, which raised over $72,000 back in 2014. The details in the Kickstarter campaign plus his own first-hand observations of the device were enough to give him the high-level summary: the device has a core of RGB LEDs behind a diffuser, and uses some software trickery to pulse out some pleasing effects and patterns. He wasn’t concerned about the Bluetooth or the smartphone application, so all he really needed to do was put some NeoPixel LEDs inside a glass cylinder and he’d be done. Of course, it always sounds easy…

The actual journey to get there, as you might have guessed from the three part series, took awhile. Sourcing the LEDs was easy enough, and using a Fadecandy controller made getting the LEDs to blink out some cool patterns fairly straightforward. But it took [Julian] a bit of experimentation and a few trips to the crafts store before he found a material which would diffuse the LEDs enough for his tastes. Though in the end, he thinks the multiple layers of acrylic he ended up going with actually do a better job of blending the light from the individual LEDs than in the original Ion.

Using the Fadecandy made it easy to drive the LEDs, but he still needed something to provide it with the commands. To that end, he added a decorative base to his LED column that hides a Raspberry Pi and all the lamp’s associated electronics. This includes a microphone which gives his lamp the same sort of sound reactive features that made the Ion so popular. The base does make his lamp a bit bulkier than the original version, but the metallic mesh construction is attractive enough the overall look works.

Of course, you might be wondering how [Julian] got the LEDs to react to sound, or do any of the other gorgeous effects shown off in the video after the break. The software which makes this possible makes up the third and final post in the series, and is really a whole project in itself. The short version of the story is that he used Python and Processing to do real-time computational fluid dynamics, but not before making the necessary adjustments to speed up the simulation on ARM hardware. You know, normal lamp stuff.

This isn’t the first time we’ve seen projects using the Fadecandy board. From creating a Tron inspired desk to building the 5,760 LED “Space Tunnel”, it looks like a great choice if you’ve got a problem that can be solved by the application of a ridiculous number of LEDS.

Continue reading “Fueled By Jealousy, This Smart Lamp Really Shines”