Cyclist’s LED Pixel Clock Has No Fat Around The Middle

If you like LED clocks and illuminated bicycle wheels, [Harald Coeleveld] has just the right weekend project for you. His RGB pixel LED clock is as simple as it is beautiful, and it can be built in no time: The minimalist and sporty design consist of not much more than a LED strip wrapped around a bicycle wheel rim.

[Harald] took 2 meters of addressable WS2812 LED strip (with 30 LEDs per meter, we assume), wrapped it around a 27″ bicycle rim padded with a foam strip, and obtained 60 equally spaced RGB LEDs on a ring, ideal for displaying time. Apparently, the rim-tape circumference of this particular 27″ bicycle wheel is close enough to 2 meters, so it lines up perfectly.

On the electronics side, the project employs an Arduino Nano and a DS3231 precision RTC module. For switching between two illumination modes for day and night, [Harald] also added a photoresistor. During the day, colored dots around the ring display the time: A red dot for the seconds, a blue one for the minutes, and a group of 3 green LEDs for the hours. At night, the entire ring shimmers with an effective red glow for easier readability.

The Arduino code for this build can be downloaded from the project page, enabling anyone to effortlessly replicate this design-hack in under an hour!

A 3D-Printed Engagement Ring

[Hans Peter] had reached the moment of popping the question. Going down on one knee and proposing to his girlfriend, the full romantic works.

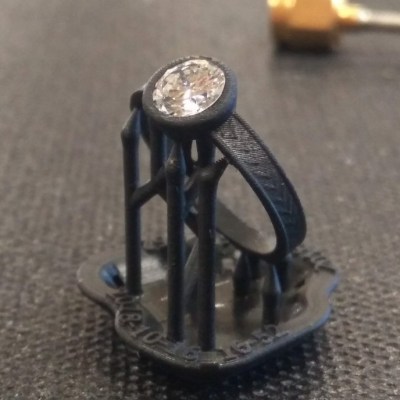
He’s a brave man, [Hans]. For instead of heading for the jeweller’s and laying down his savings on something with a diamond the size of a quail’s egg he decided that his ring should contain something very much of him. So he decided to 3D print a ring and embed a slowly pulsing LED in it. He does mention that this ring is a temporary solution, so perhaps his soon-to-be-Mrs will receive something sparkly and expensive in due course.

To fit his LED and flasher in such a small space he used a PIC10F320 microcontroller that comes in a SOT-23-6 package. This was chosen because it has a handy PWM output to pulse the LED rather than flash it. This he assembled dead-bug style with an 0603 LED, and a couple of hearing aid batteries to power the unit. He has some concerns about how long the hearing aid batteries will power the device, so as he wrote he had better hurry and get on his knees. (He informs us in his tip email that she said yes.)

Surprisingly we’ve covered quite a few engagement ring builds over the years. Closest to this one is an LED ring powered by an induction coil, but we’ve also featured machined titanium rings and some rather nice cast rings.

Free Cell Data Transfer With Slowest Morse Code Ever

Readers of a certain age will remember the payphone trick of letting the phone ring once and then hanging up to get your quarter back. This technique was used with a pre-planned call time to let someone know you made it or you were okay without accruing the cost of a telephone call. As long as nobody answered you didn’t have to pay for the call, and that continues to be the case with some pay-per-minute cellphone plans.

This is the concept behind [Antonio Ospite’s] ringtone data transfer project called SaveMySugar. Don’t judge him, this work has been ongoing for around ten years and started back when cellphone minutes were a concern. We’re just excited to see that he got the excruciatingly slow thing to work.

Those wanting to dig down to the nitty-gritty of the protocol (and you should be one of them) will want to read through the main project page. The system works by dialing the cellphone, letting it ring once, then hanging up. The time between redials determines a Morse code dot, dash, or separation between characters. Because you can’t precisely determine how long it will take each connection to read, [Antonio] built ‘noise’ measurement into the system to normalize variations. The resulting data transfer works quite well. He was able to transfer the word “CODEX” in just six minutes and thirty seconds. But it is automatic, so what do you care? See the edge-of-your-seat-action play out in the video below.

If you can’t stomach that baud, here’s a faster Morse code data transmitter but it doesn’t use the phone.

Continue reading “Free Cell Data Transfer With Slowest Morse Code Ever”

Jewelry Meets Carpentry With Bentwood Rings

[Dorkyducks] is a bit of a jeweler, a bit of a carpenter, and a bit of a hacker.  They’ve taken some time to document their technique for making bentwood rings. Bentwood is technique of wetting or steaming wood, then bending or forming it into new shapes. While the technique is centuries old, this version gets a bit of help from a modern heat source: The microwave oven. [Dorkyducks] starts with strips of veneer, either 1/36″ or 1/42″ thick. The veneer is cut into strips 1/2″ wide by about 12″ long, wrapped in a wet paper towel, and microwaved. The microwaveglue-roll heats the water in the towel, steaming it into the wood. This softens the wood fibers, making the entire strip flexible. The softened wood is then wrapped around a wooden preform dowel and allowed to dry for a day or two.

Once dry, the wood will hold the circular shape of the dowel. [Dorkyducks] then uses masking tape to tack the wood down to a new dowel which is the proper ring size for the wearer. Then it’s a superglue and wrapping game. The glue holds the laminated veneer together, and gives the ring it’s strength. From there it’s sanding, sanding, sanding. At this point, the ring can be shaped, and inlays added. [Dorkyducks] shows how to carve a ring and insert a gemstone in this gallery. The final finish is beeswax and walnut oil, though we’d probably go for something a bit longer lasting – like polyurethane.

An OLED Ring For Bluetooth Notifications

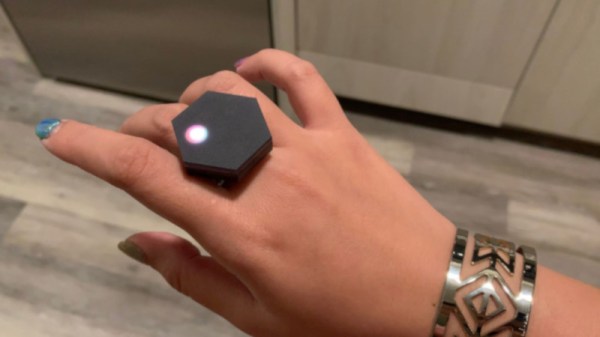
Wearables are the next frontier of amateur electronics, and [Kevin]’s Arduboy ring (link dead, try Internet Archive) is one of the best examples we’ve seen yet.

Inside the Arduboy is an nRF51822 – a chipset with Bluetooth Low Energy, an ARM Cortex M0,256k of Flash, and 16k of RAM. There’s also a an OLED and a touch button for displaying notifications from a phone, with the ability to reply to these notifications.

The enclosure for the ring is rather interesting. It’s a bit thick, but that’s for a reason – there’s a 40mAh battery stuffed along the sides of the ring. The enclosure itself is 3D printed to spec, and contrary to some beliefs, there’s nothing wrong with bending a LiPo cell once. Sure, it only has four hours of battery life with the display on, but it has a 24 hour battery life in standby mode, making it almost useful as an everyday wearable.

This is [Kevin]’s second wearable, the first being the Ardubracelet, an extremely interesting OLED bracelet with three different displays.  The Arduboy is much more compact and comes extremely close to looking like a product. You can check out the video of it below.

Continue reading “An OLED Ring For Bluetooth Notifications”

Making MicroView Wordy

Despite the MicroView shipping a ton of units, we haven’t seen many projects using this tiny Arduino and OLED display in a project. Never fear, because embedded systems engineer, podcaster, and Hackaday Prize judge [Elecia White] is here with a wearable build for this very small, very cool device.

The size and shape of the MicroView just cried out to be made into a ring, and for that, [Elicia] is using air-drying bendy polymer clay. To attach the clay to the MicroView, [Elecia] put some female headers in a breadboard, and molded the clay over them into a ring shape. It works, and although [Elecia] didn’t do anything too tricky with the headers and clay, there are some interesting things you could do running wires through the clay.

What does this ring do? It’s a Magic 8 Ball, a game of Pong controlled by an accelerometer, a word-of-the-day thing (with definitions), all stuffed into a brass silicon, OLED, and clay knuckle. Video below.

If you’re wondering, Turbillion (n). A whirl; a vortex.

Continue reading “Making MicroView Wordy”

NFC Ring Lock Box

NFC Ring Lock Box

[Nairod785] wanted to build a lock box that would lock from the inside. He started with an inexpensive, plain wooden box. This kept the cost down but would also allow him to easily decorate the box later on using a wood burning tool.

To keep the box locked, he installed a simple latch on the inside. The latch is connected to a servo with string. When the servo rotates in one direction, it pulls the string and releases the latch. When the servo is rotated in the opposite direction, the latch closes and locks the box once again.

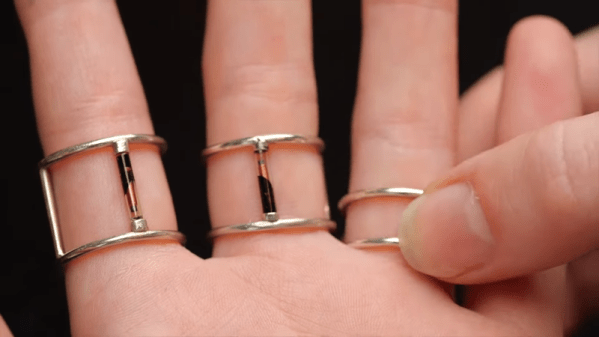
If you are going to have a locked box, then you are also going to need a key to open it. [Nairod785] used a ring with a built-in NFC tag, similar to the ring featured back in March. Inside of the box is a PN532 NFC module. The walls of the box were a little too thick for the reader to detect the ring, so [Nairod785] had to scratch the wall thickness down a bit. The NFC module is connected to an Arduino Nano. Communications are handled with I2C.

The NFC ring actually has two different NFC tags in it; one on each side. [Nairod785] had to program both of the tag ID’s into the Arduino to ensure that the ring would work no matter the orientation.

The system is powered by a small rechargeable 5V battery. [Nairod785] wired up a USB plug flush with the box wall so he can easily charge up the battery while the box is locked. It also allows him to reprogram the Arduino if he feels so inclined. There is also a power switch on the side to conserve energy.