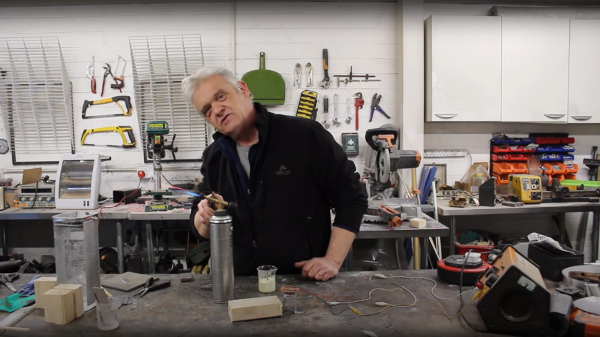
A Fresnel Lens Without The Pain

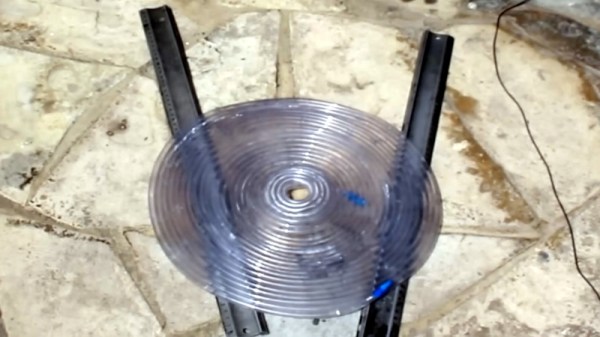
Making a traditional glass lens requires a lot of experience, skill, and patience grinding a piece of glass to the required shape, and is not for the casual experimenter. Making a glass Fresnel lens with its concentric rings requires even more work, but as the ever-resourceful [Robert Murray-Smith] shows us, a Fresnel lens can be made from far more mundane materials. He shows us a working lens made from transparent plastic tube, and even successfully smoulders a piece of paper with it under the anaemic British sun.

His lens, with its circular profile tube filled with water, is not perhaps the most efficient lens in terms of light focused per unit area of lens. From dredging up our highschool physics lessons we are guessing that half the light is diffracted outwards rather than inwards by the cylindrical profile of the coil, but for the cost of the whole device we’re not sure that matters. Next time we’re shipwrecked on a desolate island with a handy supply of clear plastic tube and fresh water, we know we can always raise a fire.

If Fresnel lenses interest you, we’ve taken a look in the past at their history.

Continue reading “A Fresnel Lens Without The Pain”

Easy Graphene Production With A Laser Engraver

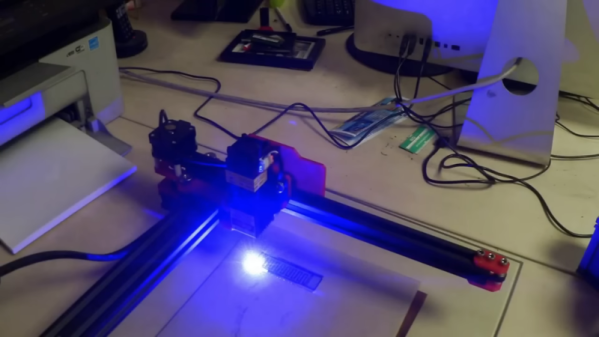
Graphene isn’t easy to produce at scale. But making small batches of graphene is doable in a few ways. [Robert Murray-Smith] decided to try producing “flash graphene.” This requires a big capacitor bank that is moderately expensive, so he decided to explain a different technique he read about using an ordinary laser cutter. Check it out in the video below.

We were a little disappointed that he didn’t actually make any graphene this time. He has, however, used other methods in other videos to create some type of graphene. In fact, he has many similar videos going back quite a ways as well as applications with concrete, capacitors, and more. We understand that this method doesn’t produce monolayer graphene, but actually creates a graphene “foam” with interesting properties. [Robert] talks about recent papers that show you can grow graphene on things other than Kapton tape using this method.

Continue reading “Easy Graphene Production With A Laser Engraver”

How Simple Can A Wind Generator Get?

As the world has moved towards sustainable energy sources over the last few years, it’s increasingly common to be close to a wind turbine. The huge turbines visible on the horizon from where this is being written are the upper end of the scale though, and along comes [Robert Murray-Smith] with the opposite, probably the simplest and smallest wind turbine we’ve seen.

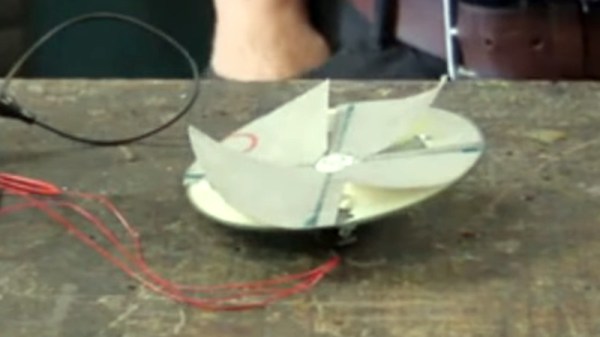
His use of a 3-phase motor from a CD-ROM drive as the generator isn’t particularly unexpected, these motors are ubiquitous and readily generate power when spun up. A simple 3-phase rectifier and a capacitor delivers a DC voltage that while the ready availability of switching converter modules should be relatively easy to turn into something more useful.

The clever part of this hack lies then in the rotor, it’s not the propeller-style bladed affair you might expect. Instead he takes a CD, as it’s the obvious thing to fit on a CD motor, and glues a piece of Tyvek on top of it. This is cut to form four flaps which make a rudimentary but effective turbine when the wind comes from the side. It’s beautifully simple, and we wish we’d thought of it ourselves. The whole thing is in the video below the break, so take a look.

Maybe this won’t solve the green energy requirement on its own, but we’ve shown you far larger fabric turbines in the past.

Continue reading “How Simple Can A Wind Generator Get?”

Making A Do-It-Yourself Sand Battery

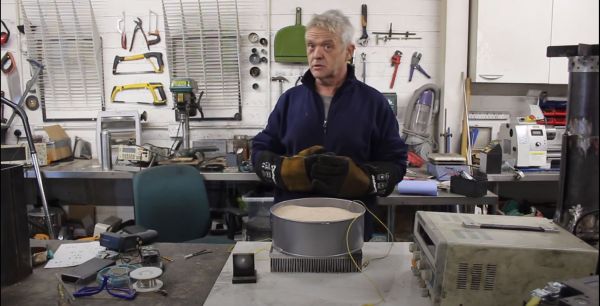
Storing energy can be done in many ways, with the chemical storage method of a battery being one of the most common. Another option is a thermal battery, which basically means making something hot, and later extracting that heat again. In this video by [Robert Murray-Smith] the basic concept of a thermal battery that uses sand is demonstrated.

By running a current through a resistive wire that’s been buried inside a container with sand, the sand is heated up to about 200 °C. As [Robert] points out, the maximum temperature of the sand can be a 1000 °C or more. Because sand doesn’t boil like water, the total amount of energy stored in sand is correspondingly higher.

Extracting the thermal energy can be done rather inefficiently using the demonstrated Peltier element. A Stirling engine, or steam generator and turbine, would get a lot more energy out. Either way, the thermal battery itself is made using just plain sand, which makes it an attractive DIY target to tinker with.

Continue reading “Making A Do-It-Yourself Sand Battery”

Copper: Rectifying AC A Century Ago

[Robert Murray-Smith] presents for us an interesting electronic device from years gone by, before the advent of Silicon semiconductors, the humble metal oxide rectifier. After the electronic dust had settled following the brutal AC/DC current wars of the late 19th century — involving Edison, Tesla and Westinghouse to name a few of the ringleaders — AC was the eventual winner. But there was a problem. It’s straightforward to step down the high voltage AC from the distribution network to a more manageable level with a transformer, and feed that straight into devices which can consume alternating current such as light bulbs and electrical heaters. But other devices really want DC, and to get that, you need a rectifier.

It turns out, that even in those early days, we had semiconductor devices which could perform this operation, based not upon silicon or germanium, but copper. Copper (I) Oxide is a naturally occurring P-type semiconductor, which can be easily constructed by heating a copper sheet in a flame, and scraping off the outer layer of Copper (II) Oxide leaving the active layer below. Simply making contact to a piece of steel is sufficient to complete the device.
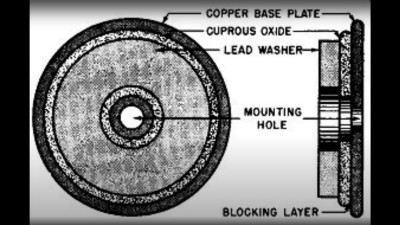
Obviously a practical rectifier is a bit harder to make, with a degree of control required, but you get the idea. A CuO metal rectifier can rectify as well as operate as a thermopile, and even as a solar cell, it’s just been forgotten about once we got all excited about silicon.

Other similar metallic rectifiers also saw some action, such as the Selenium rectifier, based on the properties of a Cadmium Selenide – Selenium interface, which forms an NP junction, albeit one that can’t handle as much power as good old copper. One final device, which was a bit of an improvement upon the original CuO rectifiers, was based upon a stack of Copper Sulphide/Magnesium metal plates, but they came along too late. Once we discovered the wonders of germanium and silicon, it was consigned to the history books before it really saw wide adoption.
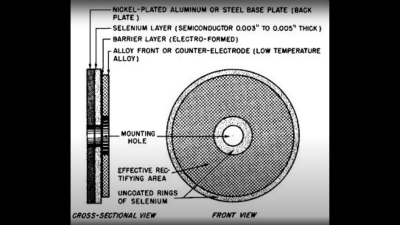
We’ve covered CuO rectifiers before, but the Copper Sulphide/Magnesium rectifier is new to us. And if you’re interested in yet more ways to steer electrons in one direction, checkout our coverage of the history of the diode.

Continue reading “Copper: Rectifying AC A Century Ago”

This DIY Microscope Design Is All Wet

[Robert Murray-Smith] wanted to recreate how some ancient microscopes worked: with a drop of water as a lens. The idea is that the meniscus of a drop of water will work as a lens. This works because of surface tension and by controlling the attraction of the water to the surface,  you can actually form convex and concave surfaces.

What’s interesting is that this doesn’t require a lot of equipment. Some plastic, a hole punch, some pens, a flashlight, and some other odds and ends. Then it’s just a matter of grabbing some puddle water and examining the critters inside. Of course, with a single lens, these are more properly magnifying glasses. Some claim that people in China built such instruments thousands of years ago. [Robert] mentions [Antonie van Leeuwenhoek] as the father of the microscope, although he wasn’t the first to build such a device. He did create amazing glass lenses using a method he kept secret but has been worked out using modern science.

It is hard to see much through the camera, but it clearly was magnifying. Not a bad little rainy day kid’s project since you probably have everything you need on hand. We wonder what other readily-available things you could image with a device like this.

Of course, if you want to build a real microscope, the designs are out there. You can even make one using — mostly — LEGO.

Continue reading “This DIY Microscope Design Is All Wet”

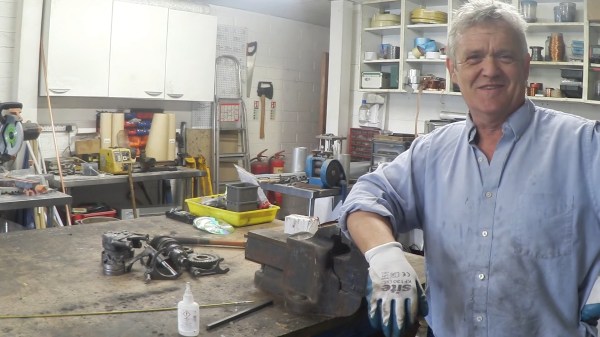
Robert Murray Smith Discusses Rivets and Riveting

Old School Fastener Tutorial Is Riveting

Whether you’re making, repairing, or hacking something together, we all need fastners. Screws, nuts and bolts, and pop rivets are handy sometimes. Various resins and even hot glue are equally useful. In some cases however the right fastener for the job eludes us, and we need another trick up our sleeve.

[Robert Murray-Smith] found himself in such a position. His goal was to join two pieces of aluminum that need a nice finish on both sides. Neither glue, pop rivets, screws, nuts or bolts would have been appropriate. [Robert] is always flush with ideas both new and old, and he resorted to using an old school fastener as explained as explained in his video “How To Make And Use Rivets“.

In the video below the break, [Robert] goes into great detail about making a simple rivet die from a 5 mm (3/16”) piece of flat steel, creating the rivet from a brass rod, and then using the flush rivet to join two pieces of aluminum. The simple tooling he uses makes the technique available to anybody with a propane torch, a vise, some basic tools, and a simple claw hammer. We also appreciate [Robert]’s discussion of cold riveting, hot riveting, and annealing the rivets as needed.

Not only is riveting a technique thousands of years old, its advancement and application during the Industrial Revolution enabled technologies that couldn’t have existed otherwise. Hackaday’s own [Jenny List] did a wonderful write-up about rivets in 2018 that you won’t want to miss!

Continue reading “Old School Fastener Tutorial Is Riveting”