Portable VO2 max measurment mask

Printable Portable Mask Gives You The Numbers On Your Workout

We’re currently in the midst of New Year’s Resolutions season, which means an abundance of spanking new treadmills and exercise bikes. And one thing becomes quickly obvious while using those machines: the instruments on them are, at best, only approximately useful for measuring things like your pulse rate, and in the case of estimating the calories burned by your workout, are sometimes wildly optimistic.

If precision quantification of your workout is your goal, you’ll need to monitor your “VO2 max”, a task for which this portable, printable mask is specifically designed. This is [Robert Werner]’s second stab at a design that senses both pressure differential and O2 concentration to calculate the maximum rate of oxygen usage during exercise. This one uses a commercially available respirator, of the kind used for painting or pesticide application, as the foundation for the build. The respirator’s filter elements are removed from the inlets to provide free flow of air into the mask, while a 3D printed venturi tube is fitted to its exhaust port. The tube houses the pressure and O2 sensors, as well as a LiPo battery pack and an ESP32. The microcontroller infers the volume of exhaled air from the pressure difference, measures its O2 content, and calculates the VO2 max, which is sent via Bluetooth to a smartphone running an exercise tracking app like Zwift or Strava.

[Robert] reports that his $100 instrument compares quite well to VO2 max measurements taken with a $10,000 physiology lab setup, which is pretty impressive. The nice thing about the design of this mask is how portable it is, and how you can take your exercise routine out into the world — especially handy if your fancy exercise bike gets bricked.

Jigglypuff Sensor Breathes CO2 So You Don’t Have To

We’ve seen a lot of environmental monitoring projects here at Hackaday. Seriously, a lot. They usually take the form of a microcontroller, a couple sensors, and maybe a 3D printed case to keep it all protected. They’re pretty similar functionally as well, with the only variation usually coming in the protocol used to communicate their bits of collected data.

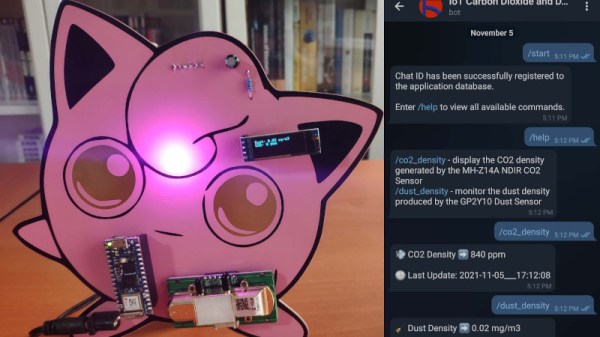
But even when compared with such an extensive body of previous work, this Jigglypuff IoT environmental monitor created by [Kutluhan Aktar] is pretty unusual. Sure, the highlights are familiar. Its MH-Z14A NDIR CO2 sensor and GP2Y1010AU0F optical dust detector are read by a WiFi-enabled microcontroller, this time the Arduino Nano RP2040 Connect, which ultimately reports its findings to the user via Telegram bot. There’s even a common SSD1306 OLED display on the unit to show the data locally. All things we’ve seen in some form or another in the past.

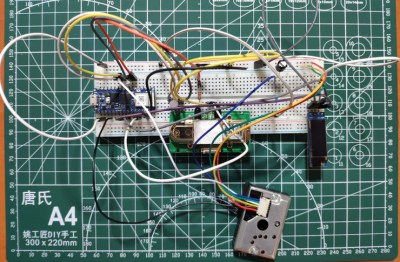
Testing the electronics on a bread board.

So what’s different? Well, it’s all been mounted to a huge Pokémon PCB, obviously. Even if you aren’t a fan of the pocket monsters, you’ve got to appreciate that bright pink solder mask. Honestly, the whole presentation is a great example of the sort of PCB artwork we rarely see outside of the BadgeLife scene.

Admittedly, there’s a lot easier ways to get notified about the air quality inside your house. We’re also not saying that haphazardly mounting your electronics onto a PCB designed to look like a character from a nearly 20+ year old Game Boy game is necessarily a great idea from a reliability standpoint. But if you were going to do something like that, then this project is certainly the one to beat.

Low-Cost Computer Gesture Control With An I2C Sensor

Controlling your computer with a wave of the hand seems like something from science fiction, and for good reason. From Minority Report to Iron Man, we’ve seen plenty of famous actors controlling their high-tech computer systems by wildly gesticulating in the air. Meanwhile, we’re all stuck using keyboards and mice like a bunch of chumps.

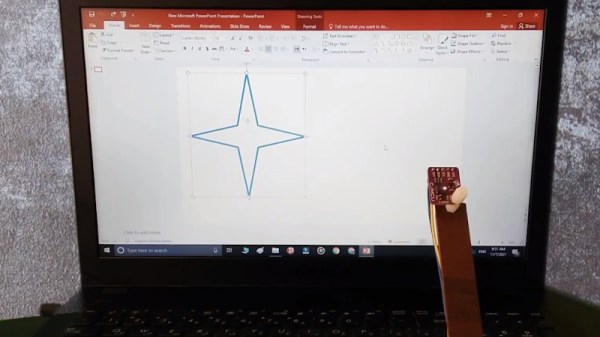
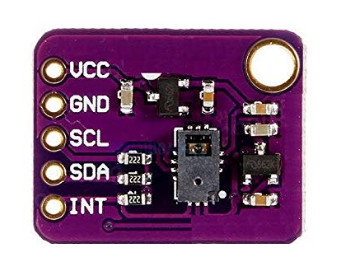
But it doesn’t have to be that way. As [Norbert Zare] demonstrates in his latest project, you can actually achieve some fairly impressive gesture control on your computer using a $10 USD PAJ7620U2 sensor. Well not just the sensor, of course. You need some way to convert the output from the I2C-enabled sensor into something your computer will understand, which is where the microcontroller comes in.

Looking through the provided source code, you can see just how easy it is to talk to the PAJ7620U2. With nothing more exotic than a switch case statement, [Norbert] is able to pick up on the gesture flags coming from the sensor. From there, it’s just a matter of using the Arduino Keyboard library to fire off the appropriate keycodes. If you’re looking to recreate this we’d go with a microcontroller that supports native USB, but technically this could be done on pretty much any Arduino. In fact, in this case he’s actually using the ATtiny85-based Digispark.

This actually isn’t the first time we’ve seen somebody use a similar sensor to pull off low-cost gesture control, but so far, none of these projects have really taken off. It seems like it works well enough in the video after the break, but looks can be deceiving. Have any Hackaday readers actually tried to use one of these modules for their day-to-day futuristic computing?

Continue reading “Low-Cost Computer Gesture Control With An I2C Sensor”

Capacitive Touch Controller For FPGAs

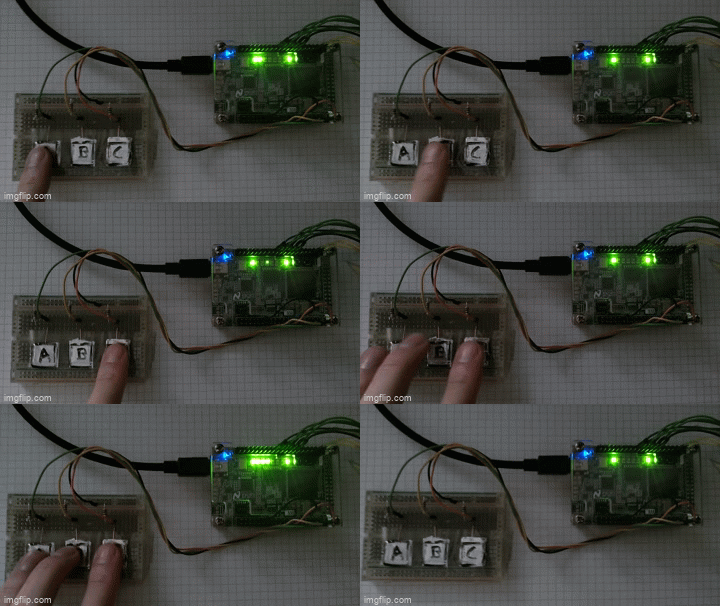
Most projects that interface with the real world need some sort of input device. Obviously this article is being written from a standardized “human interface device” but when the computers become smaller the problem can get more complicated. We can’t hook up a USB keyboard to every microcontroller since we often only need a few buttons, but even buttons can be a little bit too cumbersome for some applications. For something even simpler, we would like to turn your attention to capacitive touch controllers.

Granted, these devices are really only simpler from a hardware perspective. Rather than a switch that can be prone to failure either when its moving parts break or its contacts become corroded, a capacitive touch button only needs a certain conductive area on something like a PCB, along with a few passive components, to work. The real difficulty is in the software, so this project aims to make it simpler to bring these sort of devices to any FPGA that needs some sort of interface like this. It can operate in stand-alone mode or in a custom user interface, and was written to be platform-independent in VHDL without the need for any dependencies or macros.

The project’s page goes into a great amount of detail on how capacitive touch sensors like these work in general, and describes the operation of this specific code as well. Everything is open source, so it’s ready to be put to work right away. If you need capacitive touch capabilities on something like a microcontroller, though, take a look at this tiny Atmel-powered musical instrument instead.

Using Arduinos To Drive Undocumented Displays

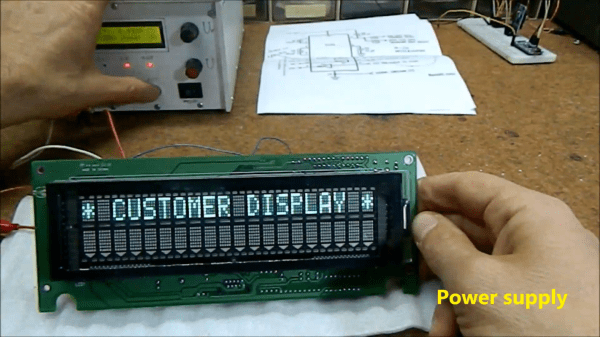
For those of us old enough to remember the VCR (and the difficulty of programming one), the ubiquitous vacuum fluorescent display, or VFD, is burned into our memories, mostly because of their brightness and contrast when compared to the superficially-similar LCD. These displays are incredibly common even apart from VCRs, though, and it’s easy to find them for next to no cost, but figuring out how to drive one if you just pulled it out of a 30-year-old VCR is going to take some effort. In this build, [mircemk] shows us how he drives unknown VFD displays using an Arduino in order to build his own weather forecasting station.

For this demonstration [mircemk] decided to turn a VFD into a weather forecasting station. First of all, though, he had to get the VFD up and running. For this unit, which came from a point-of-sale (POS) terminal, simply connecting power to the device turned on a demo mode for the display which let him know some information about it. From there, and with the knowledge that most POS terminals use RS232 to communicate, he was able to zero in on the Rx and Tx pins on the on-board microcontroller and interface them with an Arduino. From there it’s a short step to being able to output whatever he wanted to this display.

For this project, [mircemk] wanted the display to output information about weather, but rather than simply pull data from some weather API he is actually using a sensor suite connected to the Arduino to measure things like barometric pressure in order to make a 12-hour forecast. The design is inspired by old Zambretti weather forecasters which used analog wheels to input local weather data. It’s an interesting build not only for the VFD implementation but also for attempting to forecast the weather directly with just a tiny sensor set instead of downloading a forecast to display. To do any better with your own forecasts, you’d likely need your own weather station.

Continue reading “Using Arduinos To Drive Undocumented Displays”

3D Printed Sensor Detects Glyphosate

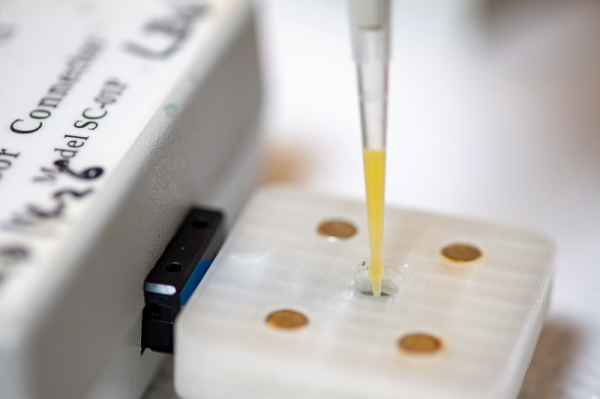
Typically, detecting glyphosate — a herbicide — in a beverage requires a sophisticated test setup. But Washington State University has a 3D printed sensor that uses nanotubes to simplify the detection of the toxin.

The idea is very similar to inexpensive blood glucose monitors. The test will eventually find use for human samples, but the initial testing was for detecting contamination in orange juice.

Continue reading “3D Printed Sensor Detects Glyphosate”

A MetaSense joystick

3D-Printing Complex Sensors And Controls With Metamaterials

If you’ve got a mechatronic project in mind, a 3D printer can be a big help. Gears, levers, adapters, enclosures — if you can dream it up, a 3D printer can probably churn out a useful part for you. But what about more complicated parts, like sensors and user-input devices? Surely you’ll always be stuck buying stuff like that from a commercial supplier. Right?

Maybe not, if a new 3D-printed metamaterial method out of MIT gets any traction. The project is called “MetaSense” and seeks to make 3D-printed compliant structures that have built-in elements to sense their deformation. According to [Cedric Honnet], MetaSense structures are based on a grid of shear cells, printed from flexible filament. Some of the shear cells are simply structural, but some have opposing walls printed from a conductive filament material. These form a capacitor whose value changes as the distance between the plates and their orientation to each other change when the structure is deformed.

The video below shows some simple examples of monolithic MetaSense structures, like switches, accelerometers, and even a complete joystick, all printed with a multimaterial printer. Designing these structures is made easier by software that the MetaSense team developed which models the deformation of a structure and automatically selects the best location for conductive cells to be added. The full documentation for the project has some interesting future directions, including monolithic printed actuators.

Continue reading “3D-Printing Complex Sensors And Controls With Metamaterials”