Speak Your WiFi

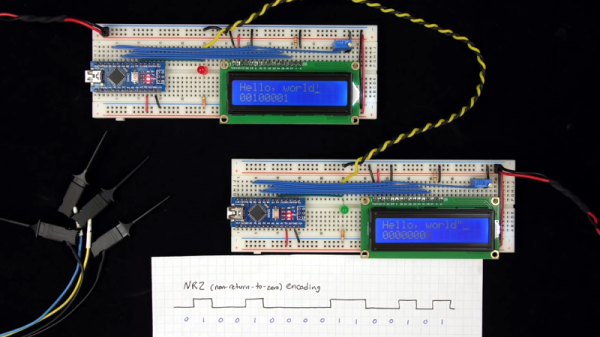
When you create a Thing for the Internet of Things, you’ve made a little computer that does a simple job and which probably has a minimal interface. But minimal interfaces leave little room for configuration, such as entering WiFi details. Perhaps if you made the Thing yourself you’ve hard-coded your WiFi credentials in your code, but that hardly translates to multiple instances. So, how to put end-user WiFi credentials easily on more than one Thing? Perhaps [Rob Dobson] has the answer with his technique of sending them as a sequence of audible tones.

There is a piece of Javascript code in a browser into which you enter your WiFi credentials, which are then expressed through the speaker as a set of FSK tones to be picked up by a microphone on the Thing. They can then be decoded into the credentials, and the Thing can connect. All the code is available, on GitHub, should you fancy it yourself.

Of course, this is nothing new, as any owner of an 8-bit machine that had a cassette interface will tell you. And on the face of it it’s much easier than those awkward impromptu hotspots with a web interface to which you connect and pass on your credentials. But while we quite like the convenience, we can’t help wondering whether expressing the credentials in audible free space might be a bit too insecure for many readers. The technique however remains valid, and we’re sure that other less sensitive applications might be found for it. Meanwhile we hope he hasn’t inadvertently shared his WiFi password in the video below the break.

Continue reading “Speak Your WiFi”

Supercon Badge Hardware Hacking: Here’s What To Bring

Hackaday Superconference is just a week away (precious few tickets remain), a celebration of all things Hackaday, which naturally includes creative projects making the most of their hardware. Every attendee gets a platform for hacking in the form of the conference badge.

To make the most of your badge hacking fun, plan ahead so you will have the extra components and the tools you need. At the most basic, bring along a serial to USB cable and a PIC programmer. These are common and if you don’t own them, ask around and you will likely be able to borrow them. Now is also the time to put in a parts order for any components you want to use but don’t have on hand!

The badge is hackable without any extras, but it’s designed for adding hardware and hacking the firmware. We’re excited to see what you can do with it. We gave an overview of this retro themed pocket computer a few days ago, today we’re inviting you to exploit its potential for your hardware hacks.

Continue reading “Supercon Badge Hardware Hacking: Here’s What To Bring”

Wrangling RC Servos Becoming A Hassle? Try Serial Bus Servos!

When we need actuators for a project, a servo from the remote-control hobby world is a popular solution. Though as the number of servos go up, keeping their wires neat and managing their control signals become a challenge. Once we start running more servos than we have fingers and toes, it’s worth considering the serial bus variety. Today we’ll go over what they are and examine three products on the market.

Continue reading “Wrangling RC Servos Becoming A Hassle? Try Serial Bus Servos!”

A Crash Course In Reliable Communication

It’s probably fair to say that anyone reading these words understands conceptually how physically connected devices communicate with each other. In the most basic configuration, one wire establishes a common ground as a shared reference point and then the “signal” is sent over a second wire. But what actually is a signal, how do the devices stay synchronized, and what happens when a dodgy link causes some data to go missing?

All of these questions, and more, are addressed by [Ben Eater] in his fascinating series on data transmission. He takes a very low-level approach to explaining the basics of communication, starting with the concept of non-return-to-zero encoding and working his way to a shared clock signal to make sure all of the devices in the network are in step. Most of us are familiar with the data and clock wires used in serial communications protocols like I2C, but rarely do you get to see such a clear and detailed explanation of how it all works.

He demonstrates the challenge of getting two independent devices to communicate, trying in vain to adjust the delays on the receiving and transmitting Arduinos to try to establish a reliable link at a leisurely five bits per second. But even at this digital snail’s pace, errors pop up within a few seconds. [Ben] goes on to show that the oscillators used in consumer electronics simply aren’t consistent enough between devices to stay synchronized for more than a few hundred bits. Until atomic clocks come standard on the Arduino, it’s just not an option.

[Ben] then explains the concept of a dedicated clock signal, and how it can be used to make sure the devices are in sync even if their local clocks drift around. As he shows, as long as the data signal and the clock signal are hitting at the same time, the actual timing doesn’t matter much. Even within the confines of this basic demo, some drift in the clock signal is observed, but it has no detrimental effect on communication.

In the next part of the series, [Ben] will tackle error correction techniques. Until then, you might want to check out the fantastic piece [Elliot Williams] put together on I2C.

[Thanks to George Graves for the tip.]

Continue reading “A Crash Course In Reliable Communication”

Serial Connection Over Audio: Arduino Can Listen To UART

We’ve all been there: after assessing a problem and thinking about a solution, we immediately rush to pursue the first that comes to mind, only to later find that there was a vastly simpler alternative. Thankfully, developing an obscure solution, though sometimes frustrating at the time, does tend to make a good Hackaday post. This time it was [David Wehr] and AudioSerial: a simple way of outputting raw serial data over the audio port of an Android phone. Though [David] could have easily used USB OTG for this project, many microcontrollers don’t have the USB-to-TTL capabilities of his Arduino – so this wasn’t entirely in vain.

At first, it seemed like a simple task: any respectable phone’s DAC should have a sample rate of at least 44.1kHz. [David] used Oboe, a high performance C++ library for Android audio apps, to create the required waveform. The 8-bit data chunks he sent can only make up 256 unique messages, so he pre-generated them. However, the DAC tried to be clever and do some interpolation with the signal – great for audio, not so much for digital waveforms. You can see the warped signal in blue compared to what it should be in orange. To fix this, an op-amp comparator was used to clean up the signal, as well as boosting it to the required voltage.

Prefer your Arduino connections wireless? Check out this smartphone-controlled periodic table of elements, or this wireless robotic hand.

Continue reading “Serial Connection Over Audio: Arduino Can Listen To UART”

Eavesdropping On A VGA Monitor’s Conversations

Did you ever wonder what your monitor and your computer are talking about behind your back? As it turns out, there’s quite a conversation going on while the monitor and the computer decide how to get along, and sniffing out VGA communications can reveal some pretty fascinating stuff about the I²C protocol.

To reverse engineer the configuration information exchanged between a VGA monitor and a video card, [Ken Shirriff] began by lopping a VGA cable in two. The inside of such cables is surprisingly complex, with separate shielding wires for each color and sync channel and a host of control wires, all bundled in multiple layers of shielding foil and braid to reduce EMI. [Ken] identified the clock and data lines used for the I²C interface and broke those out into a PocketBeagle for analysis using the tiny Linux machine’s I²C tools.

With a Python script to help decode the monitor’s Extended Display Identification Data (EDID) data, [Ken] was able to see everything the monitor knows about itself — manufacturer, serial number, all the supported resolution modes, and even deprecated timing and signal information left over from the days when CRTs ruled the desktop. Particularly interesting are the surprisingly limited capabilities of a VGA display in terms of color reproduction, as well as [Ken]’s detailed discussion on the I²C bus in general and how it works.

We always enjoy these looks under the hood that [Ken] is so good at, and we look forward to his reverse engineering write-ups. His recent efforts include a look at core memory from a 50-year old mainframe and reverse engineering at the silicon level.

Debugging With Serial Print At 5333333 Baud

Debugging with printf is something [StorePeter] has always found super handy, and as a result he’s always been interested in tweaking the process for improvements. This kind of debugging usually has microcontrollers sending messages over a serial port, but in embedded development there isn’t always a hardware UART, or it might already be in use. His preferred method of avoiding those problems is to use a USB to Serial adapter and bit-bang the serial on the microcontroller side. It was during this process that it occurred to [StorePeter] that there was a lot of streamlining he could be doing, and thanks to serial terminal programs that support arbitrary baud rates, he’s reliably sending debug messages over serial at 5.3 Mbit/sec, or 5333333 Baud. His code is available for download from his site, and works perfectly in the Arduino IDE.

The whole thing consists of some simple, easily ported code to implement a bare minimum bit-banged serial communication. This is output only, no feedback, and timing consists of just sending bits as quickly as the CPU can handle, leaving it up to the USB Serial adapter and rest of the world to handle whatever that speed turns out to be. On a 16 MHz AVR, transmitting one bit can be done in three instructions, which comes out to about 5333333 baud or roughly 5.3 Mbit/sec. Set a terminal program to 5333333 baud, and you can get a “Hello world” in about 20 microseconds compared to 1 millisecond at 115200 baud.

He’s got additional tips on using serial print debugging as a process, and he’s done a followup where he stress-tests the reliability of a 5.3 MBit/sec serial stream from an ATMega2560 at 16 MHz in his 3D printer, and found no missed packets. That certainly covers using printf as a debugger, so how about a method of using the debugger as printf?