Coffee payment system

Coffee Payment System Doesn’t Void Your Warranty

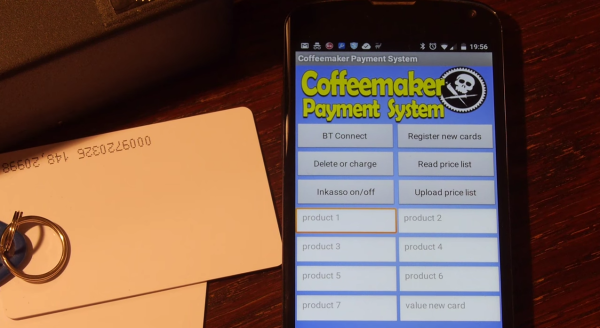
[Oliver] is back with an update to his recent coffee maker hacks. His latest hack allowed him to add a coffee payment system to an off-the-shelf coffee maker without modifying the coffee maker itself. This project is an update to his previous adventures in coffee maker hacking which logged who was using up all of the coffee.

The payment system begins with an Arduino Uno clone inside of a small project enclosure. The Arduino communicates with the coffee maker via serial using the coffee maker’s service port. This port is easily available from outside the machine, so you won’t have to crack open the case and risk voiding your warranty.

The system also includes an RFID reader and a Bluetooth module. The RFID reader allows each user to have their own identification card. The user can swipe their card over the reader and the system knows how many credits are left in their account. If they have enough credit, the machine will pour a delicious cup of coffee.

The Arduino communicates to an Android phone using the Bluetooth module. [Oliver’s] Android app was built using MIT’s app inventor. It keeps track of the account credits and allows the user to add more. The system can currently keep track of up to forty accounts. [Oliver] also mentions that you can use any Bluetooth terminal program to control the system instead of a smart phone app. Continue reading “Coffee Payment System Doesn’t Void Your Warranty”

Ask Hackaday: Are We Close To Reinventing The Keyboard For Touchscreens?

minuum-keyboard

We mourn the loss of the physical keyboard with the advent of tablets. After all, we do a bit of typing getting all of these features posted throughout the week. And we kind of blame tablets for the decline of the netbook industry (we still use a Dell Vostro A90 when not at home). But we’re trying to keep an open mind that we may not need a physical keyboard anymore. If someone can come up with an innovative alternative to the Qwerty layout that we are able to learn and can use with speed and without physical strain we’ll be on board. Our question is,  do you think we are close to a screen typing breakthrough?

This question came to mind after seeing the Minuum keyboard shown above. It compresses all of the rows of a Qwerty into a single row, monopolizing less screen space than conventional smartphone input methods. The demo video (embedded after the break) even shows them hacking the concept into a distance sensor and using a graphite-on-paper resistor. Pretty cool. But what happens when you type a word not in the dictionary, like this author’s last name?

You can actually try out the Minuum style thanks to [Zack’s] in-browser demo hack. He’s not affiliated with Minuum, but has done quite a bit of alternative keyboard input work already with his ASETNIOP chorded typing project. It’s another contender for changing how we do things.

Continue reading “Ask Hackaday: Are We Close To Reinventing The Keyboard For Touchscreens?”

Remote Control Command Center Includes RF And IR Functions

all-in-one-remote-relay-includes-RF

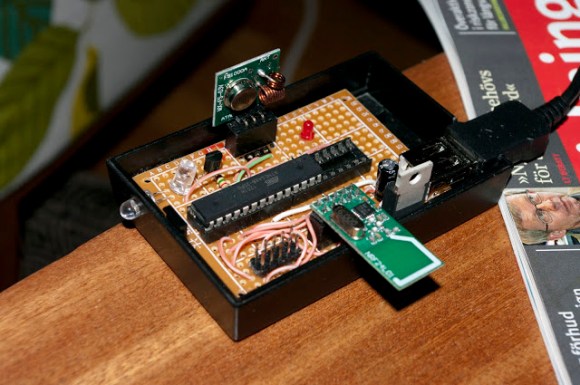
We’re still not quite sure what to call these projects, but as we’ve said before, it’s a pleasure to see what people are doing to use one remote control to rule them all. The project being developed by [Kalle Löfgren] seeks to simplify the remote controlled items in his home by combining all control into one smart phone app. The linchpin of the system is this command center which lets a smart phone send IR and RF commands to various devices (translated).

We’ve seen this done with pretty beefy microcontrollers, like this project that uses a PIC32. But the communications going on between the smartphone and the base station are very simple, as are the remote control commands which are being relayed. So we’re not surprised to find that this setup just uses an ATmega88, IR LED, Bluetooth Module, and RF module. There is no connection to a computer (the USB simply provides power via a cellphone charger). If you’re interested in how [Kalle] sniffed the protocol for each remote he wrote two other articles which you can find in the write-up linked above.

Harry Potter Location Clock Spies On Your Smart Phone

harry-potter-clock

The location clock found in the Harry Potter books makes for a really fun hack. Of course there’s no magic involved, just a set of hardware to monitor your phone’s GPS and a clock face to display it.

[Alastair Barber] finished building the clock at the end of last year as a Christmas gift. The display seen above uses an old mantelpiece clock to give it a finished look. He replace the clock face with a print out of the various locations known to the system and added a servo motor to drive the single hand. His hardware choices were based on what he already had on hand and what could be acquired cheaply. The an all-in-one package combines a Raspberry Pi board with a USB broadband modem to ensure that it has a persistent network connection (we’ve seen this done using WiFi in the past). The RPi checks a cellphone’s GPS data, compares it to a list of common places, then pushes commands to the Arduino which controls the clock hand’s servo motor. It’s a roundabout way of doing things but we imagine everything will get reused when the novelty of the gift wears off.

Arduino Compatible Home Automation For Smart Phone Or Voice Control

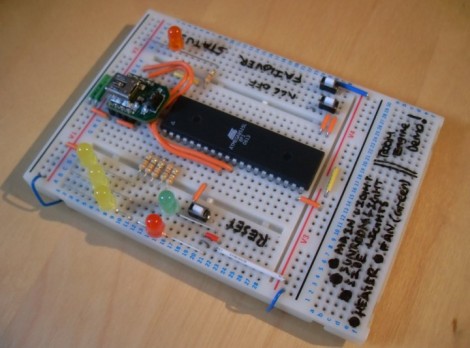
[Joseph] wrote in to share this home automation system he’s working on as a college project. He calls it the Room Engine and the house-side of the hardware is built on top of the circuit you see here. This is the most basic part of the REBoard, which is meant to connect to a computer uses RS232 or USB, and in turn use a set of relays to switch mains voltage devices.

You can follow the bread crumb on his webpage to get a broader video of the system. The interface is designed to use two parts. One is a voice recognition system that is supported by the computer. The other is an iOS interface that includes login credentials and a button-based control system. The video after the break shows off the smart phone portion of the controller. We think he’s done a good job of integrating a few appliances without the need for commercial products such as X10 modules.

If you’re just interested in switching a few things without cord’s reach of each other this can get it done, and offers scheduling functionality. It would also be pretty easy to set this up with a WiFi module and do away with the PC.

Continue reading “Arduino Compatible Home Automation For Smart Phone Or Voice Control”

Cellphone Battery Booster Built At The Checkout Counter

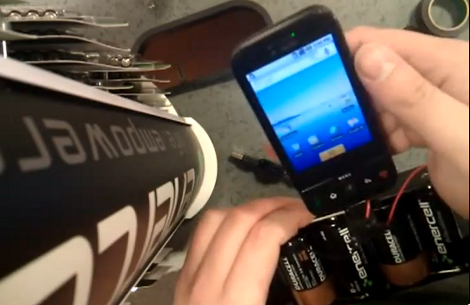
When you’re away from home and your cellphone runs out of juice it can be a real downer. Sure, you could find a store and buy a wall charger, but wouldn’t it be more fun to build your own battery booster without using tools? [Spiritplumber] did just that, popping into a Radio Shack for the parts, then making his how-to video (embedded after the break) while standing at the checkout counter. You can see he hust set his camera on top of the battery display case and got to work.

He’s using four D cell batteries to provide 6 volts of power. Assuming your phone charges at 5 volts this is going to be just a bit too high, even though there’s some tolerance with most phones. To overcome that obstacle he added a diode to the circuit, taking advantage of the 0.7 volt drop that it brings to the mix. Grab a plug adapter for your model and then just hand twist the connections. [Spiritplumber] admits it would be better to solder these, but in a bind you can get away with it. We looked up some prices for this method and we figure this would cost around $18 (batteries included) depending on the price of the plug adapter for your phone.

Of course if you’re just looking for a way to charge your phone without paying consumer prices there are ways of accomplishing that as well.

Continue reading “Cellphone Battery Booster Built At The Checkout Counter”

Smartphone Operated Garage Door Is Beginning Of Arduino Home Automation System

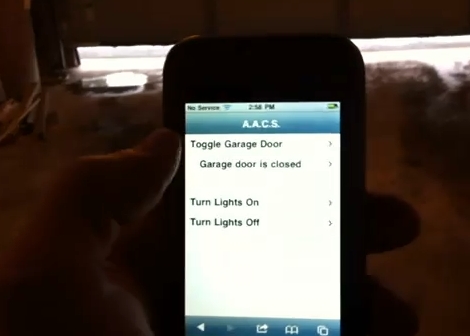
[Tim] is showing off the first step in his home automation projected with this smart-phone garage door interface. In the video after the break you can see him open and close the garage door with the touch of a button. There’s also an open or closed indicator that he can check when away from home.

An Arduino takes care of a portion of the control for this project. Like the post we saw yesterday, he’s using PHP code on a webpage to manipulate the Arduino via its USB connection in order to open and close the door using a relay. The door status is also monitored by the Arduino and sent to the PC over the serial connection. The computer uses a Python script to monitor the incoming data and update a text file which is merged into the web interface using a PHP include. Future plans for the system include adding control for heating and air conditioning systems.

If you’re looking to do something like this but wirelessly here’s some advice on ditching the Arduino and using an XBee module instead.

Continue reading “Smartphone Operated Garage Door Is Beginning Of Arduino Home Automation System”