Spark Gap And Coherer Meet Beagle Bone

Getting back to basics is a great way to teach yourself about a technology. We see it all the time with computers built from NAND gates or even discrete transistors. It’s the same for radio – stripping it back to the 19th century can really let you own the technology. But if an old-school wireless setup still needs a 21st-century twist to light your fire, try this spark gap transmitter and coherer receiver with a Beagle Bone Morse decoder.

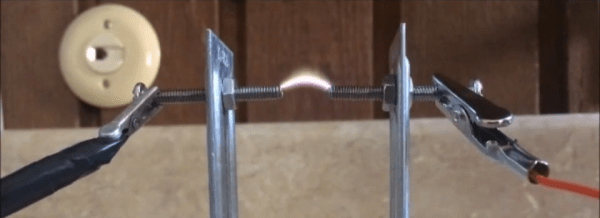
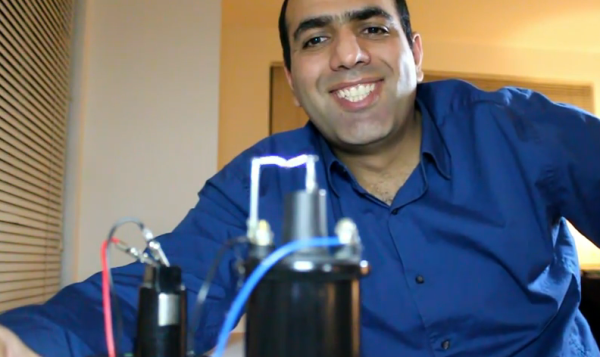
At its heart, a spark gap transmitter is just a broadband RF noise generator, and as such is pretty illegal to operate these days. [Ashish Derhgawen]’s version, which lacks an LC tuning circuit, would be especially obnoxious if it had an antenna. But even without one, the 100% electromechanical transmitter is good for a couple of feet – more than enough for experimentation without incurring the wrath of local hams.

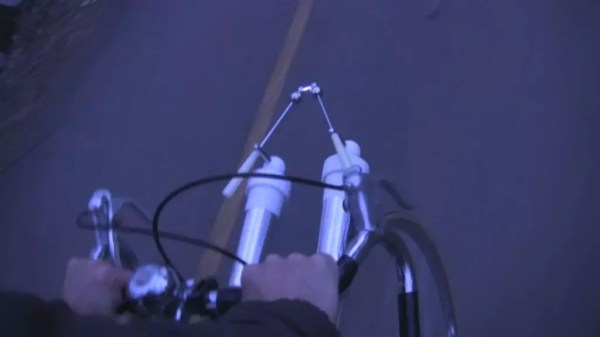
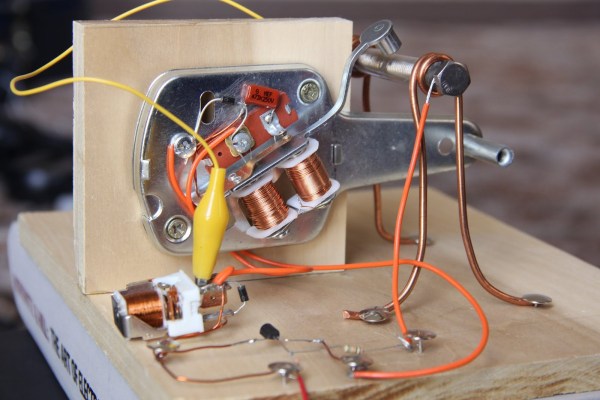
The receiver is based on a coherer, a device that conducts electricity only when a passing radio wave disturbs it. [Ashish]’s coherer is a slug of iron filings between two bolts in a plastic tube. To reset the coherer, [Ashish] added a decoherer built from an electromagnetic doorbell ringer to tap the tube and jostle the filings back into the nonconductive state. He also added an optoisolator to condition the receiver’s output for an IO pin on the Beagle, and a Python script to decode the incoming Morse. You can see it in action in the video below.

If this build looks familiar, it’s because we’ve covered [Ashish]’s efforts before. But this project keeps evolving, and it’s nice to see where he’s taken it and what he’s learned – like that MOSFETs don’t like inductive kickback much.

Continue reading “Spark Gap And Coherer Meet Beagle Bone”

J.C. Bose And The Invention Of Radio

The early days of electricity appear to have been a cutthroat time. While academics were busy uncovering the mysteries of electromagnetism, bands of entrepreneurs were waiting to pounce on the pure science and engineer solutions to problems that didn’t even exist yet, but could no doubt turn into profitable ventures. We’ve all heard of the epic battles between Edison and Tesla and Westinghouse, and even with the benefit of more than a century of hindsight it’s hard to tell who did what to whom. But another conflict was brewing at the turn of 19th century, this time between an Indian polymath and an Italian nobleman, and it would determine who got credit for laying the foundations for the key technology of the 20th century – radio.

Continue reading “J.C. Bose And The Invention Of Radio”

RC Mini Flame Thrower Brings The Burn

It goes without saying that a radio controlled mini flame thrower can be nothing but a bad idea and you should never, ever build one. But once you watch the video below, you’ll be tempted to try. But don’t do it – you’ve been warned.

That said, the video below shows that [Make-log]’s remarkably compact build is chock full of safety interlocks and sports a thoughtful and informative user interface. It’s fueled by a small can of spray deodorant whose valve is actuated by a servo and ignited by a spark-gap igniter. Alas, this final critical component is no longer available from SparkFun, so if you choose to roll your own – which you shouldn’t – you’ll need to find a substitute.

We’ve featured an unreasonable number of flame thrower projects before, including a ton of wristmounted units. Of course if you’re a musically inclined pyromaniac, you’ll also want to check out this mini Doof Warrior setup too.

Continue reading “RC Mini Flame Thrower Brings The Burn”

The First Radio Sets: A Spark Gap And A Coherer

[Ashish] let us know about his experiments in recreating the earliest type of radio set: a spark-gap transmitter and iron-filings coherer. He goes through the historical development of the kit in great detail, so we’re just going to skip that part. Go read it yourself!

Instead, we’re going to tease you with the coolest part of the rig: the coherer. In [Ashish]’s build, it’s a piece of tubing with some iron filings between two bolts. When a sufficiently strong EM wave hits the filings, they stick together and bridge the gap between the bolts, allowing electricity to flow and light up an LED, for instance. You can see this in [Ashish]’s video below the break, along with kmore discussion of that coherer.

Continue reading “The First Radio Sets: A Spark Gap And A Coherer”

Bicycle-Powered Wimshurst Machine

A lot of great pieces of real technology were inspired (or, at least, look like) pieces of technology from science fiction of the past. Like the smartphones of today have a surreal resemblance to the Star Trek communicators of the 60s, [Steve] took inspiration from a story about a bicycle racing in space and set out to make his own.

In the story, the bicycle wheels are replaced by electrostatic generators that power a type of (fictional) ion drive. Since an ion drive wouldn’t add much thrust to a bicycle operated on the Earth, [Steve] used the electrostatic generator he built to create a sparking light show. The generator is called a Wimshurst machine and has two counter-rotating discs which collect charge. The charge is dissipated across a spark gap which is placed where the bike light would normally go.

We don’t know if the sparks from the Wimshurst generator are enough for a proper headlight, but it’s definitely a cool effect. [Steve] also points out that it might also work as a bug zapper, but either way you should check out the video after the break to see it in action! While it’s not quite a tricorder it’s still a pretty impressive sci-fi-inspired build, and something that’s definitely unique in the bicycle realm.

There’s quite a collection of these Wimshurst projects beginning to come together. Here’s one made using a trio of soda bottles, and another example which used 3D printing.

Continue reading “Bicycle-Powered Wimshurst Machine”

Mehdi wth his homemade taser

[Mehdi’s] Shocking Stun Gun Tutorial

[Mehdi Sadaghdar] never lets little things like fire, shocks, or singed fingers get in the way of his projects.  His latest is a tutorial on making a simple electroshock device. A stun weapon creates a very high voltage, and is used in law enforcement to temporarily disable a person. [Mehdi] stresses repeatedly to not use this on anyone. If you do, he won’t like you anymore. Of course, if you’ve seen any of his previous videos, you know he’ll shock himself and set something on fire before the project is complete.

To create his stunner, [Mehdi] used a car ignition to produce a high voltage. The igniton coil, which is a specialized transformer, allowed him to generate the >10000V output needed for the stunner. The coil has a 60:1 ratio and is powered by a 12V DC supply. Since a coil is a short at DC, the system only creates a high voltage pulse when power is disconnected. However, the pulse was too short to create a satisfying arc. [Mehdi] added a capacitor, creating an LC circuit that oscillates as the charge decays, creating a nicer spark. He then used an RC circuit and a relay to create a simple oscillating switch. For the finishing touch, he created a spark gap on the secondary of the transformer with two nails. In typical [Mehdi] fashion, he nearly fried his digital caliper in the process.

The end result is a nice spark that warms the cockles of [Mehdi’s] fibrillating heart. We commend him for being such a brave masochist in the name of science.  Check out his tutorial after the break!

Continue reading “[Mehdi’s] Shocking Stun Gun Tutorial”

Copper Vapor Laser Is Amazing

What better way to spend a few months in the workshop than by heating Copper chloride to 400° C, building rotary spark gaps and 30kV capacitors, playing with high vacuums and building a very powerful laser? It’s just a day in [Jon]’s life as he builds a DIY Copper vapor laser.

Copper vapor lasers require temperatures of about 1500° C, but this is only when using pure Copper. Compounds such as Copper chloride are able to bring the required temperatures for lasing down to about 400° C, a reasonable temperature for [Jon]’s home built laser tube furnace. The only problem with this setup is the requirement for two electrical pulses, one to disassociate the Copper and a second to make the Copper lase.

The professional way of creating these electrical pulses would be a Thyratron, but it seems [Jon] wanted something cooler. He built a rotary spark gap out of two 2 inch thick blocks of acrylic that allow him to perfectly time the frequency and separation of the electrical pulses needed for his laser.

There is no word on exactly how much power [Jon]’s Copper vapor laser will put out when it’s complete, but [Jon]’s build log is already an amazing display of awesome. You can check out a short video showing off [Jon]’s laser, spark gap, and huge home-made capacitor after the break.

Continue reading “Copper Vapor Laser Is Amazing”