Home-built foundries are a popular project, and with good reason. Being able to melt and cast metal is a powerful tool, even if it’s “only” aluminum. But the standard fossil-fuel fired foundries that most people build are not without their problems, which is where this quick and clean single-use foundry comes into play.
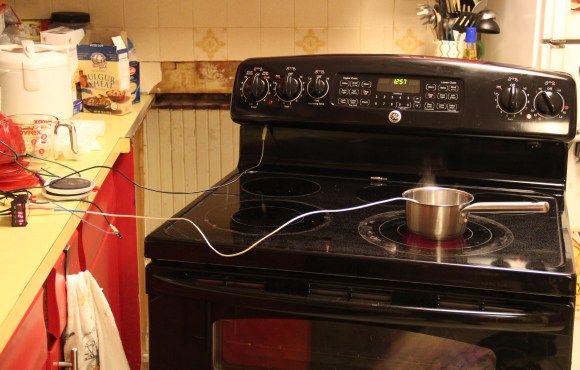
The typical home foundry for aluminum is basically a refractory container of some kind that can take the heat of a forced-air charcoal or coal fire. But as [Turbo Conquering Mega Eagle] points out, such fuels can lead to carbon contamination of the molten aluminum and imperfections when the metal is cast. With a junked electric range, [Turbo Conquering Mega Eagle] fabricates a foundry that avoids the issue in an incredibly dangerous way. The oven’s heating element is wrapped around an old stainless saucepan, fiberglass bats from the stove insulate the ad hoc crucible, and the range’s power cord is attached directly to the heating element. The video below shows that it does indeed melt aluminum, which is used to sand cast a fairly intricate part.
We can’t see getting more than one use out of this setup, though, so it’s only as sustainable as the number of ranges you can round up. But it’s worth keeping in mind for one-off jobs. For a more permanent installation, check out this portable propane-powered foundry. And to see what you can make with one, check out this engine breather cast from beer cans.
Continue reading “Foundry From Scrapped Oven For Cheap, Clean Castings”