BLDC Controller With The Teensy 3.1

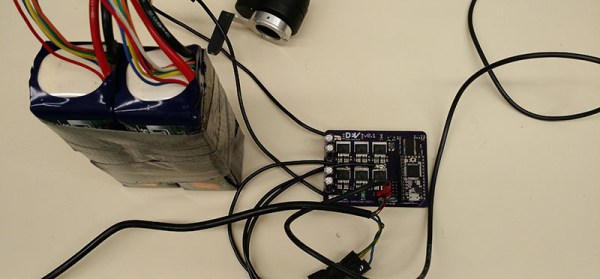
[Will] is on the electric vehicle team at Duke, and this year they’re trying to finally beat a high school team. This year they’re going all out with a monocoque carbon fiber body, and since [Will] is on the electronics team, he’s trying his best by building a new brushless DC motor controller.

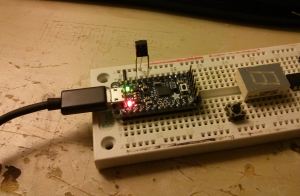
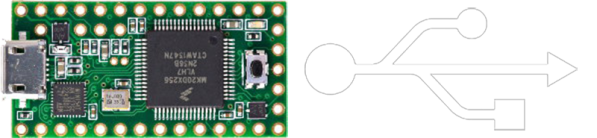
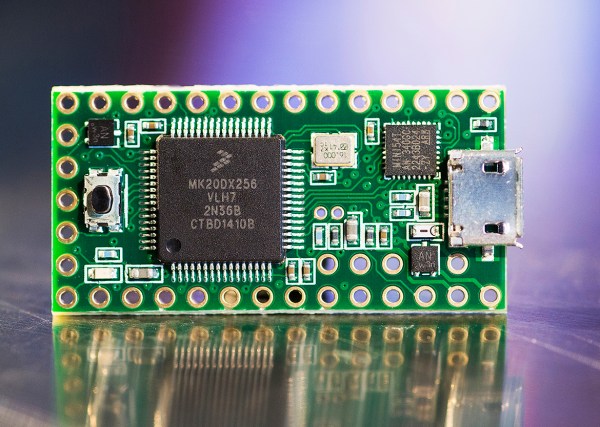
Last year, a rule change required the Duke team to build a custom controller, and this time around they’re refining their earlier controller by making it smaller and putting a more beginner-friendly microcontroller on board. Last years used an STM32, but this time around they’re using a Teensy 3.1. The driver itself is a TI DRV8301, a somewhat magical 3 phase 2A gate driver.

The most efficient strategy of driving a motor is to pulse the throttle a little bit and coast the rest of the time. It’s the strategy most of the other teams in the competition use, but this driver is over-engineered by a large margin. [Will] put up a video of the motor controller in action, you can check that out below.

Continue reading “BLDC Controller With The Teensy 3.1”

TRINKET EDC CONTEST DRAWING #5 RESULTS

The final random drawing for Hackaday’s Trinket Everyday Carry Contest was held tonight, and the winner is [flaming_goat] with Trinket Pocket IR Analyser/Transmitter!

ir2In addition to having an awesome username, [flaming_goat] loves IR protocols. Trinket Pocket IR Analyser/Transmitter is a standalone device to read, analyze and transmit Infrared (IR) signals. The IR portion of the project is handled by a Vishay TSOP38238 (PDF link) The 382 series is a 3 pin module. It comes in several variants, each tuned to a specific carrier frequency. The 38238 will decode IR signals at 38 kHz.

The demodulated IR signals are fed into the Pro Trinket, where they can be analyzed. Data is either sent through the serial terminal or displayed on the on-board 1.44″ TFT LCD. Source code for the whole project is up on [flaming_goat’s] GitHub repo.

[flaming_goat] will be receiving a Teensy 3.1 and an Audio+SD adapter from The Hackaday Store. If the Pro Trinket is a gateway drug, then Teensy 3.1 is the hardcore stuff. Powered by a Freescale Kinetis ARM Cortex M4 processor in a tiny package, the Teensy 3.1 packs quite a punch. You might think all that power would mean complex tools, but Teensy 3.1 is still easy to program using the Arduino IDE. The Audio+SD adapter board gives Teensy 3.1 the ability to create some pretty decent audio, thanks to the Teensy Audio Library.

This was the last weekly drawing for the Trinket Everyday Carry Contest, but there is still time to enter and win the big prizes! The deadline is January 3 at 12am PDT. That’s just about 3 days to enter – so procrastinators, get in the game!

USB On The Teensy 3 From The Ground Up

When implementing USB on a microcontroller, most people are going to reach for V-USB if they’re using an AVR, one of Microchip’s USB libraries if a PIC is involved, or any number of the USB libraries for various ARM processors. [Kevin] had a different idea. As a challenge to himself, he wrote a USB device driver for the Teensy 3.1 microcontroller board, getting as close to the bare metal as he could get.

Writing a USB device driver first required a literature review. There are a few peculiarities in the Freescale K20 family of microcontrollers – the one found in the Teensy 3.1 – that dictate the need for a specific memory layout, using several clocks, and handling all the USB descriptors. [Kevin] started with the clocks, every last one of which must be enabled. The clock is generated by the Multipurpose Clock Generator from a 16MHz crystal, PLL’ed to the frequencies the USB module needs, and sent out over the System Integration Module.

Following the flowcharts and sequences found in the Freescale reference guide told [Kevin] exactly what needed to be done with the startup sequence, and offered a few suggestions on what needed to be done to set up all the interrupts. [Kevin] spent an incredible amount of time documenting, programming, and smashing his head against the keyboard for this tutorial, but he does give everyone a great opportunity to learn from his struggles.

While [Kevin] has a mostly complete USB device driver, his work is far from done. That’s alright, because this project wasn’t meant to be a full-featured driver; it’s still missing real error handling, strings in the configuration, and a real VID/PID. That’s alright, it’s still a great exercise in building something from scratch, especially something that very few people have built successfully.

Oh, blatant Hackaday Store plug for the Teensy 3.1.

Tweet Messages From Punch Cards

It all started with a conversation about the early days of computing. The next thing he knew, [Tim Jagenberg’s] colleague gave him a stack of punch cards and a challenge.  [Tim] attempted to read them with a mechanical contact and failed.  Undeterred, he decided to make a punch card-to-keyboard interface using optical parts from disassembled HP print stations.  Specifically, he took apart the slotted optical interrupter switches to use their IR-LEDs and photo-transistors. Next, [Tim] drilled holes into two pieces of plastic, gluing the LEDs on one piece of plastic and the photo-transistors on the other. The photo-transistors tell the Teensy 3.1 whenever a hole is detected.

[Tim] developed an interpreter on the Teensy that reads the punch card according to IBM model 029 keypunch codes. The Teensy enumerates as a USB keyboard when connected to a computer. As a punch card is read, the Teensy outputs the decoded characters as key presses.  When a punch card has been completely read, an ‘Enter’ key press is transmitted.  Tweeting the punch cards is no more complicated than typing the text yourself. Naturally, the first message posted on Twitter from the stack of punch cards was “Hello World!”  [Tim’s] binary and source code is available for download on Github.

We’ve enjoyed covering the backstory of the punch card and a previous project reading these cards using a digital camera setup. It’s always interesting to see the clever ways people use current technology and can-do attitude to read data from obsolete systems that would otherwise be lost.  We wonder what is on the rest of those punch cards?  Let’s hope [Tim] has more punch card tweets soon!

The Network Of 1-Wire Devices

teensynet

[jimmayhugh] is a homebrewer and has multiple fermentation chambers and storage coolers scattered around his home. Lucky him. Nevertheless, multiple ways of making and storing beer requires some way to tell the temperature of his coolers and fermenters. There aren’t many temperature controllers that will monitor more than two digital thermometers or thermocouples, so he came up with his own. It’s called TeensyNet, and it’s able to monitor and control up to 36 1-wire devices and ties everything into his home network.

Everything in this system uses the 1-Wire protocol, a bus designed by Dallas Semiconductor that can connect devices with only two wires; data and ground. (To be a fly on the wall during that marketing meeting…) [jimmay] is using temperature sensors, digital switches, thermocouples, and even a graphic LCD with his 1-wire system, with everything controlled by a Teensy 3.1 and Ethernet module to push everything up to his network.

With everything connected to the network, [jimmay] can get on his personal TeensyNet webpage and check out the status of all the devices connected to any of his network controllers. This is something the engineers at Dallas probably never dreamed of, and it’s an interesting look at what the future of Home Automation will be, if not for a network connected relay.

New To The Store: Teensy 3.1

New today in the Hackaday Store is the Teensy 3.1. This development board blows away most others in its class. The board plays nicely with the Arduino IDE, but embedded developers who are hardcore enough have the option of bare metal programming for the Coretex-M4 chip.

Why would we say this blows most others away? In our minds, the 64k of RAM and 72 MHz clock speed place this far outside of what you would normally see hanging out in the Arduino ecosystem. That may be changing with new players like the Edison, but the Teensy 3.1 doesn’t require a host board and comes in just under $20 compared to the Edison’s $50 price tag.

[Paul Stoffregen], the developer of the Teensy, is a hacker’s hacker and is known to be found round these parts. All year [Paul] has been developing an Audio Library that takes advantage of the Teensy 3.1’s powerful processor (including its DMA features; we’ve been pestering him to write an article for us on that topic). We covered the library back in September and are stocking the audio add-on board in the store as well. Quite frankly, the quality of sound that this puts out is astonishing. If you’re working on a project that calls for playback of recorded sound this is one of the least-complicated ways to get there.

TFT LCDs Hit Warp Speed With Teensy 3.1

[Paul Stoffregen], known as father of the Teensy, has leveraged the Teensy 3.1’s hardware to obtain some serious speed gains with SPI driven TFT LCDs. Low cost serial TFT LCDs have become commonplace these days. Many of us have used Adafruit’s TFT LCD library  to drive these displays on an Arduino. The Adafruit library gives us a simple API to work with these LCDs, and saves us from having to learn the intricacies of various driver chips.

[Paul] has turbocharged the library by using hardware available on Teensy 3.1’s 32 Freescale Kinetis K20 microcontroller. The first bump is raw speed. The Arduino’s ATmega328 can drive the SPI bus at 8MHz, while the Teensy’s Kinetis can ramp things up to 24MHz.

Speed isn’t everything though. [Paul] also used the Freescale’s 4 level FIFO to buffer transfers. By using a “Write first, then block until the FIFO isn’t full” algorithm, [Paul] ensured that new data always gets to the LCD as fast as possible.

Another huge bump was SPI chip select. The Kinetis can drive up to 5 SPI chip select pins from hardware. The ATmega328 doesn’t support chip selects. so they must be implemented with GPIO pins, which takes even more time.

The final result is rather impressive. Click past the break to see the ATmega based Arduno race against the Kinetis K20 powered Teensy 3.1.

Paul’s library is open source and available on Github.

Continue reading “TFT LCDs Hit Warp Speed With Teensy 3.1”