Oscillator Needs Fine-Tuning

Since their invention more than a century ago, crystal oscillators have been foundational to electronic design. They allow for precise timekeeping for the clocks in computers as well as on our wrists, and can do it extremely accurately and inexpensively to boot. They aren’t without their downsides though; a quartz watch might lose or gain a few seconds a month due to variations in temperature and other non-ideal environmental situations, but for working in the world of high-frequency circuits this error is unacceptable. For that you might reach for something like an oven oscillator, a circuit with a temperature controlled chamber able to keep incredibly precise time.

[IMSAI Guy] found this 10 MHz oven oscillator on a site selling bulk electronics at bargain basement prices. But as is unsurprising for anyone who’s used a site like this to get cheap circuits, it didn’t quite hit its advertised frequency of 10.000000 MHz. The circuit design is capable of this amount of accuracy and precision, though, thanks to some cleverly-designed voltage dividers and filtering. One of those voltage dividers allows a potentiometer to control a very narrow range of output frequencies, and from the factory it was outputting between 9.999981 and 9.9999996 MHz. To get it to actually output a 10 MHz wave with eight significant digits of accuracy, a pull-up resistor on the voltage divider needed to be swapped out.

While this was a fairly simple fix, one might wonder how an off-the-shelf component like this would miss the mark in such an obvious way but still go into production. But that’s one of life’s great mysteries and also the fun of sourcing components like this. In this case, the oven oscillator was less than $10. But these circuits aren’t always as good of a deal as they seem.

Continue reading “Oscillator Needs Fine-Tuning”

A Soldering LightSaber For The Speedy Worker

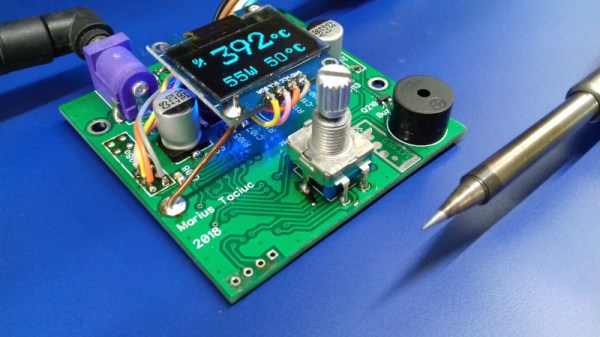
We all have our preferences when it comes to soldering irons, and for [Marius Taciuc] the strongest of them all is for a quick heat-up. It has to be at full temperature in the time it takes him to get to work, or it simply won’t cut the mustard. His solution is a temperature controlled iron, but one with no ordinary temperature control. Instead of a normal feedback loop it uses a machine learning algorithm to find the quickest warm-up.

The elements he’s using have a thermocouple in series with the element itself, meaning that to measure the temperature the power must be cut to the element. This duty cycle can not be cut too short or the measurements become noisy, so under a traditional temperature control regimen there is a limit on how quickly it can be heated up. His approach is to turn it on full-time for a period without stopping to measure the temperature, only measuring after it has had a chance to heat up. The algorithm constantly learns how long to switch it on to achieve what temperature, and is able to interpolate to arrive at the desired reading. It’s a clever way to make existing hardware perform new tricks, and we like that.

He’s appeared on these pages quite a few times over the years, but perhaps you’d like to see the first version of the same hardware. Meanwhile watch the quick heat up in action with a fuller explanation in the video below.

Continue reading “A Soldering LightSaber For The Speedy Worker”

Open Source Smart Smoker Brings The Heat (Slowly)

Conceptually, cooking on a grill is simple enough: just crank up the flames and leave the food on long enough for it to cook through, but not so long that it turns into an inedible ember. But when smoking, the goal is actually to prevent flames entirely; the food is cooked by the circulation of hot gasses generated by smoldering wood. If you want a well-cooked and flavorful meal, you’ll need the patience and dedication to manually keep the fuel and air balanced inside the smoker for hours on end.

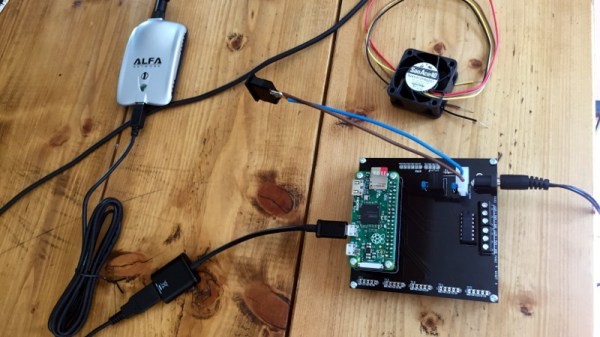
Or in the case of the Smokey Mc Smokerson, you just let the electronics handle all the hard stuff while you go watch TV. Powered by the Raspberry Pi Zero and a custom control board, this open source smoker offers high-end capabilities on a DIY budget. Granted you’ll still need to add the fuel of your choice the old fashioned way, but with automatic air flow control and temperature monitoring, it greatly reduces the amount of fiddly work required to get that perfect smoke.

[HackersHub] has been working on Smokey Mc Smokerson for a few months now, and are getting very close to building the first complete prototype. The initial version of the software is complete, and the classy black PCBs have recently arrived. Some simulations have been performed to get an idea of how the smoke will circulate inside of the smoker itself, built from a 55 gallon drum, but technically the controller is a stand-alone device. If you’re willing to makes the tweaks necessary, the controller could certainly be retrofitted to  commercially available smoker instead.

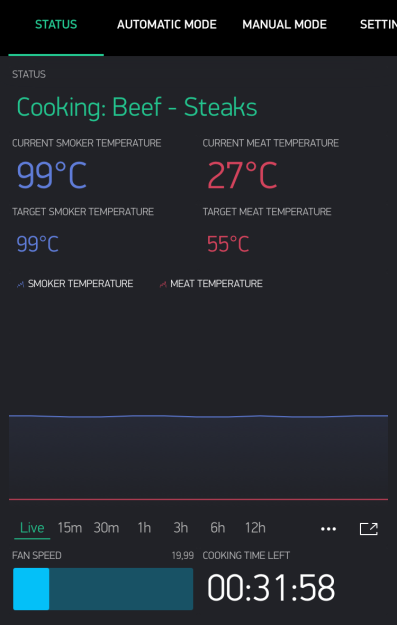
Ultimately, this project boils down to tossing a bunch of temperature sensors at the problem. The software developed by [HackersHub] takes the data collected by the five MAX6675 thermocouples and uses it to determine when to inject more air into the chamber using a PWM-controlled fan at the bottom of the smoker. As an added bonus, all those temperature sensors give the user plenty of pretty data points to look at in the companion smartphone application.

We’ve actually seen a fair number of technologically-augmented grills over the years. From this automotive-inspired “turbocharged” beast to a robotic steak flipper built out of PVC pipes, we can confidently say that not all hackers are living on a diet of microwaved ramen.

Temperature Controlled Fan Keeps Printer Cool

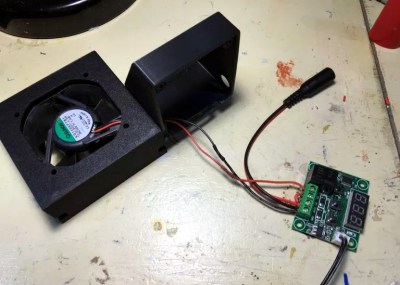
There are many annoying issues associated with desktop 3D printers, but perhaps none are trickier than keeping the machine at the proper temperature. Too cold, and printed parts can warp or fail to adhere to the bed. Too hot, and the filament can get soft and jam, or the motors will start clanking and missing steps. High-end industrial 3D printers have temperature-controlled enclosures for precisely this reason, but the best you can hope for with a printer that’s little more than some aluminum extrusion and an Arduino is a heated bed that helps but is no substitute for the real thing.

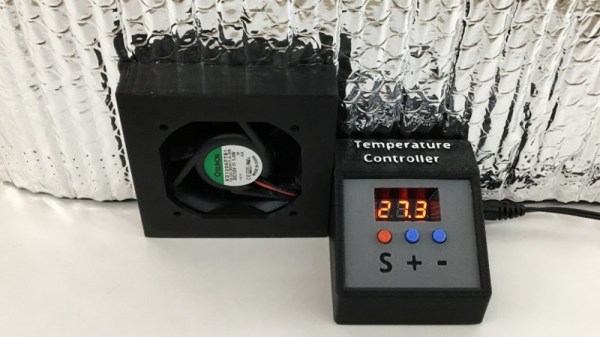
Like many 3D printer owners chasing perfect prints, [Steve Thone] ended up putting his machine into a DIY enclosure to help keep it warm. Unfortunately, there gets to be a point when things get a little too hot inside the insulating cube. To address this issue, he put together a simple but very elegant temperature controlled fan to vent the enclosure when the internal conditions go above the optimal temperature.

[Steve] picked up the digital temperature controller on Amazon for about $4 USD, and found a 60 mm fan in the parts bin. He then came up with a clever two-part printed enclosure that slides together to make the fan and controller one unit which he can place in a hole he cut in the enclosure.

A lot of attention was paid to the front panel of the device, including mid-print filament swaps to create highlighted text and separate buttons printed in different colors. The end result is a very professional looking interface that involved relatively little manual labor; often a problem when trying to come up with nice looking panels.

Whether it’s to keep from breathing ABS fumes, or to quiet the thing down enough so you can get some sleep, it looks like an enclosure of some type is becoming the latest must-have 3D printer accessory.

Probably The Simplest Electronic Temperature Controlled Soldering Iron

We’re all used to temperature controlled soldering irons, and most of us will have one in some form or other as our soldering tool of choice. In many cases our irons will be microprocessor controlled, with thermocouples, LCD displays, and other technological magic to make the perfect soldering tool.

All this technology is very impressive, but how simply can a temperature controlled iron be made? If you’re of an older generation you might point to irons with bimetallic or magnetic temperature regulation of course, so let’s rephrase the question. How simply can an electronic temperature controlled soldering iron be made? [Bestonic lab] might just have the answer, because he’s posted a YouTube video showing an extremely simple temperature controlled iron. It’s not the most elegant of solutions, but it does the job demanded of it, and all for a very low parts count.

He’s taken a ceramic housing from a redundant fuse holder, and mounted it on a metal frame to make a basic soldering iron holder into which the tip of his unregulated iron fits. To the ceramic he’s fitted a thermistor, which sits in the gate bias circuit of a MOSFET. The MOSFET in turn operates a relay which supplies mains power to the iron.

Temperature regulation comes as the iron heats the ceramic to the point at which the thermistor changes the MOSFET and relay state, at which point (with the iron power cut) it cools until the MOSFET flips again and restarts the process. You may have spotted a flaw in that it requires the iron to be in the holder to work, though we suspect in practice the thermal inertia of the ceramic will be enough for regulation to be reasonably maintained so long as the iron is returned to its holder between joints. Nobody is claiming that this temperature controlled iron is on a par with its expensive commercial cousins, instead it represents a very neat hack to conjure a useful tool from very few components. And we like that. Take a look at the full video below the break.

Continue reading “Probably The Simplest Electronic Temperature Controlled Soldering Iron”

DIY Hakko Soldering Station

[Julez] wanted another soldering station, so he decided to build one himself using a Hakko 907 soldering iron (or a clone). Of course, he could have bought a station, but anyone who reads Hackaday doesn’t require an explanation for why you would build something you could buy.

The station has two switchable outputs so you can use two different irons (perhaps with different tips) although you can only use one at a time. [Julez] bought a case with a transparent top from eBay and also got a digital temperature controller from eBay, which is the heart of the project. As for the actual iron, you can find clone versions of the 907 handpiece for well under $10.

Because the station uses a module, the actual wiring isn’t terribly difficult. There’s a pot to control the temperature and the controller directly connects to the iron’s heating element and temperature probe. There’s also a standby switch that reduces the temperature using a fixed resistor in series with the control pot.

Continue reading “DIY Hakko Soldering Station”

Hack Your Stove In The Name Of Homebrewing

stovehack

[Tim] is a homebrewer. Temperature profiling during the mashing process is apparently even more critical than the temperature curve of a solder reflow oven. His stove just wasn’t giving him the level of control he needed, so [Tim] added a PID temperature controller to his stove. Electric stoves generally use an “infinite switch” to control their burners. Infinite switches are little more than a resistor and a bimetallic strip in a single package. Not very good for accurate temperature control. The tricky part of this hack was to make it reversible and to have little visual impact on the stove. A stove top with wires hanging out would not only be dangerous electrically, it would also create a hazardous situation between [Tim] and his wife.

[Tim’s] brewpot only fit on the stove’s largest burner, so that was the only one that needed PID control. To keep things simple, he kept the commercial PID controller outside the stove’s enclosure. Inside the stove, [Tim] added a solid state relay. The relay is mounted to a metal plate, which screws to the back of the stove. The relay control lines run to an audio jack on the left side of the stove. Everything can be bypassed with a switch hidden on the right side of the stove. In normal operation, the switch is in “bypass” mode, and the stove works as it always has. When mashing time comes along, [Tim] flips the switch and plugs the jack into his PID controller. The temperature sensor goes into the brewpot itself, so no stove modification was needed there.

The end result is a very clean install that both [Tim] and his wife can enjoy.  Save a few bottles for us, [Tim]!