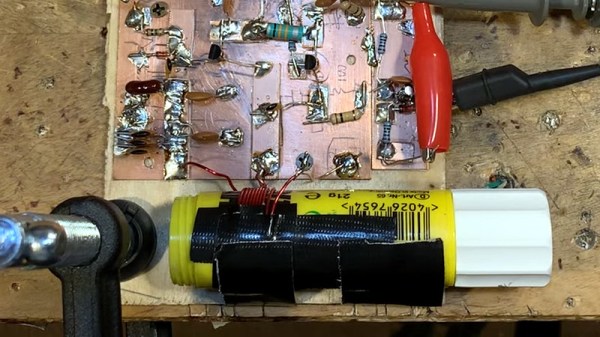
For over a century now, radio amateurs have made tuned circuits using a coil of wire and a variable capacitor. In recent decades the supply of variable capacitors has dwindled, as SDR technology has supplanted the traditional tuning capacitor. No more tuned circuits for the radio amateurs? Not quite, as [Bill Meara N2CQR] shows us in the video below the break by making variable inductors using permeability tuning. This is hardly high-tech, the major component is as simple as a glue stick.
A permeability tuned inductor has a core that is moved in and out of its center by means of a screw. A glue stick has a glue core on a lead screw from a knob at its end, so an old glue stick with the glue replaced by a ferrite ring makes a reasonable permeability tuned former. The coil is wound on its outside, and when assembled into an oscillator it gives a useful tuning range. This is hardly a new idea as permeability tuning could be found in car radios and TV tuners among other applications back in the day, but it’s still a good trick to bear in mind.
We’ve featured plenty of Bill’s videos before here at Hackaday, most recently tracking down an unusual early TV.
Many of us now outsource PCB production to board houses overseas, which offer high-quality boards with increasingly impressive turnaround times. You might still brew up your own PCB, though, and a reader found this great old hack from [William Hare] that might be worth a look.
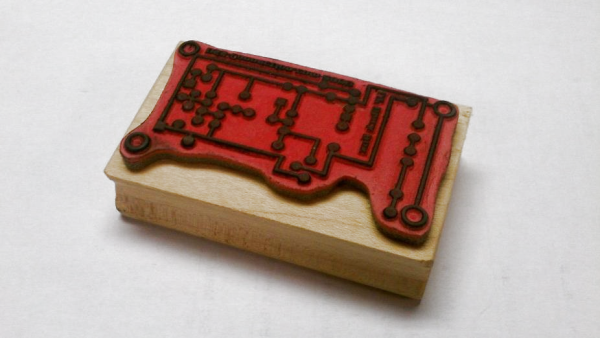
Forget toner transfer or marker pens — this build is all about speed. [William] decided to use a rubber stamp to quickly transfer ink to a copper board that can then be etched to produce a PCB. It’s simple and straightforward enough. We’ve used the same technique for silkscreen and pad art, but never as an etch resist.
The trick is to make several rubber stamps with different circuit elements, though. The genius part is that you can then assemble a PCB by simply stamping down the various circuit components you need. The boards will still need to be drilled if you’re working with through-hole parts, but tipster [Shri] notes that the technique is super useful for producing single-sided surface mount boards.
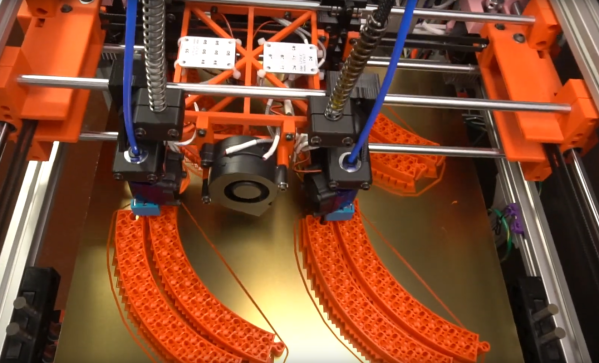
While the polygraph is colloquially associated with pseudoscientific lie detector tests, the actual invention of the first polygraph was designed to mechanically duplicate the pen strokes of someone writing. Famously, a polygraph was used by former US President Thomas Jefferson in his “modern office”, a replica of which still sits in the Smithsonian museum. Few of us have a need for a pen-based polygraph anymore, but inspiration from the centuries-old invention can still be gleaned from the machine, like in this 3D printer which can output four identical prints at once.
The printer is a Core XY design with four separate print heads, which are all locked together. The printer behaves as if there is a single print head which keeps it simpler than it otherwise could be. Some extra consideration needs to be paid to the print bed to ensure it’s level and flat, and it also includes a unique Z-axis designed to prevent Z-banding from poor quality leadscrews. It has a fairly wide print area, but a noticeable restriction is that it’s essentially quartered, so while it can produce many parts at once, it can’t produce a single part that uses the entire area of the print bed.
Every printed part used to make this printer was designed by [Rick] in OpenSCAD. He also built a custom electronics board with the printer drivers, and all other associated circuitry in KiCad. For anyone who prints large volumes of parts, this might be just the trick to increase output without having to manage more printers. If you already have more printers and need an easier way to manage them all, take a look at this dedicated Raspberry Pi set up to do just that.
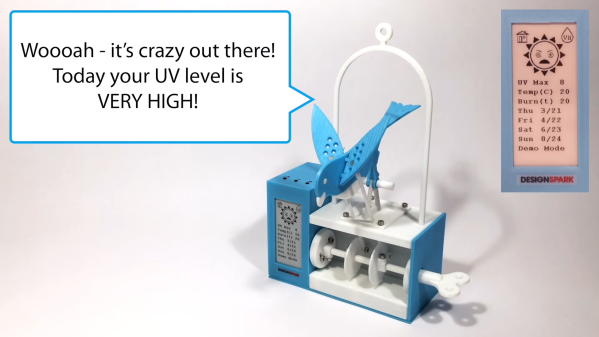
UV rays are great at helping us generate vitamin D, but they can also be harmful, causing sunburn and even melanoma. To help kids keep track of the UV index in his local area, [Jude Pullen] created the UV Budgie.
The build is based around an Arduino Nano 33 IoT board, which queries the Met Office’s API to determine the UV level in the area. The relevant data is then displayed on a small e-ink display, with cute little sun characters telling you about the prevailing conditions. It also announces the current risk level with recorded voice samples, advising on whether precautions should be taken, such as using sunscreen or sheltering inside for the worst days. Plus, there’s a bird that flaps its wings to announce an update, actuated by a small servo in the base.
It’s a fun build that should help [Jude] and his family remain sun safe in the summer. [Jude] notes the build could also be reprogrammed to share other warnings, too. APIs to query local air quality or radiation levels are just some of the ideas that come to mind. Video after the break.
A simple frame allows the controller to be held near the mouth for use.
The build is based on a simple USB gamepad. A mouse emulator program is used to turn the thumbstick movements into mouse movements, and button presses into mouse clicks.
The trick is that the thumbstick is turned into a mouth-activated joystick, making the device perfect for those with limited-to-no movement in their arms. This is achieved with a pen body used to extend the joystick so it can be readily actuated with the mouth. A custom puff-switch is also integrated into the mouth-joystick, built out of a balloon, bottle caps, and a micro switch. This enables the user to click on things without the need for another button.
Overall, it’s a great hack that turns cheap, everyday components into a useful piece of accessibility hardware. As a bonus, it can be built using only simple tools. [Olman] notes there’s no need for a 3D printer or other advanced parts or tools to build the device.
Seasoned Hackaday readers may have noticed over the years, that some of us who toil under the sign of the Jolly Wrencher have a penchant for older tech. After all, what’s not to like in a dirt cheap piece of consumer electronics from decades past that’s just begging for a bit of hardware hacking? For me at the moment this is manifesting itself in a selection of 8mm movie cameras, as I pursue a project that will eventually deliver a decent quality digital film cartridge.
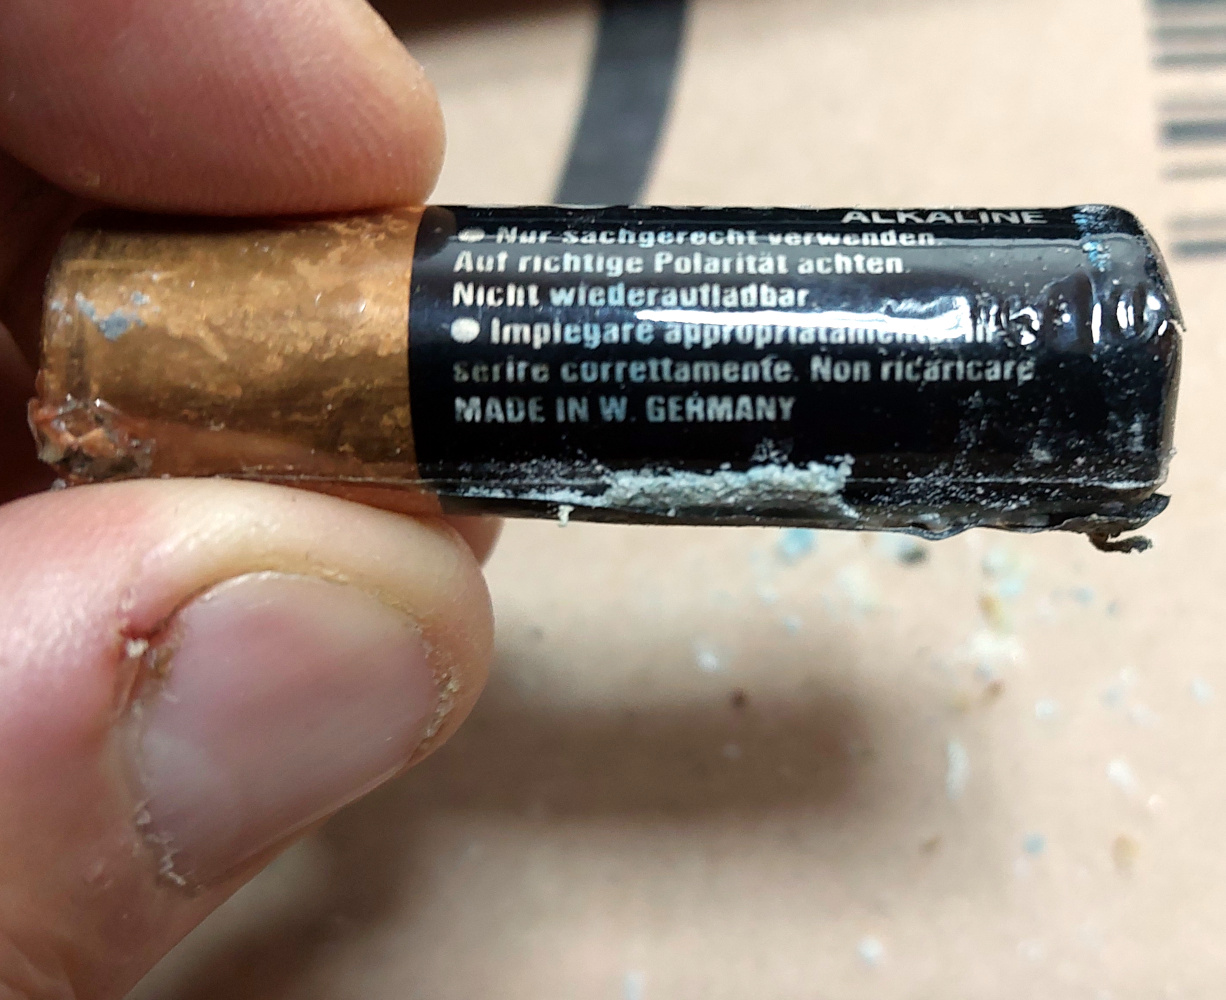
When A Cell Is From West Germany, You Know It’s Old
“Made in West Germany”
The trouble with scouring junk shops for a technology superseded four decades ago is that the cameras I find have in most cases been sitting in a drawer since the early 1980s. They were a valuable item back in the day so of course they were hung on to, then they were forgotten about until one day the grown-ups who were once the kids featured in the home movies are clearing the house, and they start their journey to my bench.
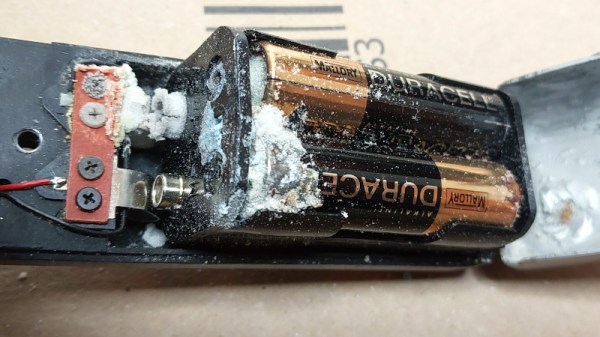
The problem is that very few owners of 8mm cameras had the good sense to remove their batteries before putting them away, so I inevitably end up with a battery compartment full of crusty 1980s Duracells and rusted contacts. This has left me curious, just what has happened here and how can I fix it?
What’s The Leaky Stuff?
Construction of a zinc-manganese “alkaline” cell. Tympanus, Public domain.
Non-rechargeable cells come in a variety of chemistries, but the commercial ones we’re most familiar with are zinc-carbon “dry cells”, and “Alkaline” zinc-manganese dioxide cells. The zinc-carbon variety are becoming less common here in 2022 and have an acidic zinc chloride or ammonium chloride electrolyte, while the alkaline cells have a higher capacity and a basic potassium hydroxide electrolyte. They both have different failure modes that result in the leaky cells, so it’s worth taking a look at each one.
The failure mode of a zinc-carbon cell is a chemical one, the acidic electrolyte reacts with the zinc can anode, and eventually eats through it. The leaking electrolyte then attacks the surrounding circuitry and battery clips. It’s hardly a concentrated acid, but it’s enough to do plenty of damage over the years.
Meanwhile an alkaline cell has a build-up of hydrogen as it degrades. It incorporates a vent which allows the hydrogen to escape, however the hydrogen pressure can instead force the electrolyte out through this vent. The electrolyte will then corrode the battery terminals and any other electronics it touches. A feature of alkaline cell leakage is a white crust, this is potassium carbonate formed from the reaction between the potassium hydroxide electrolyte and carbon dioxide in the air.
The Global Parts Bin To The Rescue
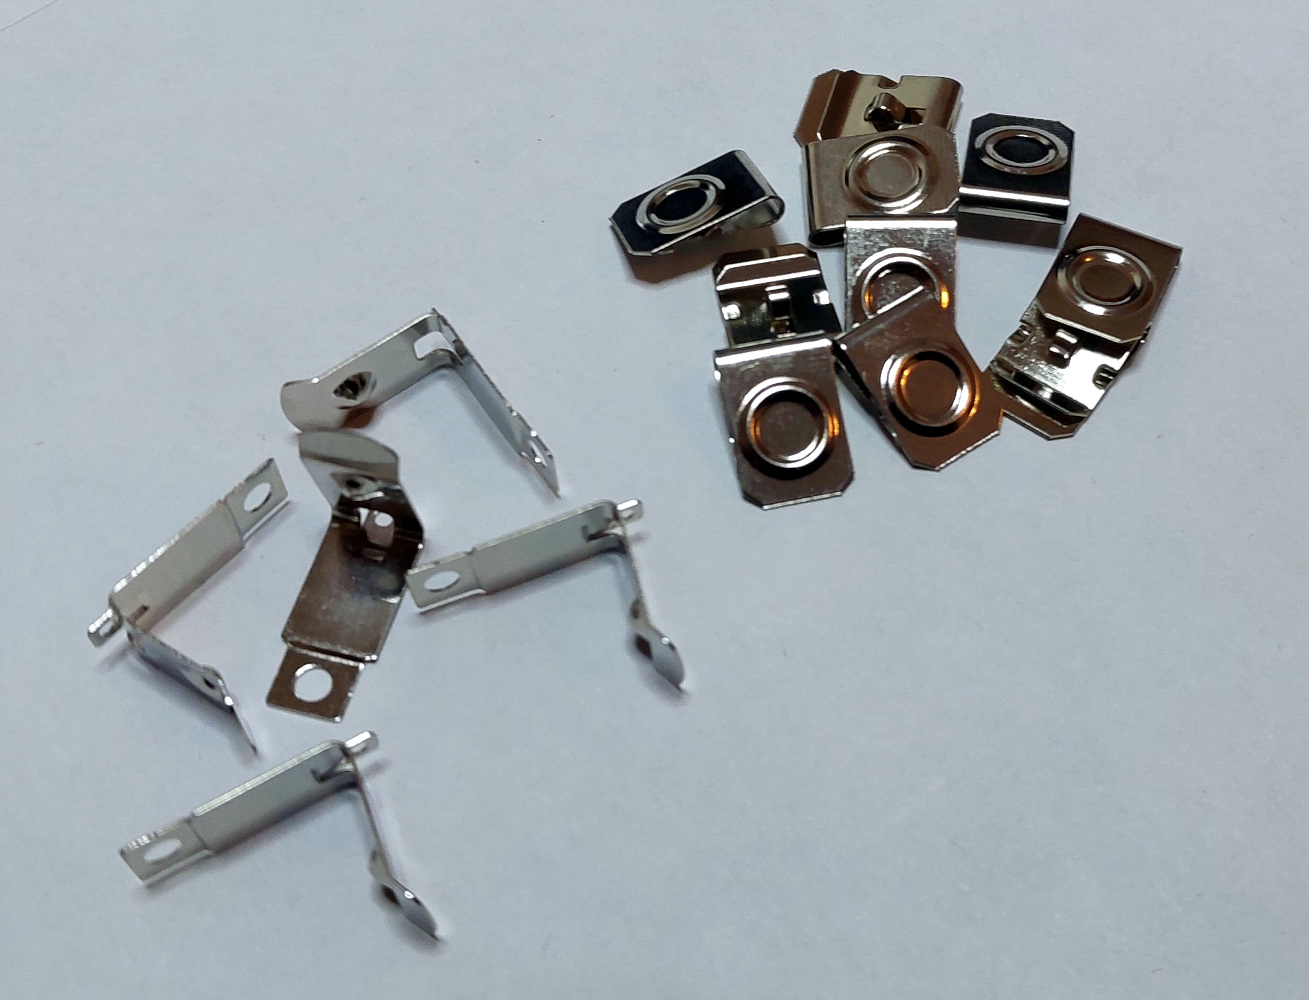
Fresh and new battery clips for AA holders
How much damage has been done is usually a function of how long the leaking batteries have been in the device. Sometimes one is lucky and the battery contacts are salvageable, otherwise they are too far gone and a replacement has to be found. A past me tried all sorts of home-made solutions using stiff copper wire and other materials, but today thanks to the miracle of international commerce it’s usually possible to find a contact the same as or very similar to the old one. A quick AliExpress search on terms such as “AA battery spring” will return numerous options, and it’s simply a case then of paging through to find the one you need on the terms you like.
So those of you who like retro tech will find something familiar in the last few paragraphs, but there’s a lesson to be found in dealing with ancient batteries. Here in 2022 we’re more likely to have lithium polymer cells in our consumer devices and so the need to keep a pile of Duracells at hand is reduced. But the thought of today’s equivalent of a Super 8 camera lying forgotten in a drawer for decades with a cheap li-po pouch cell inside it is far more frightening than something with some crusty manganese cells. Have we just found the root cause of house fires in the 2040s?
A casual understanding of how AM radio works is pretty easy to come by, and standard FM is only a little more complicated. Things can go off the tracks a bit with stereo FM, though — figuring out how they squeeze two separate audio tracks onto one radio signal is a bit of a head-scratcher. In that case, wrapping your head around the concept might be helped by mocking up a stereo FM signal with an arbitrary waveform generator and a little bit of Python.
Not that [Sebastian] of Baltic Lab was unfamiliar with multiplex FM theory, mind you. As he explains it, his goal was to generate a valid stereo FM signal with a different pure tone on each channel, 700 Hz on the left and 2,200 Hz on the right. Luckily, [Sebastian] has a nice AWG, the Siglent SDG1032X, which has an Ethernet connection that can be used to control it remotely along with PyVISA, a Python package for controlling instruments using the Virtual Instrument Software Architecture protocol.
The meat of this project, and what really helps drive home the concept of putting multiple audio signals onto an FM signal, lies in the Python code that generates the component parts. [Sebastian] does a great job explaining how he programatically generates the sum and difference signals along with the 19 kHz pilot tone, and puts them all together into one waveform. The output of the program is used to generate a series of values that are sent to the arbitrary waveform generator, which outputs the desired FM signal. Looking at the output on a spectrum analyzer, the two audio tones are clearly visible, as are the attenuated pilot tone and some other spikes a little further up.
Just add an antenna to the setup and you’d have the world’s dullest FM radio station — but at least it’d be in stereo. Or if you want to check out the origin story for FM radio, we’ve got something for that too.