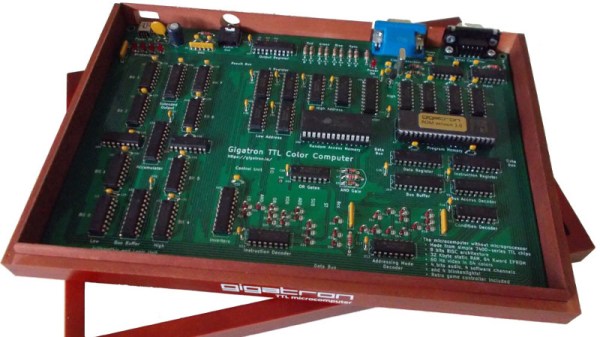
How The Gigatron TTL Microcomputer Works

About a year ago when Hackaday and Tindie were at Maker Faire UK in Newcastle, we were shown an interesting retrocomputer by a member of York Hackspace. The Gigatron is a fully functional home computer of the type you might have owned in the early 1980s, but its special trick is that it does not contain a microprocessor. Instead of a 6502, Z80, or other integrated CPU it only has simple TTL chips, it doesn’t even contain the 74181 ALU-in-a-chip. You might thus expect it to have a PCB the size of a football pitch studded with countless chips, but it only occupies a modest footprint with 36 TTL chips, a RAM, and a ROM. Its RISC architecture provides the explanation, and its originator [Marcel van Kervinck] was recently good enough to point us to a video explaining its operation.

It was recorded at last year’s Hacker Hotel hacker camp in the Netherlands, and is delivered by the other half of the Gigatron team [Walter Belgers]. In it he provides a fascinating rundown of how a RISC computer works, and whether or not you have any interest in the Gigatron it is still worth a watch just for that. We hear about the design philosophy and the choice of a Harvard architecture, explained the difference between CISC and RISC, and we then settle down for a piece-by-piece disassembly of how the machine works. The format of an instruction is explained, then the detail of their 10-chip ALU.

The display differs from a typical home computer of the 1980s in that it has a full-color VGA output rather than the more usual NTSC or PAL. The hardware is simple enough as a set of 2-bit resistor DACs, but the tricks to leave enough processing time to run programs while also running the display are straight from the era. The sync interval is used to drive another DAC for audio, for example.

The result is one of those what-might-have-been moments, a glimpse into a world in which RISC architectures arrived at the consumer level years earlier than [Sophie Wilson]’s first ARM design for an Acorn Archimedes. There’s no reason that a machine like this one could not have been built in the late 1970s, but as we know the industry took an entirely different turn. It remains then the machine we wish we’d had in the early 1980s, but of course that doesn’t stop any of us having one now. You can buy a Gigatron of your very own, and once you’ve soldered all those through-hole chips you can run the example games or get to grips with some of the barest bare-metal RISC programming we’ve seen. We have to admit, we’re tempted!

Continue reading “How The Gigatron TTL Microcomputer Works”

The 7400 Quad 2-Input NAND Gate, A Neglected Survivor From A Pre-Microprocessor World

There are a range of integrated circuits that most of us would regard as definitive examples of their type, devices which became the go-to for a particular function and which have entered our collective consciousness as electronics enthusiasts. They have been in production since the early days of consumer integrated circuits, remaining in use because of a comprehensive understanding of their characteristics among engineers, and the job they do well.

You can probably name the ones I’m going to rattle off here, the µA741 op-amp designed by David Fullagar for Fairchild in 1968, the NE555 timer from Hans Camenzind for Signetics in 1971, and a personal favourite, Bob Widlar’s µA723 linear regulator for Fairchild in 1967. There may be a few others that readers will name in the comments, but there’s one that until today it’s likely that few of you would have considered. Texas Instruments’ 5400 and 7400 TTL quad 2-input NAND gate has been in continuous production since 1964 and is the progenitor of what is probably the most numerous breed of integrated circuits, yet it doesn’t trip off the tongue when listing famous chips, and none of us can name its designer. So today we’re turning the spotlight on this neglected piece of silicon, and trying to bring it the adulation it deserves. Continue reading “The 7400 Quad 2-Input NAND Gate, A Neglected Survivor From A Pre-Microprocessor World”

Behold The WT-220: A ‘Clever’ VT-220 Terminal

[John Whittington] failed to win a bid for an old VT-220 serial terminal on eBay, so he decided to make his own version and improve it along the way. The result is the Whitterm-220 (or WT-220) which has at its core a Raspberry Pi and is therefore capable of more than just acting as a ‘dumb’ serial terminal.

Rear of the WT-220 with paint-filled laser engraving and all necessary connectors.

The enclosure is made from stacked panels of laser-cut plywood with an acrylic plate on the back for labels and connectors, where [John] worked paint into the label engravings before peeling off the acrylic’s protective film. By applying paint after laser-engraving but before peeling off the film, it acts as a fill and really makes the text pop.

Near the front, one layer of clear acrylic among the plywood layers acts as a light guide and serves as a power indicator, also doing double duty as TX/RX activity lights. When power is on, that layer glows, serving as an attractive indicator that doesn’t interfere with looking at the screen. When data is sent or received, a simple buffer circuit tied to the serial lines lights up LEDs to show TX or RX activity, with the ability to enable or disable this functionality by toggling a GPIO pin. A video overview is embedded below, where you can see the unit in action.

Continue reading “Behold The WT-220: A ‘Clever’ VT-220 Terminal”

Huge 74181 Is A Classic ALU You Can Actually Understand

You can no longer buy a brand-new 74181, they’ve been out of production for years. All is not lost though, for [Dave’s Dev Lab] have created a facsimile of one on a printed circuit board, using modern single-gate 74-series chips.

Why on earth would you want an oversized replica of an outdated logic chip from nearly five decades ago, we hear you ask? The answer lies in education. If you were to embark on learning about the internals of a microprocessor by taking a modern example such as the one that powers the device on which you are reading this, you would find it to be a daunting task. Over six decades of progress in computer technology have delivered the performance enhancements that put a supercomputer in your smartphone, but at the expense of a contemporary microprocessor being an extremely complex machine which you can’t peer into for any level of understanding.

Simple enough to work your way through the logic

The starting point for the student of microprocessor internals often lies in the past. The technology of the early 1970s holds the fundamentals from which a modern processor can be understood, but remains simple enough to grasp in its entirety as a beginner. Registers, instruction decoders, counters, and an arithmetic/logic unit, or ALU. And for decades the 74181, as an all-in-one 4-bit ALU on a chip that you might have found in a minicomputer at the turn of the 1970s, represented the most convenient way to teach the operation of these devices. Electronic engineers and computer scientists of all ages will have encountered them as they gained their qualifications.

The PCB version of the 181 faithfully follows the original, but with modern 74LVC gates laid out as they would be in the circuit diagram of the chip, and LEDs to show logic state at the different parts of the circuit. Thus when it is used to teach ALU operation it can show every part of the device in detail in a way a real 74181 would never have done.

If the 74181 has caught your interest, we’ve previously brought you [Ken Shirriff]’s reverse engineering of the device in detail using breathtaking images of the silicon.

Blast From The Past With Space Station PROM Reader

The Ursa Major Space Station SST282 is a dinosaur of a digital reverb.  Okay, so maybe 1978 isn’t ancient yet, but it is getting to the point where one has to worry about the possibility of component failure.  At least that’s what [Obsoletetechnology] thought when they created a backup of its memory contents.

As can be seen from some of Hackaday’s previous articles, a part does not have to be an older one to fail.  However, there is no such thing as being too paranoid when it comes to older parts reaching their lifetime.  Especially when there is valuable memory involved.  Each bit of PROM memory is locked by a fuse on its location grid to store permanent data.  To be able to read this and collect the respective data, a Raspberry Pi 3 PROM reader was created.

The SST282 uses 3 TTL-level 74xx series Schottky PROM memories on board that hold RAM lookup tables.  In the case that these failed, all of the subsequent information would be lost since there are no surviving memory dumps online.  Fortunately we are interested only in gathering their contents, so the PROM reader schematic is fairly rudimentary.  The chip’s address and data buses connect to a Pi’s GPIO header, and the only other thing to note is a 74LS541 TTL level shifter that converts the Pi’s 3.3V output to the PROM’s 5V TTL level.

Continue reading “Blast From The Past With Space Station PROM Reader”

Hackaday Prize Entry: A Mess Of VGA On A Breadboard

Before all our video games came over the Intertubes, before they were on CDs, and before they were on cartridges, video games were all discrete logic. Pong was the first and you can build that out of several dozen logic chips. The great [Woz] famously built Breakout out of 44 simple chips.

For [Marcel]’s entry to the Hackaday Prize, he’s taking the single board microprocessor-less computer to the next level. He’s building a multi-Megahertz 64-color computer on a breadboard. What’s the capacitance of a breadboard? Just ask [Marcel].

The design of this disintegrated computer has just about everything you could want in a discrete CPU. There is no microcontroller or complex chips like the 74181 ALU, there’s pipelining with sometimes two instructions per clock, decoding with diodes, and a 60 Hz, 64 color VGA output and four sound channels. There’s only about 40 TTL chips on this board.

The project logs for this Hackaday Prize entry are a treat in themsleves, ranging from topics to the implementation of NES controllers to getting rid of the breadboard and turning this computer into something like a vintage game system, but with a custom CPU and instruction set. It’s an amazing build, and an awesome project for the Hackaday Prize.

Continue reading “Hackaday Prize Entry: A Mess Of VGA On A Breadboard”

Homemade Computer From 1970s Chips

Sometimes it starts with a 555 timer and an op-amp. Other times with a small microcontroller. But the timing’s not so great and needs a dedicated timing crystal circuit. And maybe some more memory, and maybe the ATtiny should be swapped out for some 74LS-series chips. And now of course it needs video output too. Before you know it, you’re staring at a 40-chip computer that hearkens back to a simpler, yet somehow more complex, time of computing. At least that’s where [Marcel] is with his breadboard computer based on 1970s-era chips.

For what it does, this homebrew computer is relatively simple and straightforward. It gets 8 bits of processing power from 34 TTL chips. Another 6 round out the other features needed for the computer to operate. It is capable of rendering 64 colors in software and has more than enough memory for a computer of this sort. So far the only recurring problem [Marcel] has had has been with breadboard fatigue, as some of the chips keep popping out of the sockets.

This is a great project for anyone interested in homebrew or 8-bit computing, partially because of some of the self-imposed limitations that [Marcel] imposed on himself, like “only chips from the 70s”. It’s an impressive build on its own and looks to get much better since future plans call for a dedicated PCB to solve the issue with the worn-out breadboards. If you’re already invested in a project like this, don’t forget that the rabbit hole can go a little deeper: you can build a computer out of discrete transistors as well.