We all know the drill when it comes to online security — something you know, and something you have. But when the “something you have” is a two-factor token in a keyfob at the bottom of a backpack, or an app on your phone that’s buried several swipes and taps deep, inconvenience can stand in the way of adding that second level of security. Thankfully, this “2FA Sidecar” is the perfect way to lower the barrier to using two-factor authentication.
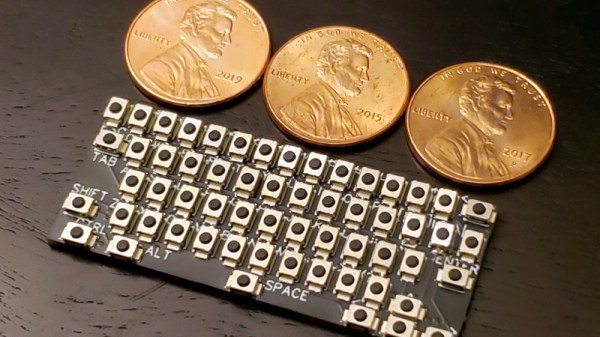
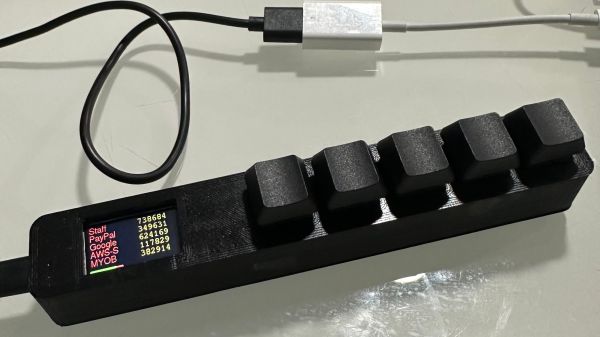
That’s especially true for a heavy 2FA user like [Matt Perkins], who typically needs to log in and out of multiple 2FA-protected networks during his workday. His Sidecar is similar in design to many of the macro pads we’ve seen, with a row of Cherry MX key switches, a tiny TFT display — part of an ESP32-S3 Reverse TFT Feather — and a USB HID interface. Pressing one of the five keys on the pad generates a new time-based one-time password (TOTP) and sends it over USB as typed keyboard characters; the TOTP is also displayed on the TFT if you prefer to type it in yourself.
As for security, [Matt] took pains to keep things as tight as possible. The ESP32 only connects to network services to keep the time synced up for proper TOTP generation, and to serve up a simple web configuration page so that you can type in the TOTP salts and service name to associate with each key. He also discusses the possibility of protecting the ESP32’s flash memory by burning the e-fuses, as well as the pros and cons of that maneuver. The video below shows the finished project in action.
This is definitely a “use at your own risk” proposition, but we tend to think that in the right physical environment, anything that makes 2FA more convenient is probably a security win. If you need to brush up on the risks and benefits of 2FA, you should probably start here.
Continue reading “Hackaday Prize 2023: Sleek Macro Pad Makes 2FA A Little Easier”