Tricking Duck Hunt To See A Modern LCD TV As CRT

A must-have peripheral for games consoles of the 1980s and 1990s was the light gun. A lens and photo cell mounted in a gun-like plastic case, the console could calculate where on the screen it was pointing when its trigger was pressed by flashing the screen white and sensing the timing at which the on-screen flying spot triggered the photo cell.

Unfortunately light gun games hail from the era of CRT TVs, they do not work with modern LCDs as my colleague [Will Sweatman] eloquently illustrated late last year. Whereas a CRT displayed the dot on its screen in perfect synchronization with the console output, an LCD captures a whole frame, processes it and displays it in one go. All timing is lost, and the console can no longer sense position.

[Charlie] has attacked this problem with some more recent technology and a bit of lateral thinking, and has successfully brought light gun games back to life. He senses where the gun is pointing using a Wiimote with its sensor bar on top of the TV through a Raspberry Pi, and feeds the positional information to an Arduino. He then takes the video signal from the console and strips out its sync pulses which also go to the Arduino. Knowing both position and timing, the Arduino can then flash a white LED stuck to the end of the light gun barrel at the exact moment that part of the CRT would have been lit up, and as far as the game is concerned it has received the input it is expecting.

He explains the timing problem and his solution in the video below the break. He then shows us gameplay on a wide variety of consoles from the era using the device. More information and his code can be found on his GitHub repository.

Continue reading “Tricking Duck Hunt To See A Modern LCD TV As CRT”

Calculator Built In Super Mario Level. Mamma Mia!

Most people use the Super Mario Maker to, well, create Super Mario game levels. [Robin T] decided to try something a little different: building a working calculator. Several hundred hours later, he created the Cluttered Chaos Calculator, which definitely lives up to the name. What this Super Mario level contains is a 3-bit digital computer which can add two numbers between 0 and 7, all built from the various parts that the game offers. To use it, the player enters two numbers by jumping up in a grid, then they sit back and enjoy the ride as Mario is carried through the process, until it finally spits out the answer in a segment display.

It’s not going to be winning any supercomputer prizes, as it takes about two minutes to add the two digits. But it is still an incredibly impressive build, and shows what a dedicated hacker can do with a few simple tools and a spiny shell or two.

Continue reading “Calculator Built In Super Mario Level. Mamma Mia!”

Wii U Laptop

Stuffing A Wii U Into A Laptop

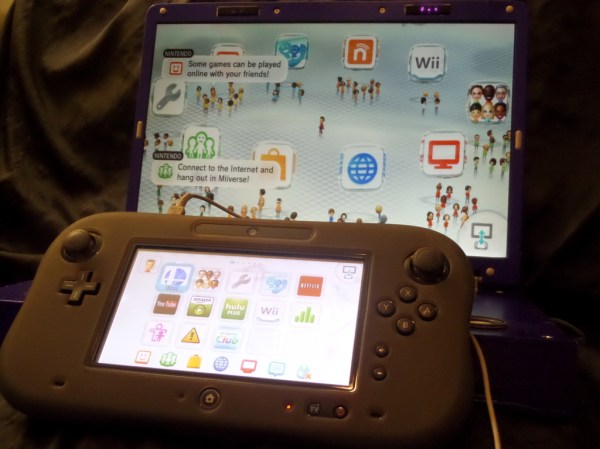
For some reason, a lot of hackers seem to have an obsession with jamming video game consoles into smaller boxes with screens. It’s more portable yes, but be honest — how much use is it actually going to get? Regardless, [RedmagnusX] has just finished up what might be the first Wii U laptop.

He’s using a 17″ laptop screen from a Dell XPS M1730, which he’s combined with a case of his own design that fits the Wii U’s guts. To interface the screen from the Wii, he picked up a driver-board from NJYtouch. He’s also managed to cram the power regulator into the laptop, and a few small speakers for audio output. He also integrated the sensor bar into the top of the unit. Not too shabby!

It reminds us a lot of this older Xbox 360 laptop mod, and looks surprisingly similar. However our favorite case mod still has to be the PlayBox — [Eddie Zarick’s] beautiful combination unit featuring an Xbox One and the PS4 in a single 22″ box.

[Thanks for the tip Jon!]

NES Controller

Turning A Classic NES Controller Into A Bluetooth Controller

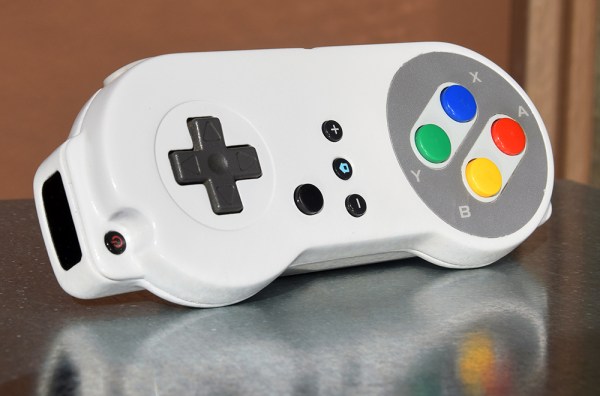
[Pietronet] is like many of us in that he enjoys playing some classic console video games from time to time. He usually plays them on his PC using a Wiimote as a controller. The Wiimote has most of the classic buttons in a comfortable configuration. Plus, it’s got Bluetooth built-in, which makes it easy to pair up to your PC. [Pietronet] decided to take it a step further, though. He managed to cram all of the guts from a Wiimote inside of the original NES controller for a more authentic feel.

The first step was to crack open the Wiimote and locate pads for each button. Once they were located, [Pietronet] used a Dremel to cut the board into a smaller size. He cut off part of the circuit board that contained the directional pad as well as the connector for the nunchuck. Next he had to solder very thin wires to each of the button pads he located earlier.

The original NES controller has a very limited number of buttons, and [Pietronet] wanted to modify the original controller as little as possible. Therefore, he attached a magnetic reed switch to the Wiimote’s sync button. This way if he ever needs to sync the Wiimote to a new console, he can do it by holding a magnet in the right place. This is a function that isn’t often used, so the inconvenience should be negligible.

The next step was to connect the buttons from the original NES controller up to the wires that were added to the Wiimote. [Pietronet] left the original circuit board mostly intact. He did have to cut a small chunk of it away in order to make room for two AAA batteries, but this didn’t affect the functionality of the controller.

The inside of the NES controller had to be cleaned out of various standoffs and plastic bits to make room for all of the extra components. The Wiimote has an LED to indicate that the controller is connected properly. [Pietronet] soldered a red SMD LED in its place on the end of two thin wires. This LED was then placed on the bottom left side of the directional pad. It’s visible through a translucent filter. This allows [Pietronet] to see when the NES controller is synced up properly.

The case fits back together and everything is held in place. The result is what looks and feels like a classic NES controller, only this one has Bluetooth connectivity and a vibration motor. Check out the video demonstration below to get an idea of what it looks like in use. Continue reading “Turning A Classic NES Controller Into A Bluetooth Controller”

Wiimote Controlled Extermination: Dalek-Style

Dalek Build

Convention-goers have likely strolled past a number of Daleks: the aliens drive around the event space, spouting threats of extermination and occasionally slapping folks with a rotating eyestalk. [James Bruton] has been hard at work building this Wii-remote-controlled Dalek with his fellow hackers at the SoMakeIt Hackerspace (you may remember our write-up from earlier this year).

Most Dalek builds seat a driver inside the body at the helm of a salvaged electric wheelchair, where they plunk around using a joystick control and simmer in an increasingly potent aroma. This version started like most, with a wooden structure from plans sourced at Project Dalek. Inside, however, [James] and his crew have tapped into the wheelchair’s motor controller to feed it a PWM signal from an Arduino Shrimp, which is linked to a Raspi. The Pi receives a Bluetooth signal from a Wiimote, and, through their custom Python script, directs the Dalek with ease.

They’re still working on finishing the Dalek’s body, but they’re using some clever tactics to push onward: using a 3D-printer to solve some of the nuanced styling choices. They’ve uploaded a gallery with additional photos on Facebook, and you can watch them goofing around with their creation (losing their balance and nearly exterminating themselves) in a video after the break.

Continue reading “Wiimote Controlled Extermination: Dalek-Style”

Star Wars Training Droid Uses The Force

Star Wars Training Droid

We all know the scene, Obi-Wan Kenobi gives Luke a helmet with the blast shield down. He tells Luke “Your eyes can deceive you. Don’t trust them. Stretch out with your feelings!” Easy for Obi-Wan to say – he doesn’t have a remote training droid flying around and shooting at him. [Roeland] and his team are working to create a real-life version of the training droid for Hackday’s Sci-Fi contest.

The training droid in Star Wars may not have had the Force on its side, but it was pretty darn agile in the air. To replicate this, the team started with a standard Walkera Ladybird micro quadcopter. It would have been simple to have a human controlling the drone-turned-droid, but [Roeland and co] wanted a fully computer controlled system. The Ladybird can carry a small payload, but it just doesn’t have the power to lift a computer and sensor suite. The team took a note from the GRASP Lab and used an external computer with a camera to control their droid.

Rather than the expensive motion capture system used by the big labs, the team used a pair of Wii Remote controllers for stereo vision. A small IR LED mounted atop the droid made it visible to the Wii Remotes’ cameras. A laptop was employed to calculate the current position of the droid. With the current and desired positions known, the laptop calculated and sent commands to an Arduino, which then translated them for the droid’s controller.

Nice work guys! Now you just have to add the blaster emitters to it!

Continue reading “Star Wars Training Droid Uses The Force”

Using The Wii U Controller With Everything

It’s been just a bit over a year since the Wii U was released along with the extremely impressive Wii U controller. With a D-pad, analog sticks, accelerometer, gyroscope, magnetometer, camera and 6.2 inch touchscreen, this controller is ripe for a million and one projects ranging from FPV quadcopters and robots to things we can’t even think of yet. At this year’s Chaos Communication Congress, [booto], [delroth], and [shuffle2] demonstrated how they cracked open the Wii U controller’s encryption allowing for Wii U controller ’emulation’ and giving us full documentation on how the whole thing works.

The guys started on their reverse engineering journey by dumping all the flash chips found on the controller’s board. In those binary blobs, they found Nintendo used a truly ingenious way of obfuscating the WiFi keys used to connect the controller to the Wii: rotate left by three. To be fair to Nintendo engineers, it was secure until someone figured it out.

Connecting the controller to a PC over WiFi is only half the battle, though. Initial information from the Wii U launch suggested Nintendo used Miracast for all the I/O between the controller and the console. This isn’t the case; instead the video, audio, camera, and button input are non-standard but very simple protocols. The hardest to break into was the video display for the touchscreen, but the guys discovered it’s pretty much H.264. After getting around some Nintendo weirdness, it’s possible to display video on the controller.

The guys have put together a small, extremely alpha library that comes with all the demos, documentation, and reverse engineering information. There’s a large wish list of what this library should include, but now that the information is public, it might be the time to pick up a Wii U.

Video of the talk below, here’s the presentation slides, and a demo of emulating a Wii U game pad on a PC.

Continue reading “Using The Wii U Controller With Everything”