A Gambler’s Bottle Opener

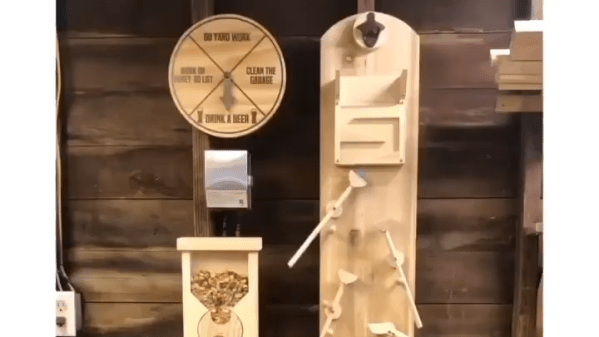
People can certainly become creative when it comes to completing simple tasks like that of removing a bottle cap. Woodworker [Matt Thompson] has come up with a next-level bottle opener that not only does the job but also functions as a game of chance. (Video, embedded below.)

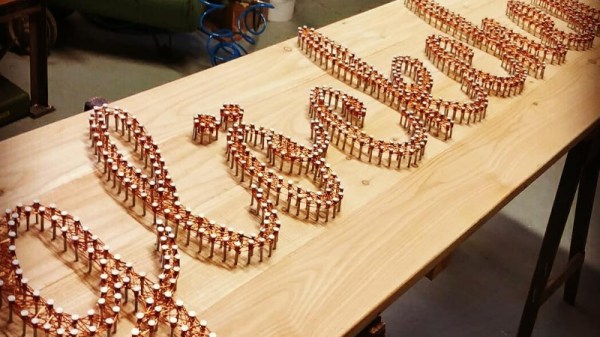
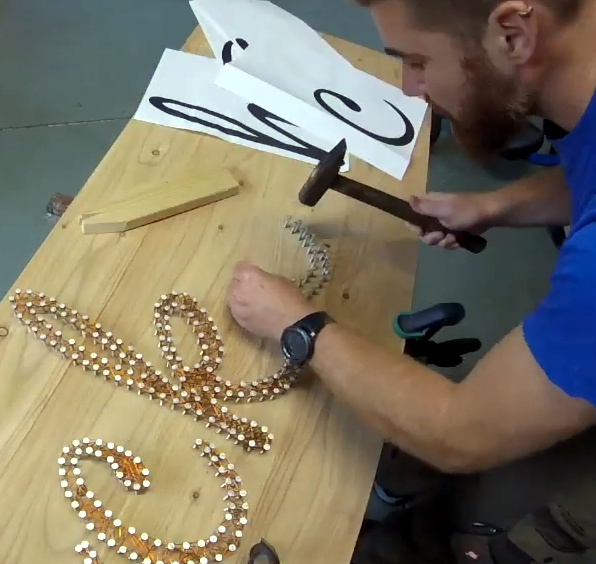
The process usually starts with a spin of his chore wheel that will surprisingly often advise you to drink a beer. While the bottle cap is removed by a standard wall-mounted opener, the fun starts when the cap falls through a wooden labyrinth of various mechanisms reminiscent of a Rube Goldberg machine. Finally, the cap goes through an arrangement of nails, known as a Galton Board which is also found in some pinball and historic gaming machines, before landing in one of two containers marked “winner” and “try again”. The former will trigger the rotating wheel of a self-built peanut dispenser to provide the thirsty person with some tasty snacks. While we would love to see a making-of video with more technical details of this project, we still appreciate the exquisite woodworking and fine craftsmanship that went into building it.

By the way, if you are ever in need of an Arduino board that can also serve as a bottle opener then have a look at HaDuino.

[Thanks to Emanuel for pointing out the proper name of the Galton Board]

Continue reading “A Gambler’s Bottle Opener”

Equipping A Workshop Using Plywood And Handheld Power Tools

Properly equipping a home workshop for the DIY discipline of your choice can often end up costing more than we would like to admit, and is a never ending process. [JSK-Koubou] is doing exactly that, except he is building almost all of his equipment using plywood, hand-held power tools and a LOT of attention to detail.

As far as we can tell the series really got started with a humble hand-held circular saw guide, with every tool being used to build more tools. So far the list boasts more than 50 different videos of tools built around a drill, circular saw, jigsaw, router, planar or grinder. This includes a wood lathe, drill press, jointer and various drills guides and sanders. The level of precision each tool almost eye watering. He even pulls out a dial gauge on some builds to check alignment. We honestly didn’t know plywood equipment could look this good and work so well. Check out the YouTube playlist after the break to see for yourself.

Previously we also covered [JSK-Koubou]’s set of perfectly tuned wooden speaker enclosures, the craftsmanship is really something to behold. For more impressive homebuilt hardware, take a look at this 8-axis camera crane built by another YouTuber for his home shop. Continue reading “Equipping A Workshop Using Plywood And Handheld Power Tools”

Wood-Turning A Bladeless Fan

It’s a simple enough premise: to make a Dyson-style bladeless fan out of wood. The execution of the finished fan, done and filmed by [Neil] from Pask Makes on YouTube, is however spectacular. Using nothing but scrap wood from a chopping board business local to him, he’s made the entire body of the fan using some interesting fabrication methods.

To plan the circular design of the body, [Neil] used an online calculator to measure the specific cuts of wood he needed in order to form cylinders out of trapezoidal sections glued together. Once the rough shape is made, he then used a profile template to turn the air channel with precision out of the two main parts of the fan body. Then, he uses SketchUp in order to figure out what shape needs to be cut from the base in order for the top to fit on it. From there, it’s just a matter of drilling out slots for the air intake, which he does so with an ingenious custom jig, and fitting the internals of a standard fan into the new wooden body.

The video, which you should definitely watch after the break if you have a spare half hour, might not be detailed enough to be used as a tutorial, but it certainly outlines his methods and the tools used well enough to impress us. And the finished build is beautiful to look at, too! If you’re looking for more impressive woodworking, we’ve covered this gorgeous recreation of a Commodore 64 case in wood. But if the hand-built nature of that doesn’t satisfy you, here’s a professional-looking custom caliper case made with CNC and laser engraving.

Continue reading “Wood-Turning A Bladeless Fan”

Wire Wrapping Skills Put To Use For Sign Making

We don’t see many wire wrapped circuits these days, and you could be forgiven for thinking it was nearly a lost art at this point. But that doesn’t mean the technique can’t be applied elsewhere. [MiHu-Works] recently wrote in to share a sign they recently made for a client’s restaurant that looks an awful lot like the back panel of a homebrew computer to us.

Before you get a chance to scroll down and complain about it in the comments, we admit this one is fairly deep into the crafts side of the spectrum. But it’s also a gorgeous piece that we’d be happy to hang up in the hackerspace, so we don’t care. There might not be any angry pixies zipping around through all that lovingly wrapped copper wire, but it certainly feels like you’re looking at the internals of some complex machine.

To make it, [MiHu-Works] first printed out the lettering on paper and put it on the wood to serve as a guide. Roofing nails were then driven into the wood to create the outline of the text. A simple tool made from a forked piece of wood was placed under the head of each nail as it was hammered in to make sure the depth was consistent. It also made sure there was adequate room underneath to wrap the copper wires through them. Then it was time for the wrapping…so much wrapping. (Who is going to come through with the robot to do this?)

A few years back we asked the Hackaday readers if they thought the days of wire wrapped circuits were over. It generated a lot of discussion and interesting ideas, but looking at projects like this, perhaps we were asking the wrong question.

Continue reading “Wire Wrapping Skills Put To Use For Sign Making”

This Mallet Has Backwards Dovetails… That’s Impossible!

Dovetails are a wedge-shaped joint found in woodworking. The wedge makes for strong joinery because a force that tries to pull it apart also increases the friction on the joint. This mallet has dovetails on either side that keep the head from flying off, but there’s also a through tenon in the center. This is an impossible joint as there’s no way to slide the mallet head onto the handle. The two pieces of wood must have grown that way!

As with everything, there’s a trick here, let it scratch your brain for a while before reading on… if you can guess how it’s done it’ll be very satisfying when you confirm your theory. Both the trick of the impossible mallet and the superb hand joinery are shown off in this video from the [Third Coast Craftsman].

The trick comes in the form of internal voids hidden from view once the two pieces of the mallet have been assembled. The through tenon is exactly as you’d expect: a straight tenon slides into a straight mortise in the mallet. The dovetails to either side of the handle and the pockets they mate with in the mallet head are not at all what you’d expect. The edges of the dovetail have been chamfered at 45 degrees so you can’t pull them to the outside of the mallet as you slide them into place. The opposite is the actual trick. Each of the dovetails bends inward until a ramp at the very end of the mallet pocket pushes it back into place.

The impossible mallet isn’t a new concept and stands as a formidable challenge for any accomplished woodworker. The images above are of [Jim Guilford’s] impossible mallet. Here the trick is fully exposed, showing the dovetail tenons of the handle clamped together as it is driven into place. Two things are striking here; the joints cannot be tested and must be perfect before assembly, and there is a real chance the tenons will break or the mallet head will split apart from the force of assembly. This project will test your courage as much as it will your patience.

Continue reading “This Mallet Has Backwards Dovetails… That’s Impossible!”

Cable Operated Blast Door Needs No Power

Every well-equipped wood shop has a dust collection system, with blast gates at every tool to direct the suction power where you need it. If these gates are hard to reach they can be real pain to operate. [Cosmas Bauer] had this problem with his table saw, and created a convenient cable-operated mechanism.

The dust chute on table saw is on the back end, meaning he needs to walk around it to open it, and then walk back to the front to operate the machine. As we all know, laziness increased efficiency can be an excellent reason for projects. Electronics or pneumatics might get the job done, but [Cosmas] realised that a mechanical system might be simpler and more reliable.  Being a woodworker, he built most of the system out of wood.

The blast door itself is held in the closed position by a piece of elastic tubing. To pull it open, he attached a bicycle cable to the blast door, with the other side attached to a latching mechanism that is the star of the show. It’s a rotating disc, with the end of the cable and operating handle attached on the outer edge. A slot track is cut in the disc, in which a pin on the end of a short arm slides. It has a few sharp corners in the track, which forces the pin to only go around in one direction, and to latch in two possible positions when released. Check out the video after the break to see it in action.

Continue reading “Cable Operated Blast Door Needs No Power”

A Custom Raspberry Pi 4 Arcade Cabinet

Over the years we’ve covered quite a few Raspberry Pi based arcade cabinets, and admittedly many of them have been fairly similar. After all, there’s only so much variation you can make before it stops looking like a traditional arcade machine. But even still, we never tire of seeing a well executed build like the one [Dawid Zittrich] recently shared with us.

These days you can order a kit that has pre-cut panels to build your cabinet with, but looking for a completely custom build, [Dawid] decided to first model his design in SketchUp and then cut out the panels himself with a jigsaw. This obviously is quite a bit more work, and assumes you’ve got sufficient woodworking tools, but we think the final result looks great. Not to mention the fact that it’s going to be a lot stronger than something made out of MDF.

He also created the side artwork himself, taking the logos and names from his favorite arcade and Amiga games and putting them on a retro-looking gradient pattern.  The marquee on the top has an acrylic front and is illuminated from behind with strips of LEDs. It’s mounted on a hinge so that it can be lifted up and a new piece of art slid in without taking apart the whole cabinet. While it might be a little more labor intensive to switch out than some of the electronic marquees we’ve seen, we do like that you still have the ability to change the artwork on a whim.

With the cabinet itself completed, [Dawid] turned his attention to the electronics. Inside you’ve got the aforementioned Raspberry Pi 4 (with a Noctua fan to keep it cool), an external hard drive, a HDMI to VGA converter with scanline generator to drive the 4:3 ratio Eizo Flex Scan S2100 monitor, and a rather beefy amplifier hanging off the Pi’s 3.5 mm analog audio output. All of which is easily accessible via a maintenance hatch built into the cabinet so [Dawid] doesn’t need to tear everything down when he wants to tweak something.

If you’d like to have that arcade cabinet feel but don’t have the space and equipment to put something like this together, you could always stick a Raspberry Pi into an iCade and call it a day.