workbench38 Articles
Feel Extreme Workbench Envy After Seeing The Tempel
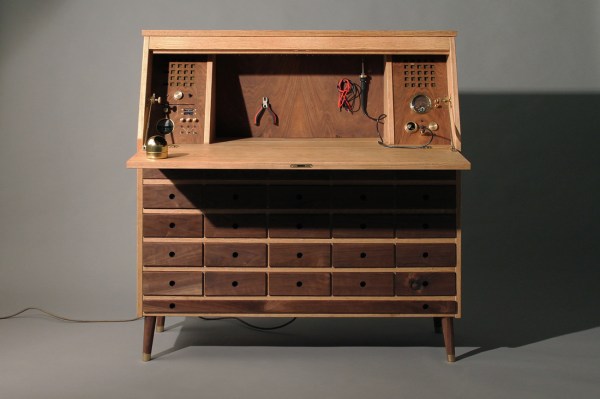
For those of us with space to spare, our workbenches tend to sprawl. The others who are more space limited will certainly feel envy at [Love Hultén]’s beautiful Tempel workbench.
The workbench appears at first to be a modern interpretation of a secretary’s desk. There are some subtle hints that it is no ordinary piece of furniture. The glowing model of our solar system on the front, for example.
With the front folded down, rather than the expected leather writing pad and letter sized drawers, a few more oddities become apparent. The back is a pegboard which holds a small selection of tools. To the left, a checkered grid obscures speakers. Knobs control volume There are even USB ports. On the right sits another speaker. Banana jacks let you use the analog voltmeter. Most appealingly, the indestructible Hakko 936 soldering iron has been entirely integrated into the structure of the desk.
If you press the right button on the front, the desk will reveal its last secret. It contains an entire workstation somewhere behind the array of drawers on the front. A linear actuator pushes a computer monitor up from inside the cabinet, covering the pegboard in the back. Awesome.
There is a build log, but unfortunately it’s been imageshacked and only the words remain. We think [Love Hultén] has finally managed to build a soldering station that’s welcome in every room of the house except for the garage.
Hacklet 92 – Workbenches And Toolboxes
Everyone needs a place to work. While some of us have well equipped labs with soldering stations, oscilloscopes, and a myriad of other tools, others perform their hacks on the kitchen table. Still, some hackers have to be on the go – taking their tools and work space along with them on the road. This week’s Hacklet is all about the best toolbox and workbench projects on Hackaday.io!
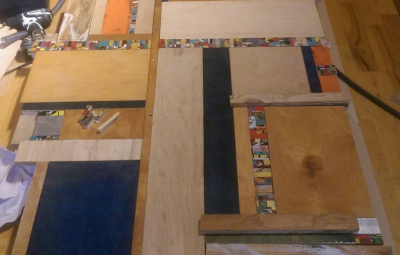
We start at the top – in this case, a bench top. [KickSucker] created Mondrian Inspired Work Table as a multi-use tabletop for all kinds of projects. Rather than slap down a piece of plywood, [KickSucker] took a more artistic route. Piet Mondrian was a dutch artist known for painting irregular grids of black and white lines. He’d fill a few of the rectangles up with primary colors, but leave most of them white. Between different off-cuts of wood, and colorful bits of skateboard deck [KickSucker] had the makings of an awesome work surface. The frame of the bench is an IKEA expedite shelf unit. The frame is made from MDF, with the offcuts laid on top of it. The fun part was arranging all the pieces to make lines and colors. The result is a great custom work table, and a heck of a lot less wood scraps lying around the shop. That’s a double win in our book!
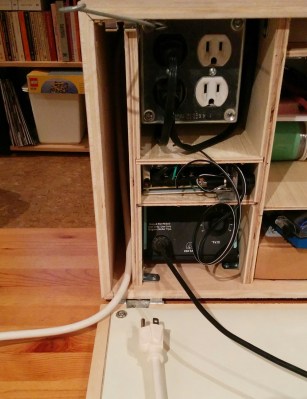
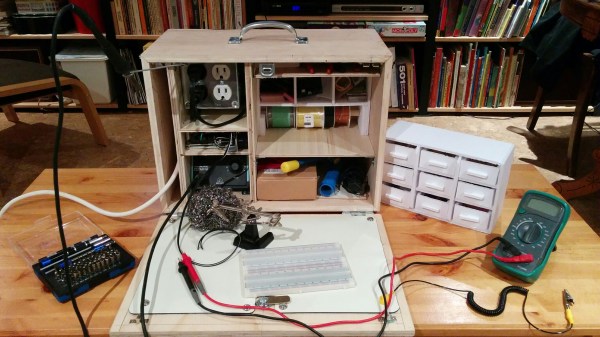
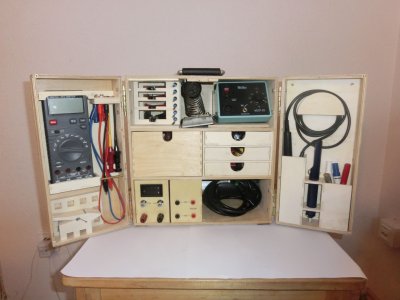
Next up is [M.Hehr] with Portable Workbench & mini Lab. [M.Hehr] has wanted a portable electronic workstation for years. We’re betting he’s seen a few of them here on the blog. While cleaning up the lab before Christmas, [M.Hehr] found a couple of wooden IKEA boxes. Each box held some drawers. An idea formed in [M.Hehr’s] head. It was time to put the plan in motion! The boxes were attached and hinged. Custom brackets were cut on a Shapeoko 2 router. Everything – even the screws were recycled. [M.Hehr] created a perfect space for each tool, ensuring that things won’t end up in a tangled mess when the box is carried around. We really love the retractable power point and custom-made power supply!
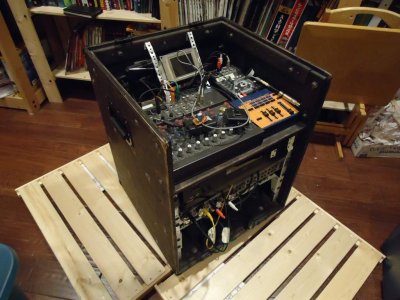
Next we’ve got [Tim Trzepacz] with Musician’s Road Box with 9 space rack. [Tim’s] sister [Tina] was playing a lot of music on the road, and needed a way to organize her gear. There are plenty of commercial solutions for this, but [Tim] decided to roll the perfect solution. He designed a plywood box with a 9U rack. [Tina’s] mixer and backing sound sources were located on the top, while effects and other modules were located in the rack. [Tim] spent a good amount of time designing the box. He was able to get the cut list down to a single piece of plywood, with room to spare. This is perfect for a 4′ x 8′ router like the ShopBot. When it comes time to hit the road, the case seals up to a rugged package. Standard roadcase corners and twist-latches finish this awesome piece.
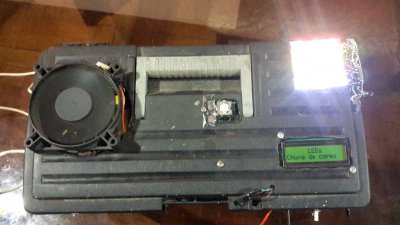
Finally we have [Géllo] with protoBox. [Géllo] is into induction heating, which requires a Zero Voltage Switching (ZVS) flyback driver. ProtoBox started life as a place for [Géllo] to store his ZVS. It has evolved to become a small portable electronics lab. [Géllo] powers the box with a set of lithium-ion batteries sourced from old laptops. This particular ZVS design is plenty powerful enough to heat metal red hot, or create some nice arcs. [Géllo] added an Arduino Mega, a Bluetooth radio, and a 2×16 character LCD. The system is controlled with relays. A bluetooth enabled smartphone can be used to enable or disable any feature. [Géllo’s] assembly techniques are a bit scary, especially considering the fact that this is a high power design. However, this is a great proof of concept!
If you want to see more workbench and toolbox projects, check out our new workbench and toolbox list! If I missed your project, don’t be shy! Just drop me a message on Hackaday.io. That’s it for this week’s Hacklet. As always, see you next week. Same hack time, same hack channel, bringing you the best of Hackaday.io!
Workbench Eye Candy From Around The World
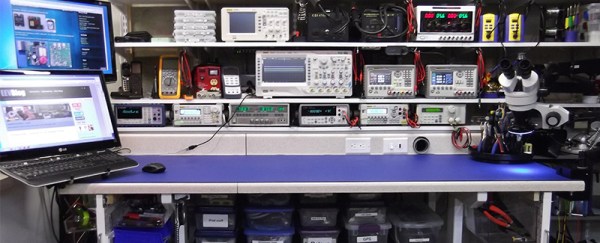
The workbench. We’re always looking for ways to make the most out of the tools we have, planning our next equipment purchase, all the while dealing with the (sometimes limited) space we’re allotted. Well, before you go off and build your perfect electronics lab, this forum thread on the EEVblog should be your first stop for some extended drooling research.
You’ll find a great discussion about everything from workbench height, size, organization, shelf depth, and lighting, with tons of photos to go with it. You’ll also get a chance to peek at how other people have set up their labs. (Warning, the thread is over 1000 posts long, so you might want to go grab a snack.)
We should stop for a moment and give a special note to those of you who are just beginning in electronics. You do not need to have a fancy setup to get started. Most of these well equipped labs is the result of being in the industry for years and years. Trust us when we say, you can get started in electronics with nothing more than your kitchen table, a few tools, and a few parts. All of us started that way. So don’t let anything you see here dissuade you from jumping in. As proof, we’ve seen some amazingly professional work being done with the most bare-bones of tools (and conversely, we seen some head-scratching projects by people with +$10,000 of dollars of equipment on their desk.)
Here’s some links that you might find handy when setting up a lab. [Kenneth Finnegan] has a great blog post on how his lab is equipped. And [Dave Jones] of the EEVblog has a video covering the basics. One of the beautiful things about getting started in electronics is that used and vintage equipment can really stretch your dollars when setting up a lab. So if you’re looking into some vintage gear, head on over to the Emperor of Test Equipment. Of course no thread about workbenches would be complete with out a mention of Jim Williams’ desk. We’ll leave the discussion about workbench cleanliness for the comments.
A Modern Woodworking Workbench
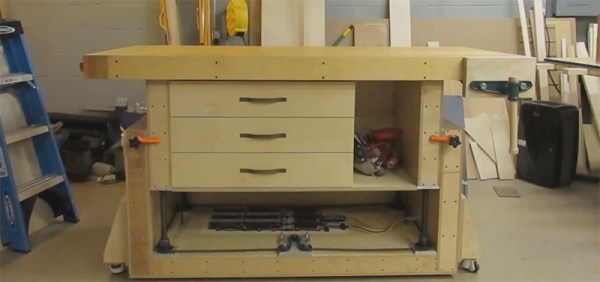
This is a post about workbenches, but not the benches you’re probably thinking about. Workbenches meant for electronics development are simple matters – just about any flat surface, a few shelves for equipment, and an anti-static mat will be fine for every conceivable use. Workbenches for woodworking are a separate matter entirely. There’s actually quite a bit of history behind the development of the woodworking workbench, but the basic idea is a thick laminated wood top, integrated vices, holes in the work surface for bench dogs, and ergonomics that allow for comfortable use of hand tools. The basic design of these benches hasn’t changed much in several hundred years, and [Dirk] thought the design was ready for a modern update.
Soundwave Tunes Up Your Portable Workbench
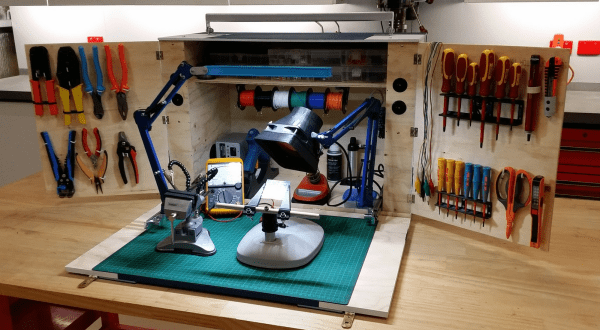
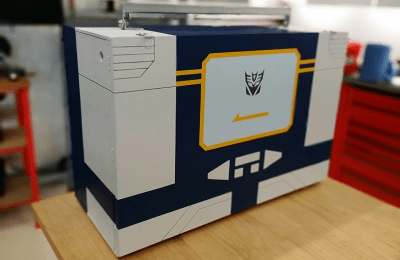
[Tez_Gelmir] built an awesome portable workbench. Not satisfied with just mundane designs, he patterned his box after Soundwave from the classic Transformers: Generation 1 series. This portable bench keeps his tools organized and ready to roll out.
[Tez] has all the basic tool groups covered – screwdrivers small and large, pliers, crimpers, soldering iron, fume extractor, vice, and wire spool. He’s also got room for parts boxes to hold his components.
The basic box is built from a single sheet of 7mm plywood. The front work area is a smaller piece of 12mm plywood. Working with 7mm plywood did prove to be a challenge – [Tez] had to use some very small screws for his hinges. The basic box construction was easy though – [Tez] used a pneumatic nailer and PVA (wood) glue.
[Tez] used a number of 3D printed parts in his design. He kept the Transformer theme going with a Decepticon logo built into his screwdriver holder. The fume extractor and lamp were also especially clever – [Tez] mounted them to drawer sliders, so they are there when he needs them, and out of the way when he doesn’t.
[Tez] spent quite a bit of time setting up his power system, and it shows. The inside of the box is framed with four power points. The main cord has its own “mouse door”, and everything tucks neatly away when not in use.
The Soundwave paint job is what sets this box apart – [Tez] spent quite a bit of time getting everything just right. It looks like Ravage is ready to spring out at any moment.
We really love this setup – Our only suggestion would be to add some sheet metal to protect the corners of the box while in transit.
Continue reading “Soundwave Tunes Up Your Portable Workbench”
The Ultimate Workstation That Folds Up
Looking for an easy way to keep on making stuff even though you’re living in a tiny dorm room? [Matt Silver] was tired of not having a dedicated work-space, so he spent some serious time designing this modular, re-configurable and collapsible portable workstation ready for almost anything.
He started out by sketching ideas, playing around with 3D models in SketchUp, and eventually building a few prototypes using trial and error — and what he’s come up with is pretty darn impressive. It folds down to just under a foot by three feet squared and has casters to roll it around. Once unfolded, you stabilize it by placing your chair on one of the walls that folds down, and the desk itself is also re-configurable for different work surfaces. He’s included a power bar, an LED work-light, and it even has storage racks for tools on the side.
It’s a very thorough Instructable, and definitely worth a look through — especially to see how it magically unfolds! And if you’re wondering about how much it would cost to build, you’re probably looking at around $200 depending on what you already have on hand. What we really like is how it’s almost entirely made out of a single 4’x8′ panel of plywood — it’s like this guy works for IKEA or something!