Colorful, Touch-Sensitive Light Table Is Ready For Gaming

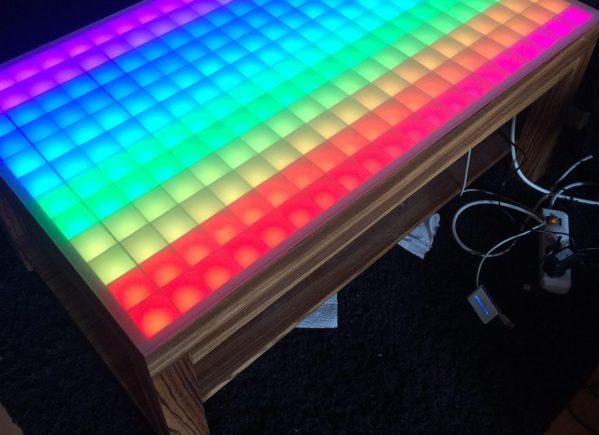
It’s an ambitious build for sure — you don’t start with $500 worth of wood if you don’t intend for the finished product to dazzle. And this 240-pixel touch-sensitive light box coffee table does indeed dazzle.

Sometimes when we see such builds as these, fit and finish take a back seat to function. [dasdingo89] bucks that trend with a nicely detailed build, starting with the choice of zebrawood for the table frame. The bold grain and the frosted glass top make for a handsome table, but what lurks beneath the glass is pretty special too. The 240 WS2812 modules live on custom PCBs, each thoughtfully provided with connectors for easy service. There’s also an IR transmitter-receiver pair on each board to detect when something is placed over the pixel. The pixel boards are connected to custom-built shift register boards for the touch sensors, and an Arduino with Bluetooth runs the whole thing. Right now the table just flashes and responds to hand gestures, but you can easily see this forming the basis of a beautiful Tetris or Pong table.

This build reminds us a little of this pressure-sensitive light floor we featured recently, which also has some gaming possibilities. Maybe [dasdingo89] and  [creed_bratton_] should compare notes and see who can come up with the best games for their platform.

[via r/DIY and a tip from emptycanister]

Ceiling Tiles Give It Up For Christmas LED Ornaments

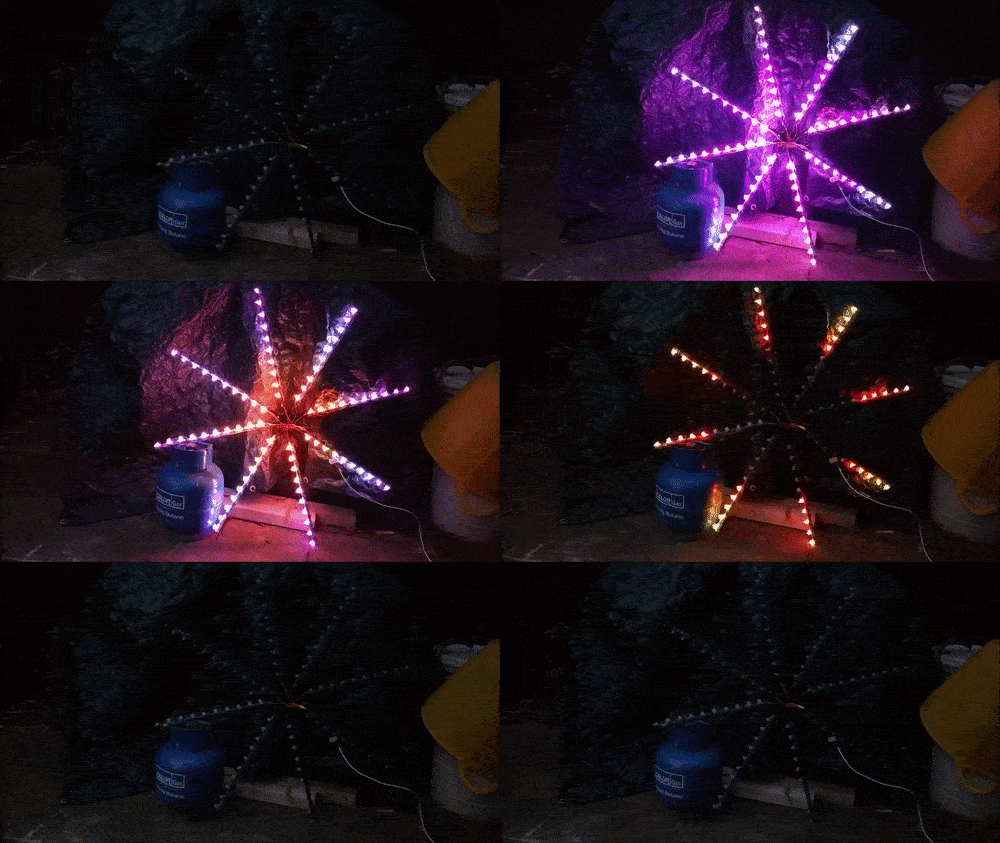
The great thing about holidays is that they always seem to require some shiny things. The modern version of shiny things seems to be LEDs and advances in technology being what they are, we now have amazing programmable LEDs. And programmable LEDs mean animated shiny things! Years ago, [wpqrek] made an LED ornament using discrete components. This year he revisited his ornament and decided to make a new, animated, RGB ornament.

[Wpqrek]’s build is based around five WS2812b strips connected to an Arduino Pro Mini. The ornament itself is a thick styrofoam ceiling tile cut into a star shape with a red-painted wooden frame. Decorated with baubles and stars, the LED strips start in the center and end up at each point in the star. With each strip connected in parallel to the Pro Mini, [wpqrek] used the Arduino Light Animation library to handle the animations.

[Wpqrek] says the result is too big for his tree, so he uses it as a stand-alone ornament. Perhaps using lighter materials would help — or getting a bigger tree! Check out the Arduino lighting controller or the Trompe-l’oeil Menorah for more holiday hacks.

Continue reading “Ceiling Tiles Give It Up For Christmas LED Ornaments”

Light Pipes And LEDs Team Up For A Modern Take On The Nixie Tube

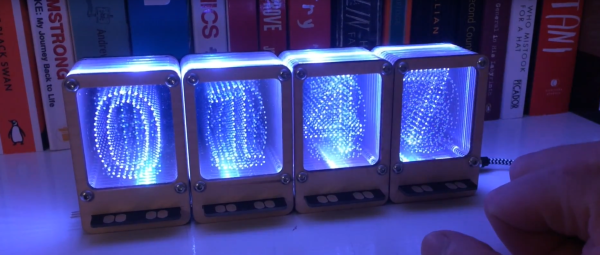
There’s no doubting the popularity of Nixie tubes these days. They lend a retro flair to modern builds and pop up in everything from clocks to weather stations. But they’re not without their problems — the high voltage, the limited tube life, and the fact that you can have them in any color you want as long as it’s orange. Seems like it might be time for a modern spin on the Nixie that uses LEDs and light pipes. Meet Nixie Pipes.

Inspired by an incandescent light-pipe alphanumeric display from a 1970s telephone exchange, [John Whittington]’s design captures the depth and look of a Nixie by using laminated acrylic sheets. Each layer is laser etched with dots in the shape of a character or icon, and when lit from below by a WS2812B LED, the dots pick up the light and display the character in any color. [John]’s modular design allows one master and an arbitrary number of slaves, so large displays can simply be plugged together. [John] is selling a limited run of the Nixie Pipes online, but he’s also open-sourced the project so you can build your own modules.

We really like the modularity and flexibility of Nixie Pipes, and the look is pretty nice too. Chances are good that it won’t appeal to the hardcore Nixie aficionado, though, in which case building your own Nixies might be a good project to tackle.

Continue reading “Light Pipes And LEDs Team Up For A Modern Take On The Nixie Tube”

Christmas Lights Done The Hard Way

It’s that time of the year again when you gotta start worrying if you’ve been naughty enough to not receive any gifts. Hopefully, Blinky Lights will appease St. Nick. Grab a strip of RGB LEDs, hook them up to an Arduino and a Power supply, slap on some code, and Bob’s your Uncle. But if you want to retain your hacker cred, you best do it the hard way. Which is what [roddersblog] did while building his Christmas Starburst LED Stars this year — and bonus points for being early to the party.
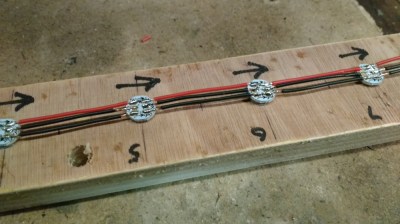
christmas-lights-the-hard-wayFor starters, he got panels (as in PCB panels) of WS2812 boards from eBay. The advantage is it lets you choose your own pitch and strand length. The flip side is, you need to de-panel each board, mount it in a jig, and then solder three lengths of hook up wire to each LED. He planned for an eight sided star with ten LED’s each. And he built three of them. So the wiring was, substantial, to say the least. And he had to deal with silicone sealant that refused to cure and harden. But nothing that some grit and determination couldn’t fix.

For control, he choose the PIC16F1509 microcontroller. This family has a feature that PIC calls the “Configurable Logic Cell” and this Application Note describes how to use CLC to interface the PIC to a WS2811. He noticed processing delays due to C code overheads that caused him some grief. After some experimentation, he re-wrote the entire program in assembly which produced satisfactory results. You can check out his code on the GitHub repository.

Also well worth a look, he’s got a few tricks up his sleeve to improve the quality of his home-brew PCB’s. He’s built his own UV exposure unit with timer, which is an interesting project in itself. The layout is designed in Eagle, with a flood fill to minimize the amount of copper required to be etched away. He takes a laser print of the layout, applies vegetable oil to the paper to make it more translucent to UV, and doubles up the prints to get a nice contrast.

Once the sensitized board has been exposed in the UV unit, he uses a weak but fresh and warm solution of Sodium Hydroxide as a developer to remove the unexposed UV photo-resist. To etch the board, he uses standard Feric Chloride solution, which is kept warm using an aquarium heater, while an aquarium air-pump is used to agitate the solution. He also describes how he fabricates double sided boards using the same technique. The end result is quite satisfying – check out the video after the break.

Continue reading “Christmas Lights Done The Hard Way”

7 Segment Display Using Neopixel Rings

There’s something about clocks — sooner or later, every hacker wants to build one. And we end up seeing all kinds of display techniques being used to show time. For the simplest of builds, 7-segment display modules usually get dug up from the parts bin. If you have a bunch of “smart” LED’s (WS2812’s, APA102’s), then building your own custom 7-segment modules isn’t too difficult either. [rhoalt] had neither, but he did have several 8 LED Neopixel rings lying around. So he thought of experimenting with those, and built a ‘Binoctular’ LED clock which uses the Neopixel rings as 7 segment displays.

figure-eight-segment-displaysEach digit is made using one pair of Neopixel rings, stacked to form a figure of eight. All the digits are composed of arcs, so readability isn’t the best but it’s not hard either. [rhoalt] does mention that the display is easier to read via blurred camera images rather than visually, which isn’t surprising. We’re long used to seeing numbers composed of straight line segments, so arc segmented digits do look weird. But we wouldn’t have known this if [rhoalt] hadn’t shown us, right ? Maybe a thicker diffuser with separator baffles may improve the readability.

The rest of the build is pretty plain vanilla — an Arduino Nano clone, a DS3231 RTC, a Lithium battery, and some buttons, all housed together in a laser cut enclosure which follows the figure of eight design brief. And as usual, once you’ve built one, it’s time to improve and make a better version.

Driving 16 WS2812B Strips With GPIOs And DMA

[Martin Hubáček] wrote in with his WS2812 LED library for the STM32F3 series processors. [Martin]’s library takes the same approach as [Paul Stoffregen]’s OctoWS2811 for the Teensy, and [Erich Styger]’s for the Freescale FRDM-K64F board. That is, it uses three DMA channels to get the signal out as fast as possible.

Continue reading “Driving 16 WS2812B Strips With GPIOs And DMA”

Realize The Truth… There Is No Word Clock

Do you always look at it encoded? – Well you have to. The image translators work for the construct program.

Word clocks are supposed to de-encode time into a more readable format. Luckily [Xose Pérez] managed to recover the encoded time signal of the simulation we are all living in with his word clock that displays time using a stylish Matrix code animation.

[Xose] already built his own versions of [Philippe Chrétien’s] Fibonacci Clock and [Jeremy Williams’s] Game Frame, and while doing so he designed a nice little PCB. It’s powered by an ATmega328p, features an RTC with backup battery, an SD-card socket, and it’s ready to drive a bunch of WS2812Bs aka NeoPixels. Since he still had a few spare copies of his design in stock, his new word clock is also driven by this board.

Continue reading “Realize The Truth… There Is No Word Clock”