What Is It, R2? Have Something To Share?

Sometimes great projects keep evolving. [Bithead942] built himself an R2-D2 to accompany him when he goes a-trooping — but something didn’t feel quite right. Turns out, R2 was missing its signature beeping banter, so he made it more contextually responsive by implementing a few voice commands.

[Bithead942]’s main costume is that of an X-Wing pilot, and the replica helmet works perfectly; it already has a fake microphone — easily replaced with a working model — and the perfect niche to stash the electronics in the ‘mohawk.’

Even though the helmet has the perfect hiding spot for a circuit, space is still at a premium. Services like Alexa tend to be pretty accurate, but require WiFi access — not a guarantee on the convention floor. Instead, [bithead942] found that the EasyVR Shield 3.0 voice recognition board provided a suitable stand-in. It needs a bit of training to work properly(cue the montage!), but in the end it compares fresh audio commands to the ‘training’ files it has stored, and if there’s a match, triggers a corresponding serial port. It’s not perfect, but it most certainly works!

Continue reading “What Is It, R2? Have Something To Share?”

TI 99/4A Weather Station

If you still have a drawer full of slap bracelets from the 1990s because, you know, they might come back, then you’ll appreciate [Vorticon’s] latest project. Sure, we see lots of weather stations, but this one is controlled by a TI 99/4A computer. This home computer from the 1980s was actually ahead of its time with a 16-bit processor.

The sensors use Xbee modules and an Arduino Uno. Of course, the Uno has more power than the TI computer, but that’s not really the point, right? He’s made a series of videos detailing the construction (you can see the first one below, but there are five, so far).

Continue reading “TI 99/4A Weather Station”

Marc with cannula and brain monitor

In Bed With An Arduino, Fighting Sleep Apnea

Sometimes the journey is as interesting as the destination, and that’s certainly the case with [Marc]’s pursuit of measuring his sleep apnea (PDF, talk slides. Video embedded below.). Sleep apnea involves periods of time when you don’t breathe or breathe shallowly for as long as a few minutes and affects 5-10% of middle-aged men (half that for women.) [Marc]’s efforts are still a work-in-progress but along the way he’s tried a multitude of things, all involving different technology and bugs to work out. It’s surprising how many ways there are to monitor breathing.

Debugging the Eeonyx conductive fabric approach

His attempts started out using a MobSenDat Kit, which includes an Arduino compatible board, and an accelerometer to see just what his sleeping positions were. That was followed by measuring blood O2 saturation using a cheap SPO2 sensor that didn’t work out, and one with Bluetooth that did work but gave results as a graph and not raw data.

Next came measuring breathing by detecting airflow from his nose using a Wind Sensor, but the tubes for getting the “wind” from his nose to the sensor were problematic, though the approach was workable. In parallel with the Wind Sensor he also tried the Zeo bedside sleep manager which involves wearing a headband that uses electrical signals from your brain to tell you what sleep state you’re in. He particularly liked this one as it gave access to the data and even offered some code.

And his last approach we know of was to monitor breathing by putting some form of band around his chest/belly to measure expansion and contraction. He tried a few bands and an Eeonyx conductive textile/yarn turned out to be the best. He did run into noise issues with the Xbee, as well as voltage regulator problems, and a diode that had to be bypassed.

But while [Marc]’s list of approaches to monitor sleep is long, he hasn’t exhausted all approaches. For example there’s monitoring a baby using lasers to detect whether or not the child is still breathing.

Continue reading “In Bed With An Arduino, Fighting Sleep Apnea”

The Foghorn Requiem

Foghorns have been a part of maritime history since the 19th century, providing much needed safety during inclement weather to mariners out at sea. Over time, their relevance has slowly reduced, with advanced navigational aids taking over the task of keeping ships and sailors safe.

The sounds of the foghorns are slowly dying out. Artists [Joshua Portway] and [Lise Autogena] put together the Foghorn Requiem, a project which culminated on June 22nd 2013, with an armada of more than 50 ships gathered on the North Sea to perform an ambitious musical score, marking the disappearance of the sound of the foghorn from the UK’s coastal landscape.

ship_layoutUp close, a foghorn is loud enough to knock you off your shoes. But over a distance, its sound takes on a soulful, melancholy quality, shaped by the terrain that it passes over. The artists tried capturing this quality of the foghorn, with help from composer [Orlando Gough] who created a special score for the performance. It brought together three Brass Bands – the Felling Band, the Westoe Band and the NASUWT Riverside Band, almost 50 ships at sea and the Souter Lighthouse Foghorn to play the score.

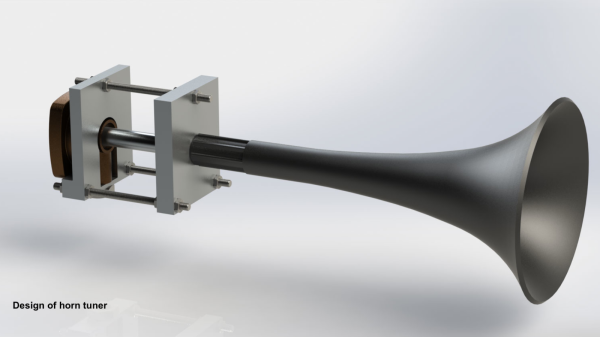
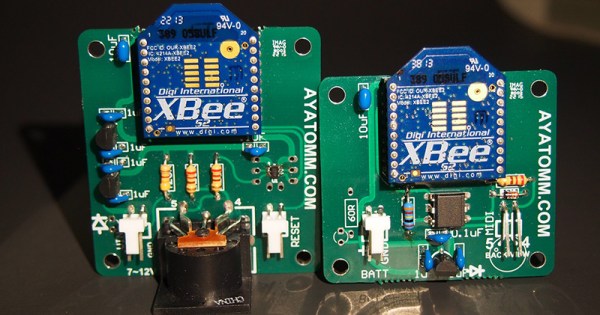
Each of the more than 50 vessels were outfitted with a custom built, tunable foghorn, actuated by a controller box consisting of a TI Launchpad with GPS, RTC, Xbee radio and relay modules. Because of the great distances between the ships and the audience on land, the devices needed to compensate for their relative position and adjust the time that they play the foghorn to offset for travel time of the sound. Each controller had its specific score saved on on-board storage, with all controllers synchronized to a common real time clock.

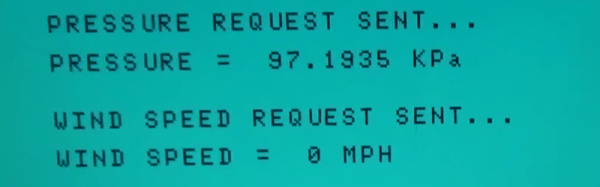
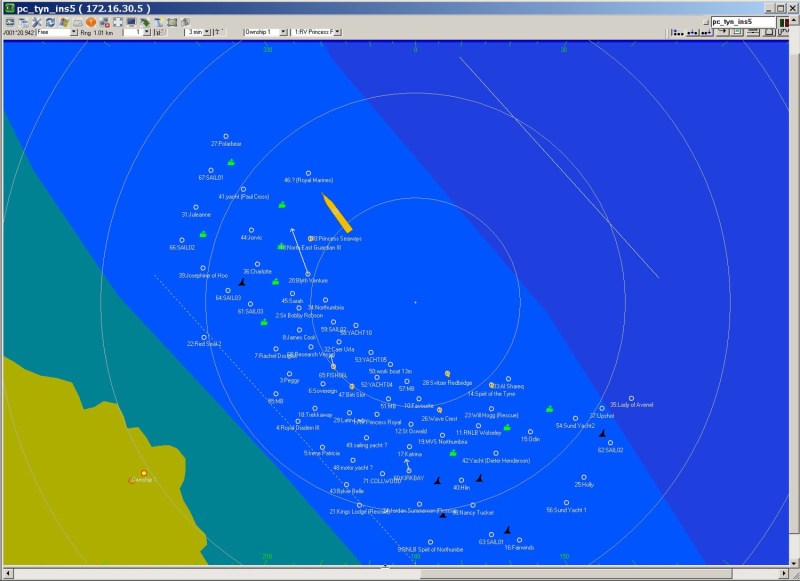
Marine radios were used to communicate with all the ships, informing them when to turn on the controllers, about 10 minutes from the start of the performance. Each device then used its GPS position to calculate its distance from the pre-programmed audience location, and computed how many seconds ahead it had to play its horn for the sound to be heard in time on the shore. The controllers then waited for a pre-programmed time to start playing their individual foghorn notes. The cool thing about the idea was that no communication was required – it was all based on time. Check out the video of the making of the Foghorn Requiem after the break, and here’s a link to the audio track of the final performance.

This is a slightly different approach compared to the Super Massive Musical Instrument that we posted about earlier.

Continue reading “The Foghorn Requiem”

Transmitting MIDI Signals With XBEE

What do you do when you want to rock out on your keytar without the constraints of cables and wires? You make your own wireless keytar of course! In order to get the job done, [kr1st0f] built a logic translator circuit. This allows him to transmit MIDI signals directly from a MIDI keyboard to a remote system using XBEE.

[kr1st0f] started with a MIDI keyboard that had the old style MIDI interface with a 5 pin DIN connector. Many new keyboards only have a USB interface, and that would have complicated things. The main circuit uses an optoisolator and a logic converter to get the job done. The MIDI signals are converted from the standard 5V logic to 3.3V in order to work with the XBEE.

The XBEE itself also needed to be configured in order for this circuit to work properly. MIDI signals operate at a rate of 31,250 bits per second. The XBEE, on the other hand, works by default at 9,600 bps. [kr1st0f] first had to reconfigure the XBEE to run at the MIDI bit rate. He did this by connecting to the XBEE over a Serial interface and using a series of AT commands. He also had to configure proper ID numbers into the XBEE modules. When all is said and done, his new transmitter circuit can transmit the MIDI signals wirelessly to a receiver circuit which is hooked up to a computer.

These Are The Droid Controllers You’ve Been Looking For

When I was in the 4th grade our teacher announced that we had a special guest visiting us from somewhere “Far, far away…” As we piled out of the classroom and into to the courtyard, my jaw hit the floor – It was R2D2! The droid started to move around, and made all the noises like the movie. I couldn’t believe what I was seeing. R2D2 was real, and he was right in front of me! (My young mind made the conclusion that if R2D2 was real, then all of Star Wars was real.) I had to turn around to see my friends’ reactions. Unfortunately, it’s at that moment, I saw a middle-aged man, holding a RC transmitter, with antenna extended, standing in the background operating the controls. Sigh. R2 wasn’t real – it’s just a remote-controlled robot. My dreams of becoming a Jedi were forever crushed.

[Chris James] of the R2 Builders Club has been working hard to make a pair of “Stealth RC” controllers to help keep the magic of R2D2 intact.  These dual joystick, 3D printed, hand-held units can be easily hidden in the palm of your hand, or the front pockets of a loose jacket while you operate them. Loaded with features, these tiny controllers use XBee radios to talk to a receiver and custom PCB inside the droid, that in turn, can then control dozens of servos, motors, sound playback and more. Because some R2D2 builds will have dozens and dozens of functions, rather than have a button for each one, [Chris] has programmed in gesture controls in to the unit, so that two controllers and can control several dozen preprogrammed actions. [Chris] hasn’t finalized the design just yet – he still calls it a “beta” build, but so far his documentation is outstanding (PDF) – some of the best we’ve seen.

You can learn more about the R2 Builders Club and the controllers in the video after the break

Continue reading “These Are The Droid Controllers You’ve Been Looking For”

robotic dog

Robot K-9 Scares Off The Daleks

[Bithead942’s] love of the ever popular Dr Who series led her to develop a replica of the 4th Doctor’s robotic companion. It’s name is K-9, and was built from scratch in only 4 months. Its shell is made from HPDE – a light and bendable plastic. A custom plastic bender was constructed to get the angles just right, and custom laser cut parts were used in various places.

Its frame consists of aluminum channel, and is packed full of juicy electronics. An arduino with an XBee shield controls the remote voice, frickin’ laser and eye sensors. Another arduino is paired with a motor shield to control the linear actuator for the neck movement. And a Raspberry Pi keeps the LCD screen in order.

We’re not done, folks. Because this puppy is radio controlled, a custom controller is needed. Sparkfun’s Fio paired with another XBee is used along with a 16×2 LCD and various other electronics to keep the robot on an invisible leash.

Be sure to check out the blog site, as it goes into great detail on all the various parts used to construct this complicated but awesome project.