Can A Bundle Of Soda Straws Be A Camera?

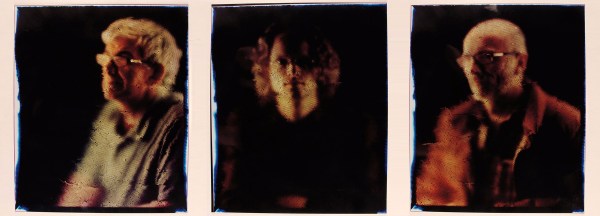
This one is hard to classify. Is it a hack, or is it art? Perhaps it’s both. However you want to classify it, it’s pretty cool to turn a bundle of drinking straws into a camera.

strawcamera_012
Click for larger image

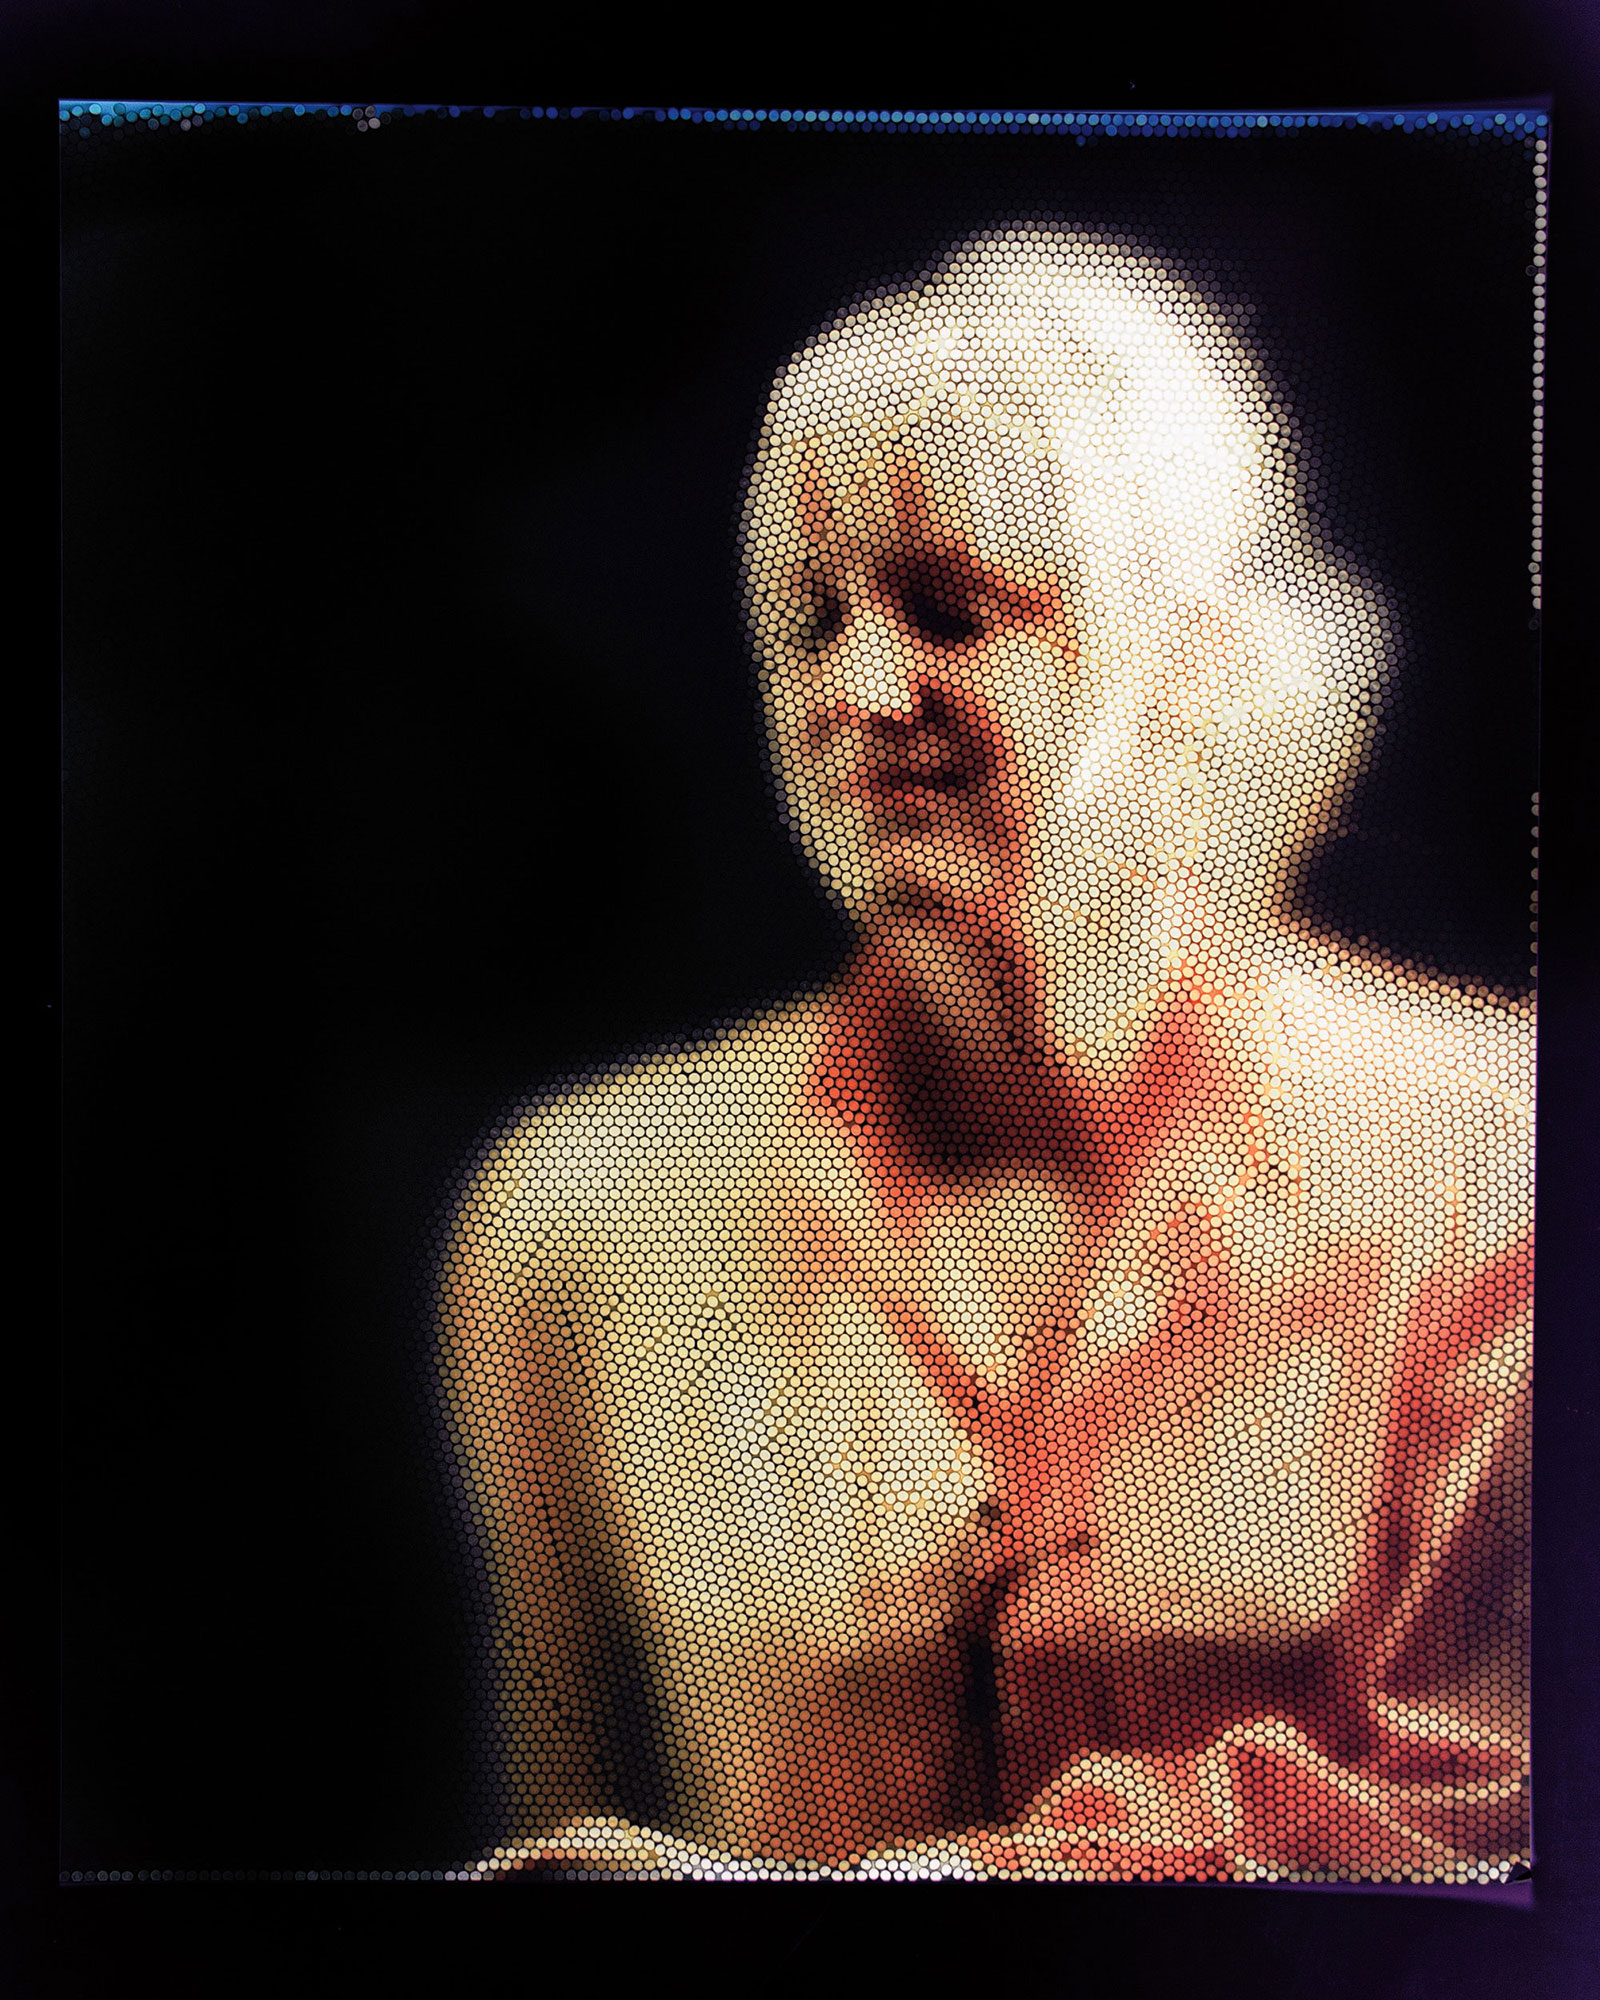
If you’re looking for the technology here, you won’t find much. There’s no lens, no shutter, and no electronics of any kind in [Mick Farrell] and [Cliff Haynes]’ Straw Camera. This is literally a box full of drinking straws standing on end, with a sheet of photo paper behind it. Each straw sends a spot of light that represents the average hue and luminance of its limited view of the subject directly to the film. The process of making an exposure consists of composing the scene, turning out the lights, loading the camera, and setting off a flash.

The resulting images are defocused but recognizable, like seeing familiar sights through a heavy fog. The straws make a strong texture over the ghostly image of the subject – indeed, the straws are the only thing in focus. The fact that the straws don’t form a perfect honeycomb due to settling and imperfections in the bundles is jarring at first, but as you see the images you get used to the extra texture.

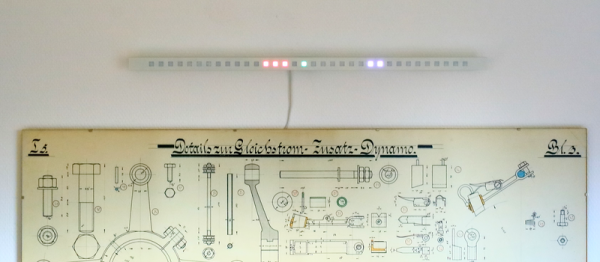
When we first saw this, we wondered about the possibility of putting a simple photosensor at the bottom of each straw to capture similar images digitally. The TCS3200 would be about the right size, but given that there are about 32,000 straws in the bundle, the BOM might get a little out of hand. Still, a scaled down digital straw camera might yield some interesting images.

Thanks to [Stuart Rogers] for the tip.

Beautiful Linear RGB Clock

Yup, another clock project. But here, [Jan] builds something that would be more at home in a modern art museum than in the dark recesses of a hacker cave. It’s not hard to read the time at all, it’s accurate, and it’s beautiful. It’s a linear RGB LED wall clock.

7512951486134540347You won’t have to learn the resistor color codes or bizarre binary encodings to tell what time it is. There are no glitzy graphics here, or modified classic timepieces. This project is minimal, clean, and elegant. Twelve LEDs display the hours, six and nine LEDs take care of the minutes in add-em-up-coded decimal. (It’s 3:12 in the banner image.)

The technical details are straightforward: WS2812 LEDs, an Arduino, three buttons, and a RTC. You could figure that out by yourself. But go look through the log about building the nice diffusing plexi and a very clean wall-mounting solution. It’s the details that separate this build from what’s hanging on our office wall. Nice job, [Jan].

Arduino Altair 8800 Simulator

Browse around eBay for an original Altair 8800 and you quickly find that the price range is in the thousands of dollars. If you are a collector and have some money in your pocket maybe that’s okay. But if you want the Altair 8800 experience on a budget, you can build yourself a clone with an Arduino. [David] kindly shared the build details on his Arduino Project Hub post. Using an Arduino Due (or a Mega for 25% of original speed), the clone can accurately reproduce the behavior of the Altair’s front panel elements. We covered a similar project in the past, using the Arduino Uno.

While not overly complicated to build one, you will need a back
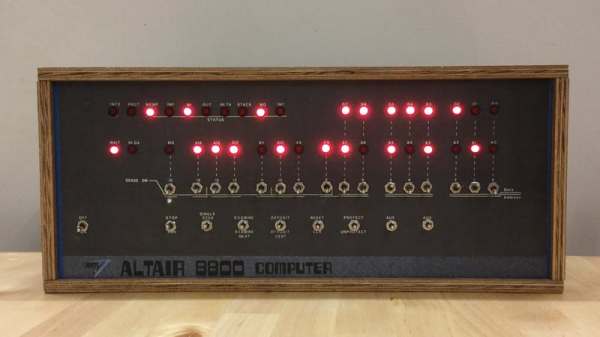
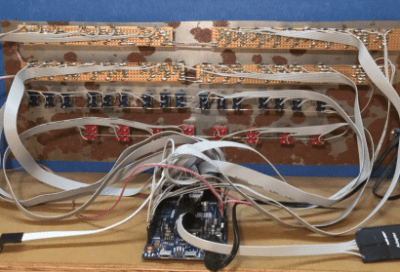
fair amount of patience so you can solder all the 36 LEDs, switches, transistors, and resistors but in the end, you’ll end up with a brand new computer to play with.  In 1975, an assembled Altair 8800 Computer was selling for $621 and $439 for an unassembled version. Sourced right, your clone would be under 50 bucks. Not bad.

The simulator comes with a bunch of software for you to try out and even games like Kill-the-Bit and Pong. BASIC and Assembler example programs are included in the emulator software and can easily be loaded.

In addition, the simulator includes some extra functions and built-in software for the Altair which are accessible via the AUX1/AUX2 switches on the front panel (those were included but not used on the original Altair). From starting different games to mount disks in an emulated disk drive, there are just too many functions to describe here. You can take a look at the simulator documentation for more information.

In case you don’t know already, here’s how to play Kill-the-Bit:

Continue reading “Arduino Altair 8800 Simulator”

PolaPi-Zero For Surprisingly Good Instant Photos

The ‘Pola’ in the PolaPi is a giveaway for what this Hackaday.io project is. This polaroid-like camera, created by [Muth], is a sort of black and white, blast from the past mixed with modern 3D printing. It is based on a Raspberry-pi Zero with a camera module, a Sharp memory LCD for viewing the image, and a Nano thermal printer to print the actual photo. Throw in some buttons, a battery and a slick 3D printed case and you have your own PolaPi.

polapi-front
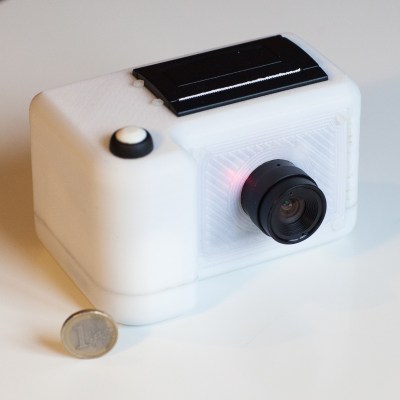
Right now it’s already on the second iteration as [Muth]s gave the first prototype to some lucky person. As he had to rebuild the whole camera from scratch, he took advantage of what he learned in the first prototype and improved on it. The camera has a ‘live’ 20fps rate on the LCD and you can take your photo, review it, and if you like the shot, print it. The printed photo is surprisingly good, check it out in the video after the break.

Currently the software is being actively developed and the latest version has, among other things, a slit-scan mode. For those who don’t know, slit-scan photography is a technique that can create some crazy warped and psychedelic effects (in this case, as psychedelic as a black and white photo can be).

We know you want one for yourself. If you don’t want to spend the time installing and configuring your RPi Zero, [Muth] kindly shared an SD card image with everything ready.

Continue reading “PolaPi-Zero For Surprisingly Good Instant Photos”

Genetically Engineered Muscle Cells Power Tiny Bio-Robots

One of the essential problems of bio-robotics is actuators. The rotors, bearings, and electrical elements of the stepper motors and other electromechanical drives we generally turn to for robotics projects are not really happy in living systems. But building actuators the way nature does it — from muscle tissue — opens up a host of applications. That’s where this complete how-to guide on building and controlling muscle-powered machines comes in.

Coming out of the [Rashid Bashir] lab at the University of Illinois at Urbana-Campaign, the underlying principles are simple, which of course is the key to their power. The technique involves growing rings of muscle tissue in culture using 3D-printed hydrogel as forms. The grown muscle rings are fitted on another 3D-printed structure, this one a skeleton with stiff legs on a flexible backbone. Stretched over the legs like rubber bands, the muscle rings can be made to contract and move the little bots around.

Previous incarnations of this technique relied on cultured rat heart muscle cells, which contract rhythmically of their own accord. That yielded motion but lacked control, so for this go-around, [Bashir] et al used skeletal muscle cells genetically engineered to contract when exposed to light. Illuminating different parts of the muscle ring lets the researchers move the bio-bots anywhere they want. They can also use electric stimulation to control the bio-bots.

The method isn’t quite at the point where home lab biohackers will start churning out armies of bio-bots. But the paper is remarkably detailed in methods and materials, from the CAD files for 3D-printing the forms and bio-bot skeletons to a complete troubleshooting guide. It’s all there, and it could be a game changer for developing the robotic surgeons of the future.

Continue reading “Genetically Engineered Muscle Cells Power Tiny Bio-Robots”

40-Acre HAARP Rides Again, And They Want You To Listen

News comes to us this week that the famous HAARP antenna array is to be brought back into service for experiments by the University of Alaska. Built in the 1990s for the US Air Force’s High Frequency Active Auroral Research Program, the array is a 40-acre site containing a phased array of 180 HF antennas and their associated high power transmitters. Its purpose it to  conduct research on charged particles in the upper atmosphere, but that hasn’t stopped an array of bizarre conspiracy theories being built around its existence.

The Air Force gave up the site to the university a few years ago, and it is their work that is about to recommence. They will be looking at the effects of charged particles on satellite-to-ground communications, as well as over-the-horizon communications and visible observations of the resulting airglow. If you live in Alaska you may be able to see the experiments in your skies, but residents elsewhere should be able to follow them with an HF radio. It’s even reported that they are seeking reports from SWLs (Short Wave Listeners). Frequencies and times will be announced on the @UAFGI Twitter account. Perhaps canny radio amateurs will join in the fun, after all it’s not often that the exact time and place of an aurora is known in advance.

Tinfoil hat wearers will no doubt have many entertaining things to say about this event, but for the rest of us it’s an opportunity for a grandstand seat on some cutting-edge atmospheric research. We’ve reported in the past on another piece of upper atmosphere research, a plan to seed it with plasma from cubesats, and for those of you that follow our Retrotechtacular series we’ve also featured a vintage look at over-the-horizon radar.

HAARP antenna array picture: Michael Kleiman, US Air Force [Public domain], via Wikimedia Commons.

Monitor All The Laundry Things With This Sleek IoT System

If like us you live in mortal fear of someone breaking into your house when you’re on vacation and starting a dryer fire while doing laundry, this full-featured IoT laundry room monitor is for you. And there’s a school bus. But don’t ask about the school bus.

In what [seasider1960] describes as “a classic case of scope creep,” there’s very little about laundry room goings on that escapes the notice of this nicely executed project. It started as a water sensor to prevent a repeat of a leak that resulted in some downstairs damage. But once you get going, why not go too far? [seasider1960] added current sensing to know when the washer and dryer are operating, as well as to tote up power usage. A temperature sensor watches the dryer vent and warns against the potential for the aforementioned tragedy by sounding an obnoxious local alarm — that’s where the school bus comes in. The whole system is also linked into Blynk for IoT monitoring, with an equally obnoxious alarm you can hear in the video below. Oh, and there are buttons for testing each alarm and for making an Internet note to reorder laundry supplies.

We’ve seen a spate of laundry monitoring projects lately, all of which have their relative merits. But you’ve got to like the fit and finish of [seasider1960]’s build. The stainless face plate and in-wall mount makes for a sleek, professional appearance which is fitting with the scope-creepy nature of the build.

Continue reading “Monitor All The Laundry Things With This Sleek IoT System”