Shellcode Over MIDI? Bad Apple On A PSR-E433, Kinda

If hacking on consumer hardware is about figuring out what it can do, and pushing it in directions that the manufacturer never dared to dream, then this is a very fine hack indeed. [Portasynthica3] takes on the Yamaha PSR-E433, a cheap beginner keyboard, discovers a shell baked into it, and takes it from there.

[Portasynthinca3] reverse engineered the firmware, wrote shellcode for the device, embedded the escape in a MIDI note stream, and even ended up writing some simple LCD driver software totally decent refresh rate on the dot-matrix display, all to support the lofty goal of displaying arbitrary graphics on the keyboard’s dot-matrix character display.

Now, we want you to be prepared for a low-res video extravaganza here. You might have to squint a bit to make out what’s going on in the video, but keep in mind that it’s being sent over a music data protocol from the 1980s, running at 31.25 kbps, displayed in the custom character RAM of an LCD.

As always, the hack starts with research. Identifying the microcontroller CPU lead to JTAG and OpenOCD. (We love the technique of looking at the draw on a bench power meter to determine if the chip is responding to pause commands.) Dumping the code and tossing it into Ghidra lead to the unexpected discovery that Yamaha had put a live shell in the device that communicates over MIDI, presumably for testing and development purposes. This shell had PEEK and POKE, which meant that OpenOCD could go sit back on the shelf. Poking “Hello World” into some free RAM space over MIDI sysex was the first proof-of-concept.

The final hack to get video up and running was to dig deep into the custom character-generation RAM, write some code to disable the normal character display, and then fool the CPU into calling this code instead of the shell, in order to increase the update rate. All of this for a thin slice of Bad Apple over MIDI, but more importantly, for the glory. And this hack is glorious! Go check it out in full.

MIDI is entirely hacker friendly, and it’s likely you can hack together a musical controller that would wow your audience just with stuff in your junk box. If you’re at all into music, and you’ve never built your own MIDI devices, you have your weekend project.

Continue reading “Shellcode Over MIDI? Bad Apple On A PSR-E433, Kinda”

Decoding 433 MHz Signals With Arduino & Raspberry Pi

433 MHz radio signals are all around us. They’re used for things like smart power plugs, garage door openers, and home weather stations. Decoding these signals can allow you to interface and work with these devices on your own terms. To help in those efforts, [Joonas Pihlajamaa] has written a three-part tutorial on decoding these signals.

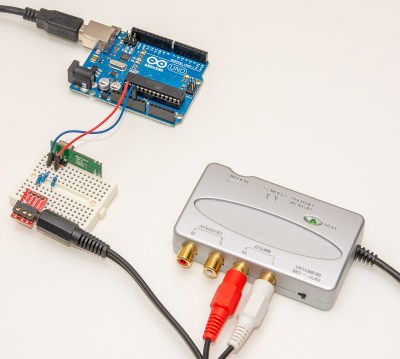
A soundcard makes for a very cheap oscilloscope.

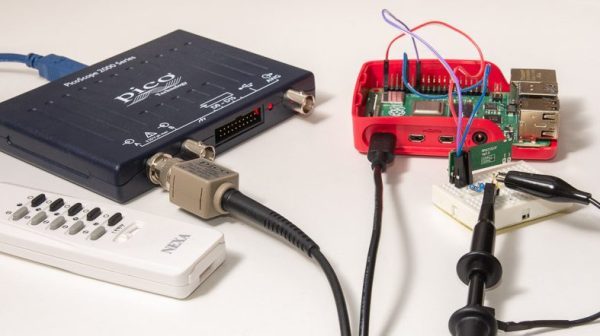
The focus of the tutorials is decoding the signals of a Nexa radio-controlled smart plug. [Joonas] first explores using an Arduino to do the job, paired with a RFM210LCF-433D radio receiver module. This setup dumps out data to a computer over serial for decoding. [Joonas] then tried an alternative strategy, using a soundcard as a “poor man’s oscilloscope” to do the same job, using the same radio module and using Audacity for signal analysis. Finally, [Joonas] brought out the big guns, hooking up a Picoscope digital oscilloscope to a Raspberry Pi 4 for a more deluxe attempt at decoding the signals.

The tutorial goes to show that higher-end tools can make such a job much easier. However, the cheaper techniques are a great way of showing what can be done with the bare minimum in tools. We’re hoping for an exciting fourth part to [Joonas’s] work, where he instructs us on how to decode 433 MHz signals by drinking huge amounts of caffeine and staring at a very fast blinking LED. If you’ve got your own nifty signal analysis (or SIGINT!) hacks, be a good sport and drop them into the tipsline!


Arduino Library Brings Rtl_433 To The ESP32

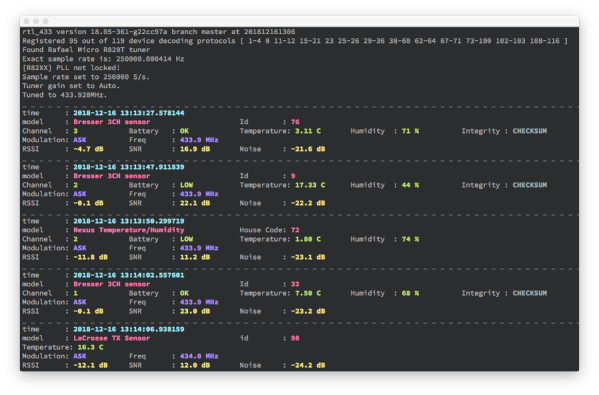
If you have an RTL-SDR compatible radio there’s an excellent chance you’ve heard of the rtl_433 project, which lets you receive and decode signals from an ever-expanding list of supported devices in the ISM radio bands. It’s an incredibly useful piece of software, but the fact that it requires an external software defined radio and a full-fledged computer to run dictated the sort of projects it could realistically be used for.

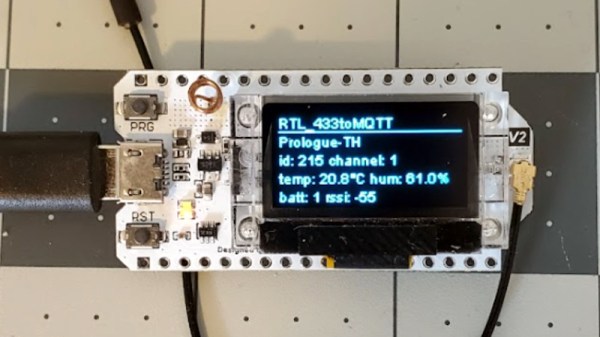
But thanks to the rtl_433_ESP Arduino library developed by [NorthernMan54], we’re now able to pack that functionality into a much smaller package. All you need is an ESP32 microcontroller and a CC1101 or SX127X transceiver module. If you’re looking for a turn-key hardware platform, the documentation notes the LILYGO LoRa32 V2 board includes the required hardware, plus adds a handy OLED display and microSD slot. It should be noted that the range of these radios don’t compare particularly well to a full-size RTL-SDR device, but that probably won’t come as much of a surprise. Continue reading “Arduino Library Brings Rtl_433 To The ESP32”

Low-Cost 433 MHz Door Sensors Get Open Firmware

It’s an unfortunate reality these days that if you see a cheap piece of consumer electronics, there’s a good chance its only cheap because it’s designed to lock you into some ecosystem where you’ll either end up paying a subscription, or worse, have your personal information sold behind your back. One of the best tools we have against these sort of anti-consumer practices is the development of open source firmware replacements that put control of the device into the hands of the community, rather than a corporation.

Now, thanks to the work of [Jonathan Armstrong] we have such a firmware for the 433 MHz magnetic door and window sensors that you can pick up on AliExpress for $4 USD a piece. The new firmware not only ensures you can use these sensors with a wide array of receivers, but adds a number of new features over their stock configuration. Continue reading “Low-Cost 433 MHz Door Sensors Get Open Firmware”

Connecting Commercial 433 MHz Sensors To MQTT And Home Assistant With RTL-SDR

When [Elixir of Progress] was looking at setting up environmental sensors around their home to keep track of temperature, humidity and such, the obvious ideas of using WiFi-connected sensors didn’t work due to lack of WiFi range. Although Zigbee (Z-wave) sensors have longer range than WiFi, they are decidedly more expensive, proprietary and require a special transceiver hub. That’s where 433 MHz sensors for weather stations come into the picture.

The idea is simple: virtually all of those sensors – many of them rated for outdoor use – use the unlicensed 433 MHz spectrum that can easily be captured using cheap RTL-SDR (software defined radio) USB dongles. With the data stream from these sensors captured, the open source rtl_433 project enables automatic decoding of these data streams for a wide range of supported sensors.

While Realtek RTL2832-based and other RTL-SDRs can be found for quite cheap, it should be noted that these can run quite hot. Rather than heatsinking the IC, for this project it was elected to only listen sporadically and allow the RTL-SDR receiver to cool down in between listening sessions.

Getting the data from there into Home Assistant, InfluxDB or similar is easy, as rtl_433 can output the decoded data directly to an Influx database, MQTT broker as well as other formats. In this case, the data was sent via MQTT with the Home Assistant instance configured to treat these MQTT topics as sensors. With each sensor’s location carefully registered, this allows for setting up a dense, very low-power network of 433 MHz sensors for monitoring and home automation purposes.

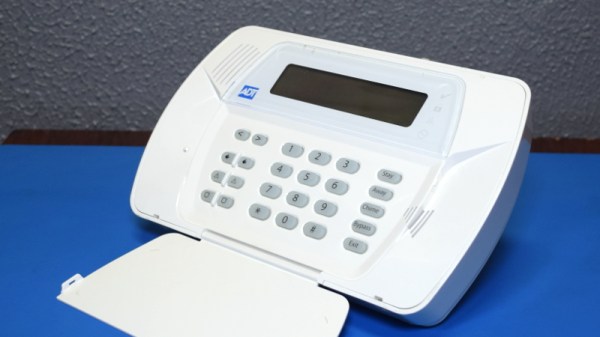
Teardown: Impassa SCW9057G-433 Alarm System

This series of monthly teardowns was started in early 2018 as an experiment, and since you fine folks keep reading them, I keep making them. But in truth, finding a new and interesting gadget every month can sometimes be a chore. Which is why I’m always so thankful when a reader actually sends something in that they’d like to see taken apart, as it absolves me from having to make the decision myself. Of course it also means I can’t be blamed if you don’t like it, so keep that in mind as well.

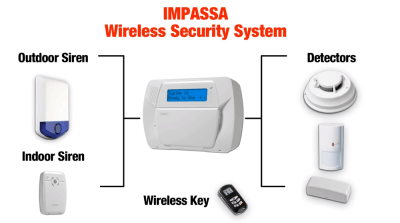
Coming our way from the tropical paradise of Eastern Pennsylvania, this month’s subject is an ADT branded Impassa SCW9057G-433 alarm system that was apparently pulled off the wall when our kind patron was moving house. As you might have guessed from the model number, this unit uses 433 MHz to communicate with various sensors and devices throughout the home, and also includes a 3G cellular connection that allows it to contact the alarm monitoring service even if the phone line has been cut.

Diagram of Impassa home security setup
The alarm can connect to a wide array of 433 MHz devices.

From how many of these are on eBay, and the research I’ve done on some home alarm system forums, it appears that you can actually pick one of these up on the second-hand market and spin your own whole-house alarm system without going through a monitoring company like ADT. The extensive documentation from Impassa covers how to wire and configure the device, and as long as the system isn’t locked when you get it, it seems like wiping the configuration and starting from scratch isn’t a problem.

If it’s possible to put together your own homebrew alarm system with one of these units at the core, then it seems the least we can do is take it apart and see what kind of potentially modifiable goodies are waiting under that shiny plastic exterior.

Continue reading “Teardown: Impassa SCW9057G-433 Alarm System”

ESP8266 Adds WiFi To A 433 MHz Weather Station

There’s no shortage of cheap weather stations on the market that pull in data from several wireless sensors running in the 433 to 900 MHz range and present you with a slick little desktop display, but that’s usually where the flow of information stops. Looking to bridge the gap and bring all that local climate data onto the Internet, [Jonathan Diamond] decided to reverse engineer how his weather station worked.

The first phase of this project involved an RTL-SDR receiver, GNURadio, and a sprinkling of Python. [Jonathan] was able to lock onto the signal and piece together the data packets that reported variables such as temperature, wind speed, and rainfall. Each one of these was a small puzzle in itself, and in the end, there’s still a few bits which he hasn’t quite figured out. But he at least had enough to move onto the next step.

Tapping into the radio module.

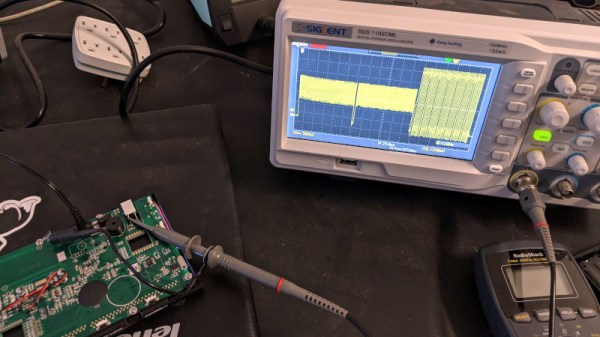
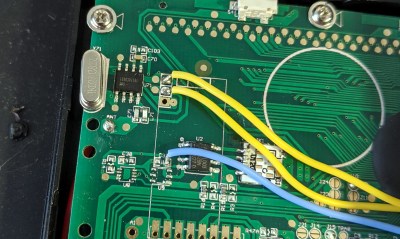
Now at this point, he could have pulled the data right out of the air with his RTL-SDR. But looking to push his skills to the next level, [Jonathan] decided to open up the base station and isolate its receiver. Since he already decoded the packets on the RF side, he knew exactly what he was looking for with his oscilloscope and logic analyzer. Once he was tapped into the feed coming from the radio, the final step was writing some code for the ESP8266 that could listen on the line, interpret the data packets, and push the resulting variables out over the network.

In this case, [Jonathan] decided to funnel all the data into Weather Underground by way of the Personal Weather Station API. This not only let him view the data through their web interface and smartphone application, but brought their hyperlocal forecasting technology into the mix at no extra charge. If you’re not interested in sharing your info with the public, it would be a trivial matter to change the firmware so the data is published to a local MQTT broker, or whatever else floats your proverbial boat.

If you’re really lucky, your own weather station may already have an ESP8266 onboard and is dumping all its collected data to the serial port. But if not, projects like this one that break down how to reverse engineer a wireless signal can be a great source of inspiration and guidance should you decide to try and crack the code.