Vibratory Rock Tumbler Bounces On Printed Spring

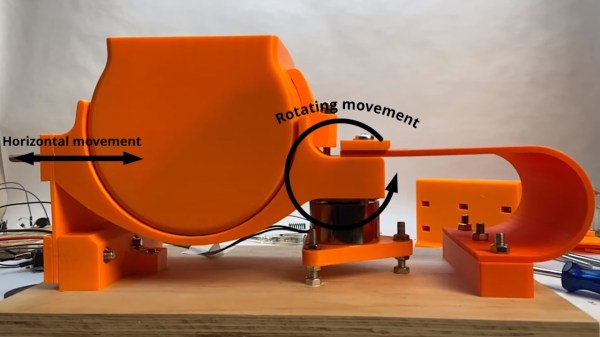
If you’re reading Hackaday, there’s a good chance you had a rock tumbler in your younger days. Hell, we’d put odds on a few of you having one rumbling away in the background as you read this. They’re relatively simple contraptions, and a common enough DIY project. But even still, this largely 3D printed rock tumbler from [Fraens] is unique enough to stand out.

To make a basic rock tumbler, all you really need to do is rotate a cylindrical chamber and let physics do its thing. Such contraptions are known as, unsurprisingly, rotary rock tumblers. But what [Fraens] has put together here is a vibratory tumbler, which…well, it vibrates. If this was Rockaday we might go farther down this particular rabbit hole and explain the pros and cons of each machine, but the short version is that vibratory tumblers are more mechanically complex and are generally better suited to fine finish work than rotary tumblers which take a brute force approach that tends to round off the rocks.

Continue reading “Vibratory Rock Tumbler Bounces On Printed Spring”

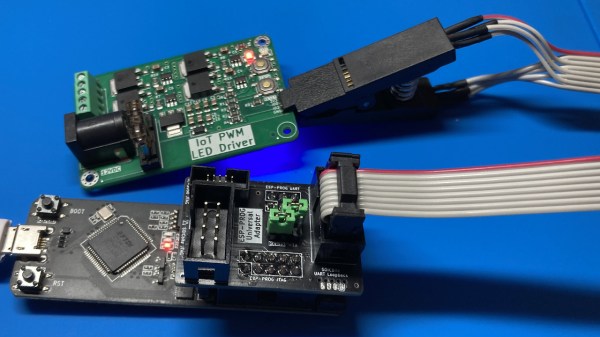
Showing the ESP-Prog-Adapter board plugged into the ESP-Prog adapter, wired to a SOIC clip, that then attaches to a PCB under test

ESP-Prog-Adapter Makes Your ESP32 Tinkering Seamless

Did you ever struggle with an ESP32 board of yours, wishing you had exposed that UART, or seriously lacking the JTAG port access? If so, you should seriously check out [0xjmux]’s ESP-PROG-Adapter project, because [0xjmux] has put a lot of love and care into making your ESP32 hardware interfacing a breeze. This project shows you how to add JTAG and UART headers with extra low board footprint impact, gives you a KiCad library to do so super quickly, and shares a simple and helpful adapter PCB you can directly use with the exceptionally cheap Espressif’s ESP-Prog dongle you should have bought months ago.

The hardware is perfect for ZIF no-soldering interfacing – first of all, both UART and JTAG can be connected through a SOICBite connection, a solderless connector idea that lets you use SPI flashing clips on specially designed pads at the edge of your board. For the fancy toolkit hackers among us, there’s also a Tag Connect symbol suggested and a connector available, but it carries JTAG that you will already get with the SOICBite, so it’s maybe not worth spending extra money on.

Everything is fully open-source, as one could hope! If you’re doing ESP32 hacking, you simply have to order this board and a SOIC clip to go with it, given just how much trouble [0xjmux]’s board will save you when programming or debugging your ESP32 devices. Now, you don’t strictly need the ESP-Prog dongle – you could remix this into an adapter for the Pi Pico board instead. Oh, and if designing boards with ARM CPUs are your thing, you might benefit from being reminded about the Debug Edge standard!

Multiply Your Multimeter With Relays And USB

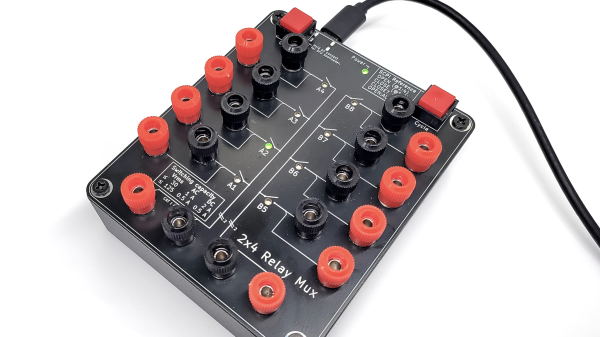
Multimeters are a bit like potato chips: you can’t have just one. But they’re a lot more expensive than potato chips, especially the good ones, and while it’s tempting to just go get another one when you need to make multiple measurements, sometimes it’s not practical. That’s why something like this 2×4 relay-based multiplexer might be a handy addition to your bench

In this age of electronics plenty, you’d think that a simple USB relay board would be easy enough to lay hands on. But [Petteri Aimonen] had enough trouble finding a decent one that it became easier to just roll one up from scratch. His goal was to switch both the positive and negative test leads from up to four instruments to a common set of outputs, and to have two independent switching banks, for those times when four-lead measurements are needed. The choice of relay was important; [Petteri] settled on a Panasonic DPDT signal relay with low wetting current contacts and a low-current coil. The coils are driven by a TBD62783A 8-channel driver chip, while an STM32 takes care of USB duties.

The mechanical design of this multiplexer is just as slick as the electrical. [Petteri] designed the PCB to act as the cover for a standard Hammond project box, so all the traces and SMD components are mounted on the back. That just leaves the forest of banana-plug binding posts on the front, along with a couple of pushbuttons for manual input switching and nicely silkscreened labels. The multiplexer is controlled over USB using the SCPI protocol, which happily includes an instrument class for signal switchers.

We think the fit and finish on this one is fantastic, as is usual with one of [Petteri]’s builds. You’ll probably recall his calibrated current reference or his snazzy differential probe.

Modular Vacuum Table Custom-Fits The Parts

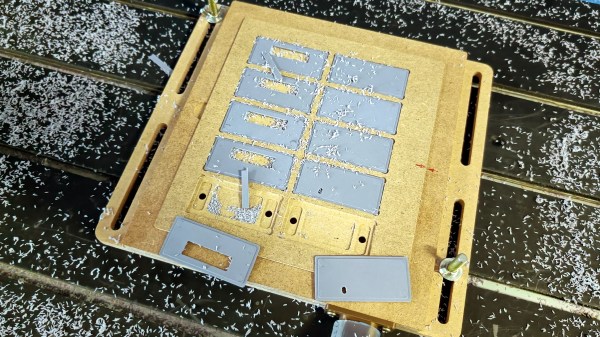
[enhydra] needed to modify a bunch of side inserts from some cheap ABS enclosures, and to save time and effort, he created a simple vacuum table with swappable inserts to precisely fit the parts. Suction is provided by a shop vacuum (plugged in near the bottom in the photo above) and it worked very well! Sealing and gaskets weren’t even required.

A vacuum table provides a way to hold workpieces flat and secure while a CNC machine does its thing, and because no clamps are involved, it can really speed up repetitive work. [enhydra]’s solution combines a vacuum table with a jig that ensures every rectangular piece is held exactly where the machine expects it to be, making the whole process of modifying multiple units significantly more efficient.

The whole thing — vacuum table and modular top — was straightforward to CNC cut out of what looks like particle board and worked as-is, no added gaskets or seals required, making this a very economical solution.

Vacuum tables can be pretty versatile and applied in more than one way, so keep that in mind the next time you’re wondering how best to approach a workshop problem. We’ve seen a well-engineered table used to speed up PCB milling, and we’ve also seen a DIY vacuum table combined with a heat gun and plastic plates from the dollar store make a bare-bones thermoforming rig.

SMD Soldering, Without The Blobs

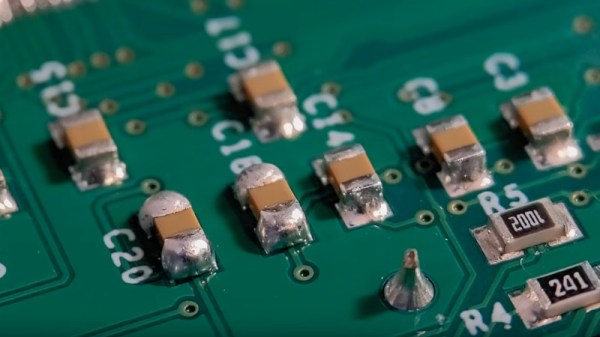
Hand soldering of surface mount components is a bread-and-butter task for anyone working with electronics in 2024. So many devices are simply no longer available in the older through-hole formats, and it’s now normal for even the most homebrew of circuits to use a PCB. But how do you solder your parts? If like us you put a blob of solder on a pad and drop the part into it, then [Mr. SolderFix] has some advice on a way to up your game.

The blob of solder method leaves a little more solder on the part than is optimal, sometimes a bulbous lump of the stuff. Instead, he puts a bit of flux on the pad and then applies a much smaller quantity of solder on the tip of his iron, resulting in a far better joint. As you can see in the video below, the difference is significant. He starts with passives, but then shows us the technique on a crystal, noting that it’s possible to get the solder on the top of these parts if too much is used. Yes, we’ve been there. Watch the whole video, and improve your surface mount soldering technique!

He’s someone we’ve featured before here at Hackaday, most recently in lifting surface mount IC pins.

Continue reading “SMD Soldering, Without The Blobs”

Night Vision The Old Way

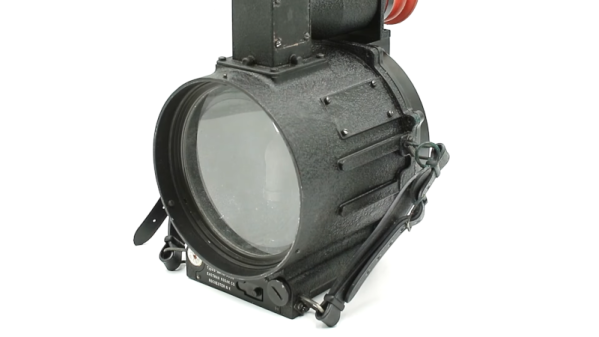
Solid state electronics have provided lighter weight night vision units that work better than the old-fashioned gear that used photomultiplier tubes, but there was an even older technology as [Our Own Devices] shows us in a recent video. The Metascope Type B was a first-generation passive night vision viewer that relied on moonlight.

The video shows a 1946 technical paper from the Office of Scientific Research and Development with [Vannevar Bush] credited as the institute’s director. If that name sounds familiar, you may remember that he foresaw hypertext (inspiring both [Doug Englebart] and the creation of the Web).

The Type B was an improvement over the older Type A, which had been tested during the invasion of North Africa in 1942. The type A weighed less than two pounds and was much smaller than the type B. However, it didn’t work very well, so they stopped making them and did a redesign, which is what you see in the video. The type B weighed almost 5 pounds.

To use the metascope, you had to “charge” it with light and then wait. Eventually, you’d need to charge it again. The type B allowed you to charge one phosphor plate while using another one. When that plate became weak, you could swap the plates to continue using the device.

If you aren’t keen on the history, you can skip to just before the 15-minute mark of the video for the hardware examination. He doesn’t open the device, but that’s probably wise, given the nature, age, and rarity of the metascope.

Modern image sensors are very sensitive to infrared, and normal cameras usually have filters to keep them out. Not that you can’t remove it, of course. If you want to see something more modern, [Nick] built his own AN/PVS-14 night vision scope and you can too.

Continue reading “Night Vision The Old Way”

Are Minimills Worth It?

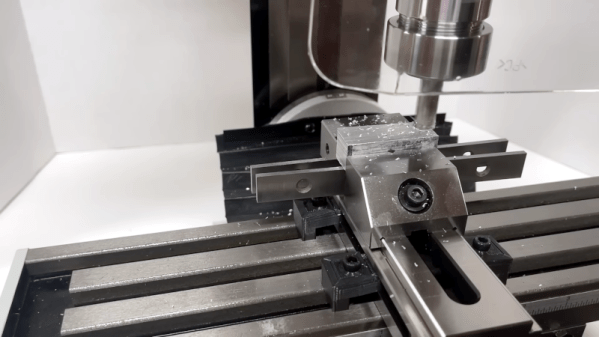
These days, the bar for home-built projects is high. With 3D printers, CNC, and cheap service providers, you can’t get away with building circuits in a shoe box or an old Tupperware container. While most people now have access to additive manufacturing gear, traditional subtractive equipment is still a bit less common. [Someone Should Make That] had thought about buying a “minimill” but he had read that they were not worth it. Like a lot of us, he decided to do it anyway. The pros and cons are in the video you can watch below.

During setup, he covered a few rumors he’d heard about these type of mills, including they are noisy, have poor tolerances, and can’t work steel. Some of these turned out to be true, and some were not.

Continue reading “Are Minimills Worth It?”