Reactive Load For Amplifiers Teaches Lessons About Inductors

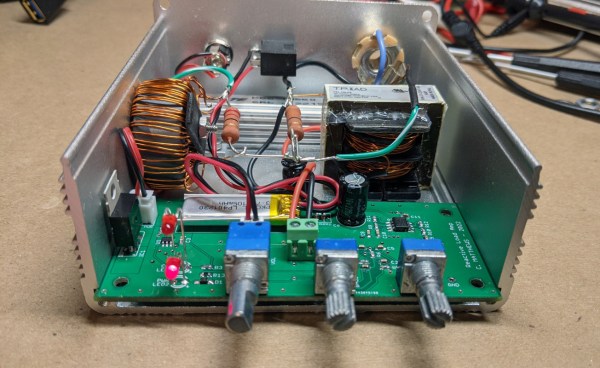
The sound produced by any given electric guitar is shaped not just by the instrument itself but by the amplifiers chosen to make that sound audible. Plenty of musicians swear by the warm sound of amplifiers with vacuum tube circuits, but they do have some limitations. [Collin] wanted to build a reactive load for using tube amps without generating a huge quantity of sound, and it resulted in an interesting project that also taught him a lot about inductors.

The reactive load is essentially a dummy load for the amplifier that replaces a speaker with something that won’t produce sound. Passive loads typically use resistor banks but since this one is active, it needs a very large inductor to handle the amount of current being produced by the amplifier. [Colin] has also built a headphone output into this load which allows it to output a much smaller quantity of sound to a headset while retaining the sound and feel of the amplifier tubes, and it additionally includes a widely-used tone control circuit as well.

There’s a lot going on in the design of the circuitry for this amplifier load, including a lot of research into low-frequency inductors that can handle a significant amount of current. [Collin] eventually ended up winding his own, but the path he took to it was long and winding. There’s a lot of other circuit theory discussed as well especially with regards to the Baxandall EQ that he built into it as well. And, if you’d like to learn more about tube amplifiers in general, take a look at this piece which notes one of the best stereo amps ever produced.

Drastic Plastic: Enclosure Rebuild Uses Donor Material

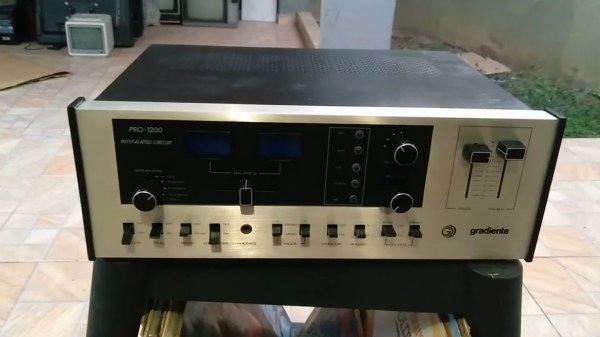
Although 3D printers are great, people tend to use them as a universal hammer wherein almost everything becomes a nail that’s just begging to be struck. So as hacker appetites become finicky with the same old fare, it’s refreshing to see an enclosure restoration done in such an old-school fashion. To wit: [Doidão Santos]’ classic repair of the crumbling side fairings on a vintage amplifier.

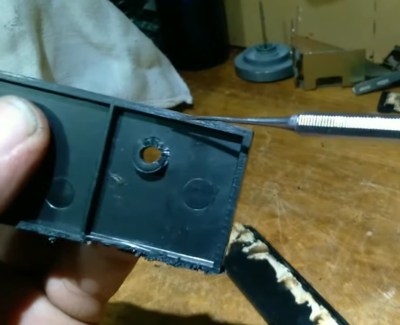
Yes, instead of designing replacement pieces, printing them, and hiding the layered evidence with paint or an acetone blur, [Doidão] called upon a broken sound system whose chassis bore a relief in the corners similar to that of the amplifier.

After cutting out two matched pieces of donated plastic, [Doidão] taped them together and welded ’em with a soldering iron outfitted with a curved-but-flattened spade tip that looks ideal for this purpose. Although the donor enclosure provided much-needed relief, one corner was lacking in this aesthetic, so [Doidão] cast a little bit of molten plastic using the relief as a mold.

Once the pieces were tacked together, [Doidão] filed them down, sanded them, polished them to a nice shine, and installed them on the amplifier. They look great, and no one will be the wiser. But if we were in [Doidão]’s shoes, we’d tell everyone what we’d done. Be sure to check it out after the break.

Ready for more fantastic plastic resto-hacks? Let us introduce you to [drygol].

Continue reading “Drastic Plastic: Enclosure Rebuild Uses Donor Material”

Carver M-400 Amplifier Repair Keeps The 1980’s Alive

Carver is a famous name in audio equipment although they have been known to use odd names for things. For example, the 1980’s vintage M-400 magnetic field power amplifier that [JohnAudioTech] is repairing (see the two videos below). That sounds like something off a bad Star Trek remake, but, apparently, we weren’t alone in thinking that, judging by this 1982 review of the unit from a UK magazine.

Still, it is an interesting high-power amplifier and we love seeing gear of this age torn apart. The beast is rated at 201 watts — you have to wonder if the extra watt is another marketing ploy.

There were actually two units and they looked pretty good for four-decade-old boxes. One sounded pretty good outside of some noticeable buzzing. The other had something shorted inside. If you enjoy watching repair videos, you’ll appreciate this two-parter.

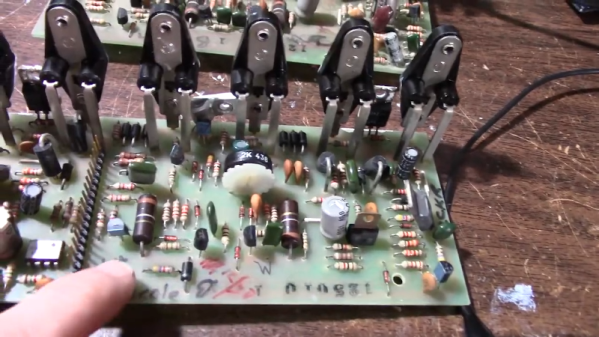
We have to admit — and it may be a personal bias — there is something more pleasing about seeing a PCB populated with a bunch of interesting-looking through-hole components. Modern boards with a sea of surface mount parts tend to look a little bland, aesthetically speaking. Of course, when it comes time to make our own boards, we are happy to use SMD and forego all that hole drilling!

We like watching computer repair videos, in particular. Or sometimes, something really exotic.

Continue reading “Carver M-400 Amplifier Repair Keeps The 1980’s Alive”

Upcycled Practice Amp Build Goes To Eleven

What do you call someone who gives the toddler in your life a musical instrument as a gift? In most cases, “mortal enemy” is the correct answer, but not everyone feels quite so curmudgeonly, and might even attempt to turn up the volume a bit. Such is the case with this wonderfully detailed practice amp for the grandkids’ electric ukelele.

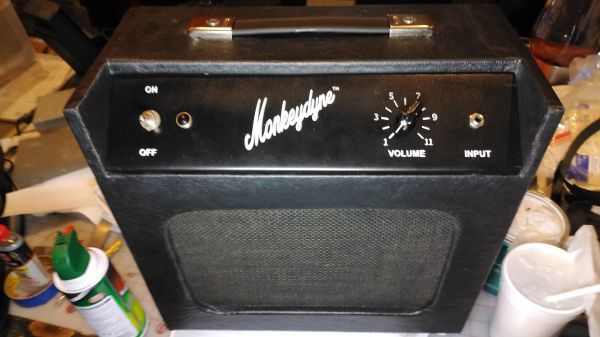
The aptly named [packrat] [Professor Mayhem] really made this build a tour de force of scrap bin sourcing. The amp is built around a module salvaged from an old TV, a stereo Class-D amp that was modified to provide 30 watts output and a volume control. The driver came from a flood-damaged speaker unit, and the power supply from a gutted wall wart. The case was built with scrap plywood and covered with pebble-grain fabric to give it that pro audio look, while the chassis for the electronics was bent from a piece of sheet steel.

But it’s the tiny details that really sell this project. Everything from the pilot light to the pointer knob screams 1970s, as do the painstaking front panel lettering and vinyl “Monkeydyne” logo. [Professor Mayhem] even went the extra mile to create an etched-brass serial number plate, a mock specs and safety label, and even a QA inspection tag that was (sort of) stapled inside the cabinet.

We tip our hats to [Professor Mayhem] for this four-month labor of love and obvious nostalgia trip, which the kids are sure to love. [Professor Mayhem] does admit that some will argue with his decision to use a Class D amp and a switch-mode power supply, but let’s be real — for the application, it’s probably more than sufficient.

Thanks for the tip, [packrat].

Class A Amplifiers, Virtually

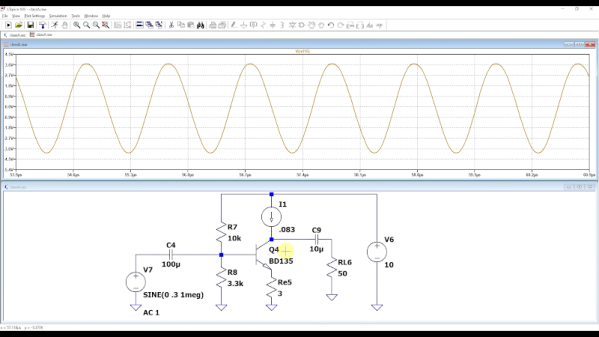
If you didn’t know better, you might think the phrase “class A amplifier” was a marketing term to help sell amplifiers. But it is, of course, actually a technical description of an amplifier that doesn’t distort the input waveform because it doesn’t depend on multiple elements to handle different areas of the input waveform. Want to know more? [FesZ] has a new video covering the basics of class A amplifiers including some great simulations. You can see the video below.

A class A amplifier uses a transistor that is always biased on. It never saturates or switches off. This is good for linearity, but not always the best for efficiency so there are other classes of amplifiers, too. However, for many applications, class A is the most common configuration.

There are a number of trade-offs involved with each type of amplifier and [FesZ] covers them in detail. But the real interesting part is the simulations in Spice. Sure, you can build the circuits and look at everything with a meter or scope, but using Spice is much handier.

There is a second video upcoming. We hope he covers other amplifier types too, as you really do want to understand the differences when you need to design something. If you want more Spice stuff, check out some of our previous posts. If for some reason, you don’t like LTSpice, there’s always Micro-Cap 12.

Continue reading “Class A Amplifiers, Virtually”

Getting Root On Linux Amplifier Adds New Inputs

We remember when getting Linux on your average desktop computer was a tricky enough endeavor that only those with the most luxurious of graybeards would even attempt it. A “Linux box” in those heady days was more than likely an outdated machine salvaged from the dumpster, side panel forever removed, cranking away in a basement or garage. Fast forward today, and Linux is literally everywhere: from smartphones and luxury cars, to TVs and refrigerators. Ironically it’s still not on most desktop computers, but that’s a discussion for another time.

So when [Michael Nothhard] sent in the fascinating account of how he hacked his Linux-powered Bluesound Powernode N150 amplifier to unlock more inputs, the least surprising element was that there was a “smart amplifier” out there running the free and open source operating system. What piqued our interest was that he was able to bust his way in with relative ease and enable some impressive new capabilities that the manufacturer would probably have rather been kept under wraps.

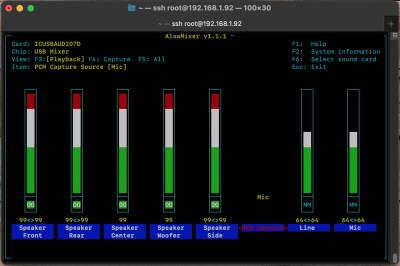
Configuring the CM6206’s audio settings.

[Michael] explains that the N150 has a USB port on the back side of it, and that officially, it only works with mass storage devices and a handful of approved peripherals such as a Bluetooth dongle. But as he was hoping to connect some more devices to the input-limited amplifier, he wondered if he could get a USB audio adapter recognized by the OS. After using a known exploit to get root access, he started poking around at the underlying Linux system to see what kind of trickery the developers had done.

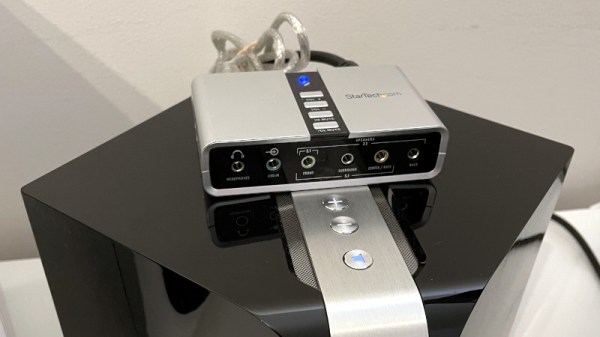
Based on a fairly common C-Media CM6206 chipset, the StarTech 7.1 USB audio adapter was picked up by the kernel without an issue. But to actually get it working with the amplifier’s stock software, he then needed to add a new <capture> entry to the system’s sovi_info.xml configuration file and make some changes to its default ALSA settings. With the appropriate files modified, the new USB audio input device popped up under the official Bluesound smartphone application.

At the end of the write-up [Michael] notes that you’ll need to jump through a few additional hoops to make sure that an upstream firmware update doesn’t wipe all your hard work. Luckily it sounds like backing up the configuration and returning it to the newly flashed Powernode is easy enough. We’ve certainly seen more elaborate methods of gaining control of one’s sound system over the years.

Adding WiFi Remote Control To Home Electronics? Be Prepared To Troubleshoot

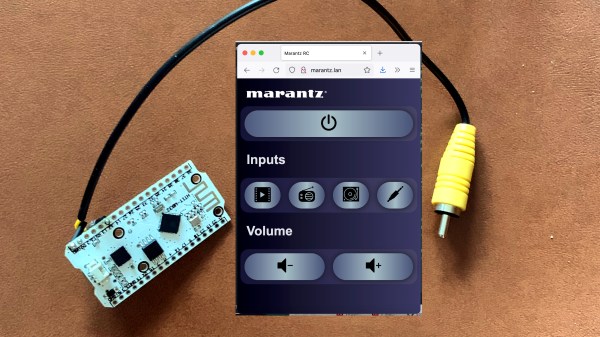
[Alex] recently gave a Marantz audio amplifier the ability to be remotely-controlled via WiFi by interfacing an ESP32 board to a handy port, but the process highlights how interfacing to existing hardware often runs into little, unforeseeable problems that can sink the project unless solved.

At its core, the project uses an ESP32 and the ESPAsyncWebServer project to create a handy web interface that is accessible over WiFi. Then, to actually control the amplifier, [Alex] decoded the IR-based remote signals by watching the unit’s REMOTE ports, which are intended as a pass-through and repeater for IR signals to other Marantz units. This functionality can be exploited; by sending the right signals to the REMOTE IN port, the unit can be controlled by the ESP32. With the ESP32 itself accessible by just about any WiFi device, [Alex] gains the freedom to control his amplifier with much greater flexibility than just the IR remote would offer.

Sounds fairly straightforward, but as usual when interfacing to an existing piece of electronics, there were a few glitches. The first was that high and inconsistent latency (from 10 ms to 100 ms) made controlling the amplifier a sometimes frustrating experience, but that was solved by disabling power saving on the WiFi interface. Another issue was that sending signals by connecting a GPIO pin to the REMOTE IN port of the amplifier worked, but had the side effect of causing the amplifier to no longer listen to the IR remote. Apparently, current flowing from the REMOTE port to the ESP32’s GPIO pin was to blame, because adding a diode in between fixed the problem.

The GitHub repository holds the design files and code. This kind of project can be pretty complex, because the existing hardware doesn’t always play nice, and useful boards like a modern ESP32 aren’t always available. Adding a wireless interface to vintage audio equipment has in the past involved etching circuit boards and considerably more parts.