Building A Better Baby Bottle Boiler

[Sebastian Foerster] hasn’t been at his blog in a while. He and his wife just had twins, so he’s been busy standing waiting for formula or milk to warm up. Being a technical kind of guy, he took a look at the tools currently on the market to do this, analyzed them, and decided instead to do it himself.

[Sebastian] looked to his Nespresso Aeroccino – a milk frother designed to give you hot or cold frothy milk for the top of whatever beverage you decide to put it on top of. It made the milk a bit too hot, 60°C, but once it got to the temperature, it would shut off, so if [Sebastian] could get it to shut off at a lower temperature, he had found the solution!

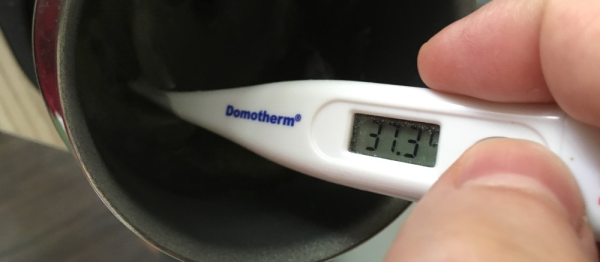
After taking the Aeroccino apart and going over the circuit, it seemed like a simple design relying on a resistor and NTC (negative temperature coefficient) thermistor connected to an ATTiny44 microcontroller. [Sebastian] didn’t want to have to reprogram the ATTiny, so he looked at the resistor and NTC. The resistor and thermistor create a voltage divider and that voltage is read in by the microcontroller through an analog pin. After looking up some info on the thermistor and replacing the resistor with a potentiometer, [Sebastian] could adjust the shut-off temperature while measuring with a thermometer. When he got the temperature he liked, he reads the value of the potentiometer and then replaces it with a couple of resistors in series.

Now [Sebastian] gets the babies’ bottles ready from fridge to temperature in about 25 seconds. He doesn’t have to worry about keeping an eye on the bottles as they heat up. We’re sure that getting two bottles ready in under a minute is much better on the nerves of new parents than waiting around for ten minutes. For more fun with thermistors, check out our article on resistors controlled by the environment or check out this bluetooth bbq thermometer!

Building A Linear Motor

linear-motor

We admit that this project doesn’t have very many details available, but it was just too neat for us to pass up. It’s a small linear motor which [ligonapProduktion] built after seeing a very brief description of a commercially available version.

The video after the break shows him testing the motor. In this screenshot he’s holding the center shaft while the coil assembly moves back and forth. But it works with a stationary coil moving the rod as well. The motor is basically a modified solenoid. There are sixteen neodymium magnets inside the shaft. The set of four coils is driven by an ATtiny44. Just like a stepper motor, energizing the coils in the correct order pushes against the rare earth magnets creating motion.

We’re not sure if he has any use in mind for this build. For us we just like to see the concept in practice (we feel the same way about a homopolar motor build).

Continue reading “Building A Linear Motor”

Making Your Anime Papercraft Move To The Music

This anime character is dancing to the music thanks to some animatronic tricks which [Scott Harden] put together. She dances perfectly, exhibiting different arm and head movements at just the right time. The secret to the synchronization is actually in the right channel of the audio being played.

The character in question is from an Internet meme called the Leekspin song. [Scott] reproduced it on some foam board, adding a servo to one arm to do the leek spinning, and another to move the head. These are both driven by an ATtiny44. All of the movements have been preprogrammed to go along with the audio track. But he needed a way to synchronize the beginning of each action set. The solution was to re-encode the audio with one track devoted to a set of sine wave pulses. The right audio channel feeds to the AVR chip via an LM741 opamp. Each sine wave triggers the AVR to execute the next dance move in the sequence. You can see the demo video for the project after the break.

Continue reading “Making Your Anime Papercraft Move To The Music”

USB Dongle For Unmodified NES Controllers

This USB dongle will let you use your unmodified NES controllers on a computer. That’s because it includes the same socket you’d find on the classic console.

The image above shows the prototype. Instead of etching the copper clad board, each trace was milled by hand (presumably with a rotary tool). To the left the black square is made of several layers of electrical tape that builds the substrate up enough to fit snugly in a USB port.

An ATtiny45 running the V-USB stack has no problem reading the controller data and formatting it for use as a USB device. This is actually the second iteration of the project. The first attempt used an ATtiny44 and a free-formed circuit housed inside the controller. It worked quite well, but required alterations to the circuit board, and you needed to replace the stock connector with a USB plug. This dongle allows the controller to go unaltered so it can be used with an NES console again in the future.

A Novel Binary Clock From Hackaday’s Own

Hackaday’s very own [Mike Szczys] just shared an awesome binary clock he’s been working on. Unlike a normal binary clock that is only readable by self-admitted geeks and nerds, [Mike]’s clock is nearly comprehensible by the general population.

There are 12 lines of three LEDs around the face of [Mike]’s clock. These LEDs represent the time in minutes in binary – the inner LED is 1, the middle LED is 2, and the outer LED is 4. Adding up each of the LEDs around the clock face gives the number of minutes passed since the top of the hour.

To display the hour, [Mike] used a red/blue bi-color LED in the center of each line of LEDs. For example, at 1:03 the one ‘o clock hand will have a blue LED in the first position and a purple LED in the second position. A minute later at 1:04, this changes to blue, red, blue.

If that is a little confusing, there’s a wonderful video demonstrating the pattern of LEDs throughout the hour.

For such an interesting clock, the build is fairly simple – just an ATtiny44 with an STP16CP05 LED driver. Time is kept with a battery-backed MCP7940 real-time clock, and power is provided by a simple USB port.

[Mike] had enough boards manufactured for several dozen clocks, but only had enough parts (and patience) to solder up four clocks. You can check out the time-lapse of him going to town with a soldering iron on one of these boards after the break. As with all good builds, the code and schematics are provided on GitHub if you’d like to make your own.

Continue reading “A Novel Binary Clock From Hackaday’s Own”

ATtiny44 Drop-in Replacement For Ikea Dioder’s Stock PIC Controller

The Ikea Dioder is an LED light sold at the big blue and yellow building that lets you mix your own colors using a simple button and wheel controller. [Marco Di Feo] looked at all of the other projects out there that alter the controller and figured out that the IC can be directly replaced with an ATtiny44 microcontroller. With that chip soldered onto the board he added IR control so that he can change colors using his universal remote control (translated).

[Marco] removed the potentiometer normally responsible for selecting the color. This frees up one pin on the microcontroller which he then uses to receive signals from a TSOP1736 IR receiver. The video after the break shows the device, which illuminates the back of his home entertainment center, reacting to commands from his remote control.

Of course this can be done without the chip swap as the PIC 16F684 that comes with it can be reprogrammed in place. But [Marco] didn’t have a PICkit or other programmer on hand. Continue reading “ATtiny44 Drop-in Replacement For Ikea Dioder’s Stock PIC Controller”

One-handed GameCube Controller

[Hasse] built a one-handed video game controller for his brother. He fit everything he needed into the body of an existing controller and came up with a very usable system. The controller will be right-hand only, so the left shoulder button was moved underneath the right side where your middle finger can get at it. This leaves the d-pad and the left analog stick to account for. By combining an ATtiny44A, an accelerometer, and a digital to analog converter the controller can sense motion. The microcontroller reads in the accelerometer data, gives user feedback via four added LEDs on the d-pad, and the DAC feeds the appropriate signals back into the controller as if you were using the stick. There is even a switch to select whether the motion data is mapped to the analog stick or to the d-pad. We’ve included a demo video after the break.

Find that you also need some one-armed typing assistance? Check out this half-qwerty keyboard hack. Continue reading “One-handed GameCube Controller”