Casting A Simple 3D Print In Aluminium

3D printing with plastics and resins is great for quickly prototyping parts with all manner of geometries, but strength and durability of the parts produced is often limited. One way around this is to use your 3D printed parts as patterns for casting in something tougher like aluminium. That’s precisely what [Brian Oltrogge] did to produce an attractive wall hook from a 3D printed design.

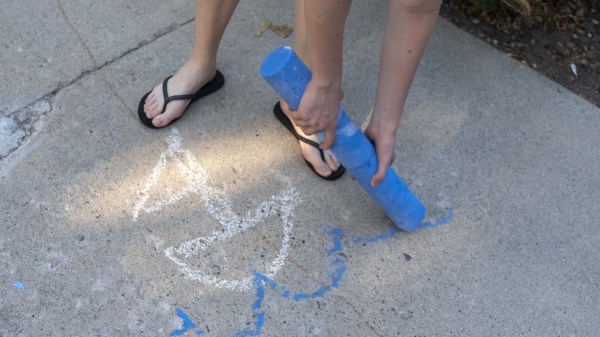
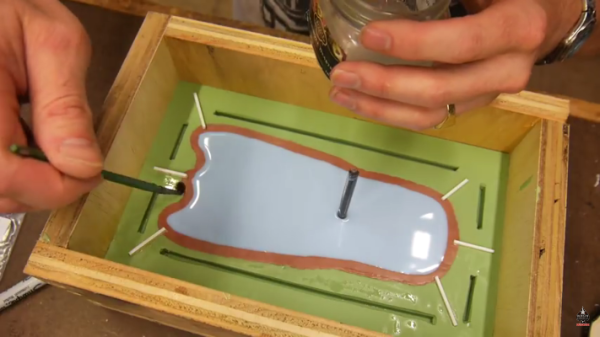
The process starts with the design and printing of a wall hook, with [Brian] taking care to include the proper draft angles to allow the pattern to be properly removed from the mold. The print is carefully sanded down and post-processed to be highly smooth, so that it doesn’t spoil the mold when its removed for the casting process. From there, a sand casting mold is built around the pattern using sodium silicate in a 3-4% mix by weight with fine masonry sand. Once ready, the pattern is removed, and the mold is assembled, ready for the pour.

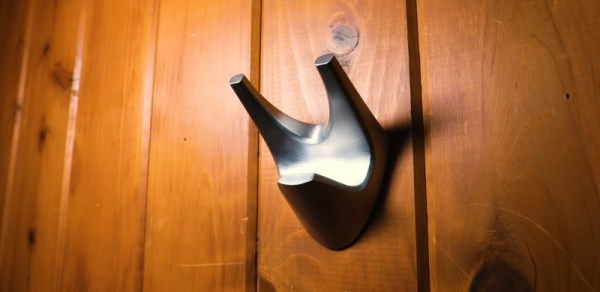
[Brian] completes the process with a simple gravity casting method using molten aluminium. The part is then removed from the mold, and filed down to improve the surface finish from the sand casting process. It’s then polished up to a nice shine and hung on the wall.

[Brian] does a great job of explaining the basics of what it takes to get gravity casting right; draft angles in particular are something often ignored by beginners, yet are crucial to getting good results. You needn’t just settle for casting inanimate objects though; we’ve featured DIY casting processes for gears before, too. Video after the break.

Continue reading “Casting A Simple 3D Print In Aluminium”

Mixing Up Your Own Supersized Sidewalk Chalk

When folks started quarantining, chalk art spilled onto driveways and sidewalks to remind us that there’s still beauty and creative people doing what they always do. Now it’s time to strut your stuff and show your neighbors that things are greener on your slab of concrete. [friedpotatoes] has shared their giant sidewalk recipe with the world so you can paint the town red. With chalk.

Name brand sidewalk chalk is expensive considering how easy it is to make. What Big Chalk doesn’t want you to know is that the ingredients are just water, plaster of Paris, and tempera paint; meaning this project should be safe enough for the junior hackers to get some hands-on time. Some folks use food coloring instead of paint, but we know what happens to clothing when kids get their mitts on food coloring. [friedpotatoes] also includes extensive repurposing of recyclables, which is commendable.

The instructions suggest filling potato chip (crisp) tubes through a milk jug funnel to make giant pieces, but you can use any mold you like. If you have a CNC machine, it should be no trouble to make stamp-like pieces of chalk for tagging on the go, or shapes like arrows when you have to direct a miniature parade.

For permanent and precise sidewalk decorations, you can check out a graffiti paint machine and for totally temporary messages there is a water-dispensing writer.

H2gO Keeps Us From Drying Out

The scientific community cannot always agree on how much water a person needs in a day, and since we are not Fremen, we should give it more thought than we do. For many people, remembering to take a sip now and then is all we need and the H2gO is built to remind [Angeliki Beyko] when to reach for the water bottle. A kitchen timer would probably get the job done, but we can assure you, that is not how we do things around here.

A cast silicone droplet lights up to show how much water you have drunk and pressing the center of the device means you have taken a drink. Under the hood, you find a twelve-node NeoPixel ring, a twelve millimeter momentary switch, and an Arduino Pro Mini holding it all together. A GitHub repo is linked in the article where you can find Arduino code, the droplet model, and links to all the parts. I do not think we will need a device to remind us when to use the bathroom after all this water.

Another intrepid hacker seeks to measure a person’s intake while another measures output.

Continue reading “H2gO Keeps Us From Drying Out”

Using Lasagna To Make Cost-Saving Molds

Building a one-off prototype is usually pretty straightforward. Find some perfboard and start soldering, weld up some scrap metal, or break out the 3D printer. But if you’re going to do a production run of a product then things need to have a little more polish. In [Eric Strebel]’s case this means saving on weight and material by converting a solid molded part into something that is hollow, with the help of some lasagna.

What [Eric] walks us through in this video is how to build a weep mold. First, the solid part is cast in silicone. Using the cast, some “sheet clay” is applied to the inside which will eventually form the void for the new part’s walls. The clay needs to be flush with the top of the mold, though, and a trick to accomplish this task is to freeze the mold (next to the lasagna) which allows the clay to be scraped without deforming.

From there, the second half of the mold is poured in, using special channels that allow the resin to “weep” out of the mold (hence the name). This two-part process creates a much more efficient part with thin walls, rather than the expensive solid prototype part.

[Eric] is no stranger around these parts, either. He’s an industrial designer with many tips and tricks of the profession, including a method for building a machining tool out of a drill press and a vise as well as some tips for how to get the most out of a low-volume production run of a product you might be producing.

Continue reading “Using Lasagna To Make Cost-Saving Molds”

Broken Finger Is No Obstacle To Modern Hacker

[Jim Merullo] and his son were enjoying a nice game of Frisbee when an unfortunate dive led to an injury. His son broke his pinky finger leaving doctors no choice other than bounding his entire left hand in an unreasonably large cast. For most, this would mean no use of the left hand for several weeks, which is somewhat problematic if tin01
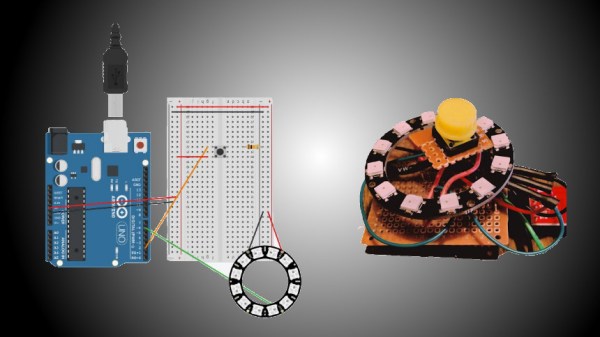
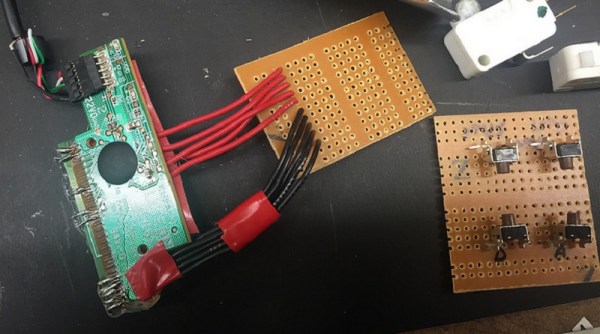
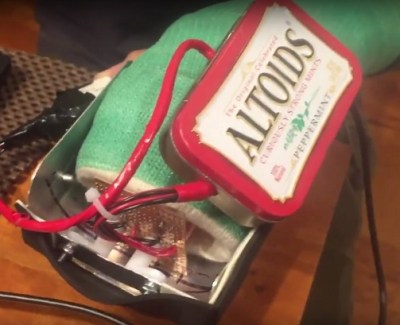
your son has a Minecraft addiction.  [Jim], however, is no stranger to the hacker community and began working on a solution. He broke out the #2 Philips screwdriver, fired up the soldering iron and got to work.

A detailed analysis of the injured left hand revealed limited use of the middle and ring finger, and full use of the thumb. Because his son played the game using his right hand for the mouse and left for the keyboard, he needed to find a way for him to operate a keyboard with the limited use of his left hand. He took apart an old USB keyboard and soldered up some tactile switches to emulate the needed key presses. After making a fashionable Altoids tin mount that fit over the cast, his son was able to enjoy his favorite video game with limited interruption.

Continue reading “Broken Finger Is No Obstacle To Modern Hacker”

Casting a hand part 1

[Bil’s] Quest For A Lost Finger: Episode I

A little over a year ago I had a semi-gruesome accident; I stepped off of a ladder and I caught my wedding ring on a nail head. It literally stripped the finger off the bone. This was in spite of me being a safety-freak and having lived a whole second life doing emergency medicine and working in trauma centers and the like. I do have trauma center mentality which means, among other things, that I know you can’t wind the clock back.

hand9A few seconds make an incredible differences in people’s lives. Knowing that it couldn’t be undone, I stayed relaxed and in the end I have to say I had a good time that day as I worked my way through the system (I ended  up in a Philadelphia trauma center with a nearby hand specialist) as I was usually the funniest guy in the room. Truth be told they ask incredibly straight questions like”are you right handed?”  “Well I am NOW”.

So now I could really use a bit of a body hack, having seen the X-Finger on Hackaday long before I knew that I would one day work with them, I was hoping that we could get one to work for me. In speaking with a couple of the mechanical engineers on the Hackaday staff we decided to get [James Hobson] and [Rich Bremer] involved and that the best way to do it was to get a casting of my injured hand out to them.


Continue reading “[Bil’s] Quest For A Lost Finger: Episode I”

Blueberry Squishee? Mechanically-separated chicken? Nope! It’s Oogoo!

Oogoo, A Home-made Sugru Substitute

If you follow Instructables.com, it might seem like every third article lately is about Sugru, the nifty air-drying silicone putty that’s good for all manner of repairs and custom parts. It’s fantastic stuff (and we love their slogan, “Hack things better”), but one can’t (yet!) just drop in on any local hardware store to buy a quick fix…so [mikey77] has cooked up a recipe for a basic Sugru work-alike. His “Oogoo” (a name likely inspired by oobleck) is a simple mix of corn starch and silicone caulk.

A two-ingredient recipe would hardly seem adequate material for an article, but [mikey77]’s left no stone unturned, providing an extensive tutorial not only on mixing the compound, but how to add colors, cast and carve custom shapes, and how his home-made recipe compares to the name brand product. As a bonus, the article then drifts into a little Halloween project where he demonstrates etching conductive cloth, how to make conductive glue, and other hands-on shenanigans.