Building A Hammer Powered By Gunpowder

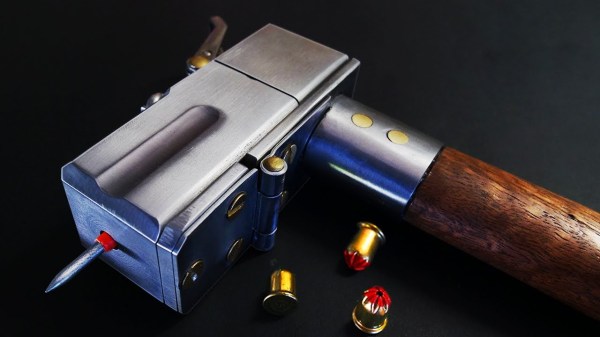
Hammers are pretty straightforward tools. If you need more impact force, just get a bigger hammer. Alternatively, you can look at enhancing performance with chemical means, and we don’t mean by using steroids. No, instead, you can try hammering with the aid of gunpowder, and [i did a thing] has done just that.

The build relies on using 6.8mm blank cartridges designed for the Ramset brand of explosive nail drivers. However, rather than buying such a tool off the shelf, [i did a thing] built one in a traditional hammer format instead. The device looks like a hammer, with a hinge on the two-piece head, which allows a blank cartridge to be placed inside. When the hammer is swung at a hard surface, the impact triggers the blank which drives the nail forward with incredible force.

[i did a thing] was able to pierce steel with the device, and sent a nail clean through a surfboard, too. It’s a very dangerous thing, so if you’re experimenting in this space, do be careful. Video after the break.

Continue reading “Building A Hammer Powered By Gunpowder”

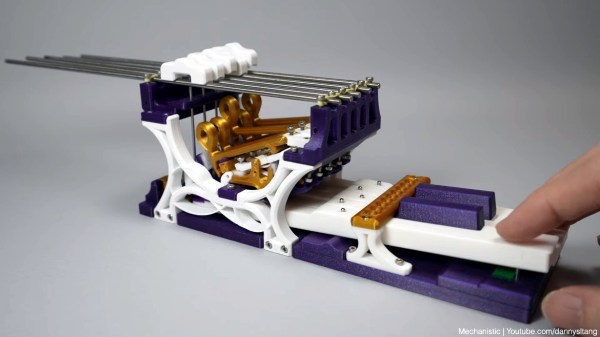
A 3D-printed scale model of the mechanism inside a grand piano.

Printed Piano Mechanism Sure Is Grand

Do you know how a piano works? Sure, you press a key and a hammer strikes a string, but what are the finer points of this operation? The intricacy of the ingenious mechanism is laid bare in [Mechanistic]’s 3D-printed scale model of a small section of the grand piano keyboard. The ‘grand’ distinction here is piano length-agnostic and simply refers to any non-upright. Those operate the same way, but are laid out differently in order to save space.

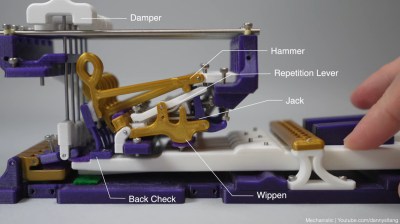
The keys of an acoustic piano are much longer than just the part that shows — they are long levers that do a lot of work, including working their own sound dampeners. The really interesting part is the mechanism that allows a note to be played repeatedly without first releasing the key. This same mechanism also lets the pianist play softly, loudly, or somewhere in between based on the amount of pressure applied.

So you know that the hammer strikes the string (or in this case, the rod), and you can probably figure that it backs off to let the string ring out. But there’s also this whole system that keeps the hammer close by for repeated strikings, as long as the person is holding down the key. Be sure to check it out in the build video after the break.

[Mechanistic] must be going for the standing ovation, because they say in the video’s comments that they will release STL files when they’re finished writing the assembly guide (!). What an encore that will be.

There are many ways to hack an acoustic piano, but don’t go thinking you can sub in guitar strings.

Continue reading “Printed Piano Mechanism Sure Is Grand”

Robert Murray Smith Discusses Rivets and Riveting

Old School Fastener Tutorial Is Riveting

Whether you’re making, repairing, or hacking something together, we all need fastners. Screws, nuts and bolts, and pop rivets are handy sometimes. Various resins and even hot glue are equally useful. In some cases however the right fastener for the job eludes us, and we need another trick up our sleeve.

[Robert Murray Smith] found himself in such a position. His goal was to join two pieces of aluminum that need a nice finish on both sides. Neither glue, pop rivets, screws, nuts or bolts would have been appropriate.  [Robert] is always flush with ideas both new and old, and he resorted to using an old school fastener as explained as explained in his video “How To Make And Use Rivets“.

In the video below the break, [Robert] goes into great detail about making a simple rivet die from a 5mm (3/16”) piece of flat steel, creating the rivet from a brass rod, and then using the flush rivet to join two pieces of aluminum. The simple tooling he uses makes the technique available to anybody with a propane torch, a vise, some basic tools, and a simple claw hammer. We also appreciate [Robert]’s discussion of cold riveting, hot riveting, and annealing the rivets as needed.

Not only is riveting a technique thousands of years old, its advancement and application during the Industrial Revolution enabled technologies that couldn’t have existed otherwise. Hackaday’s own [Jenny List] did a wonderful write up about rivets in 2018 that you won’t want to miss!

Continue reading “Old School Fastener Tutorial Is Riveting”

Adjustable, Piston-Damped Hammer

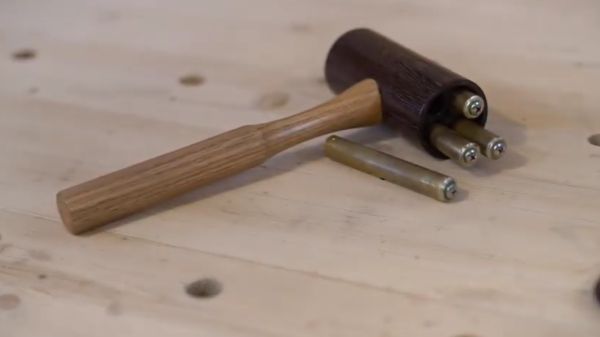
When all you have is a hammer, every problem is a constant quest for an even better hammer, as the popular saying goes. At least, that seems to be [Ebenisterie Éloïse]’s situation. She wanted a deadblow hammer that not only had an aesthetically pleasing wood and brass construction, but also one that included adjustable dampers to make sure that each hammer swing is as efficient as possible.

For those unfamiliar with specialty hammers, dead blow hammers typically have some movable mass such as sand or lead shot within the hammer head. This mass shifts forward when the hammer strikes an object, reducing rebound of the hammer off of the object and transferring more energy into each strike. This hammer omits a passive mass in favor of four custom-machined brass tubes, each of which holds a weighted fluid, a spring, and brass weight. Each piston acts as a damper in a similar way to a shock absorber on a vehicle, and a screw and o-ring at the top of each one allows them to be adjustable by adding different weight fluids as needed. Some detailed testing of the pistons shows a marked improvement over any of the passive mass varieties as well.

Not only is this an incredible amount of detail and precision for a tool that is often wielded in a non-precise way (at least among those of us for who aren’t skilled craftspeople), but it is also made out of wood, leather, and brass which gives it an improved look and feel over a plastic and fiberglass hammer that is typical of most modern deadblow hammers. It even rivals this engineer’s hammer with its intricate custom engraving in craftsmanship alone.

Continue reading “Adjustable, Piston-Damped Hammer”

Fail Of The Week: Taking Apart A Tesla Battery

It takes a lot of energy to push a car-sized object a few hundred miles. Either a few gallons of gasoline or several thousand lithium batteries will get the job done. That’s certainly a lot of batteries, and a lot more potential to be unlocked for their use than hurling chunks of metal around on wheels. If you have an idea for how to better use those batteries for something else, that’s certainly an option, although it’s not always quite as easy as it seems.

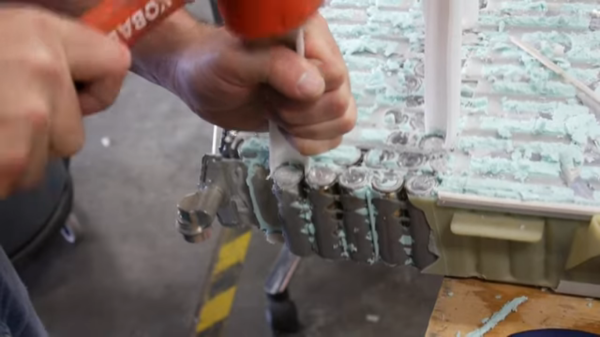
In this video, [Kerry] at [EVEngineering] has acquired a Tesla Model 3 battery pack and begins to take it apart. Unlike other Tesla batteries, and even more unlike Leaf or Prius packs, the Model 3 battery is extremely difficult to work with. As a manufacturing cost savings measure, it seems that Tesla found out that gluing the individual cells together would be less expensive compared to other methods where the cells are more modular and serviceable. That means that to remove the individual cells without damaging them, several layers of glue and plastic have to be removed before you can start hammering the cells out with a PEX wedge and a hammer. This method tends to be extremely time consuming.

If you just happen to have a Model 3 battery lying around, [Kerry] notes that it is possible to reuse the cells if you have the time, but doesn’t recommend it unless you really need the energy density found in these 21700 cells. Apparently they are not easy to find outside of Model 3 packs, and either way, it seems as though using a battery from a Nissan Leaf might be a whole lot easier anyway.

Continue reading “Fail Of The Week: Taking Apart A Tesla Battery”

Blacksmithing For The Uninitiated: Curves And Rings

You know the funny looking side of the anvil? That’s where the best curves come from. It’s called the anvil horn and is the blacksmith’s friend when bending steel and shaping it into curves.

The principle of bending a piece of steel stock is very easy to understand. Heat it up to temperature, and hammer it over a curved profile to the intended shape. A gentler touch is required than when you are shaping metal. That’s because the intent is to bend the metal rather than deform. Let’s take a look!

Continue reading “Blacksmithing For The Uninitiated: Curves And Rings”

Blacksmithing For The Uninitiated: Your First Time At The Anvil

For the past few months we’ve been running this series of Blacksmithing For The Uninitiated posts, exploring the art of forge work for a novice. It’s based upon my experience growing up around a working blacksmith’s business and becoming an enthusiastic if somewhat inexpert smith, and so far we’ve spent our time looking at the equipment you might expect to need were you embarking on your own blacksmith work. Having assembled by now a basic forge of our own it’s now time to fire it up and take to the anvil for our first bit of smithing.

Lighting a forge is easy enough. Some people do it with a gas torch, but I break a piece of firewood into sticks using a hammer with the fuller set in the hardy hole on the anvil as an impromptu splitter. Making a small fire by lighting some paper under my pile of sticks placed on the hearth next to the tuyere I start the blower and then pile coke on top of the resulting conflagration. After about ten minutes I will have a satisfying roar and a heap of glowing coals, and as they burn there will be some slag collecting in the bottom of the fire that I will eventually need to rake out. Continue reading “Blacksmithing For The Uninitiated: Your First Time At The Anvil”