You know the funny looking side of the anvil? That’s where the best curves come from. It’s called the anvil horn and is the blacksmith’s friend when bending steel and shaping it into curves.
The principle of bending a piece of steel stock is very easy to understand. Heat it up to temperature, and hammer it over a curved profile to the intended shape. A gentler touch is required than when you are shaping metal. That’s because the intent is to bend the metal rather than deform. Let’s take a look!
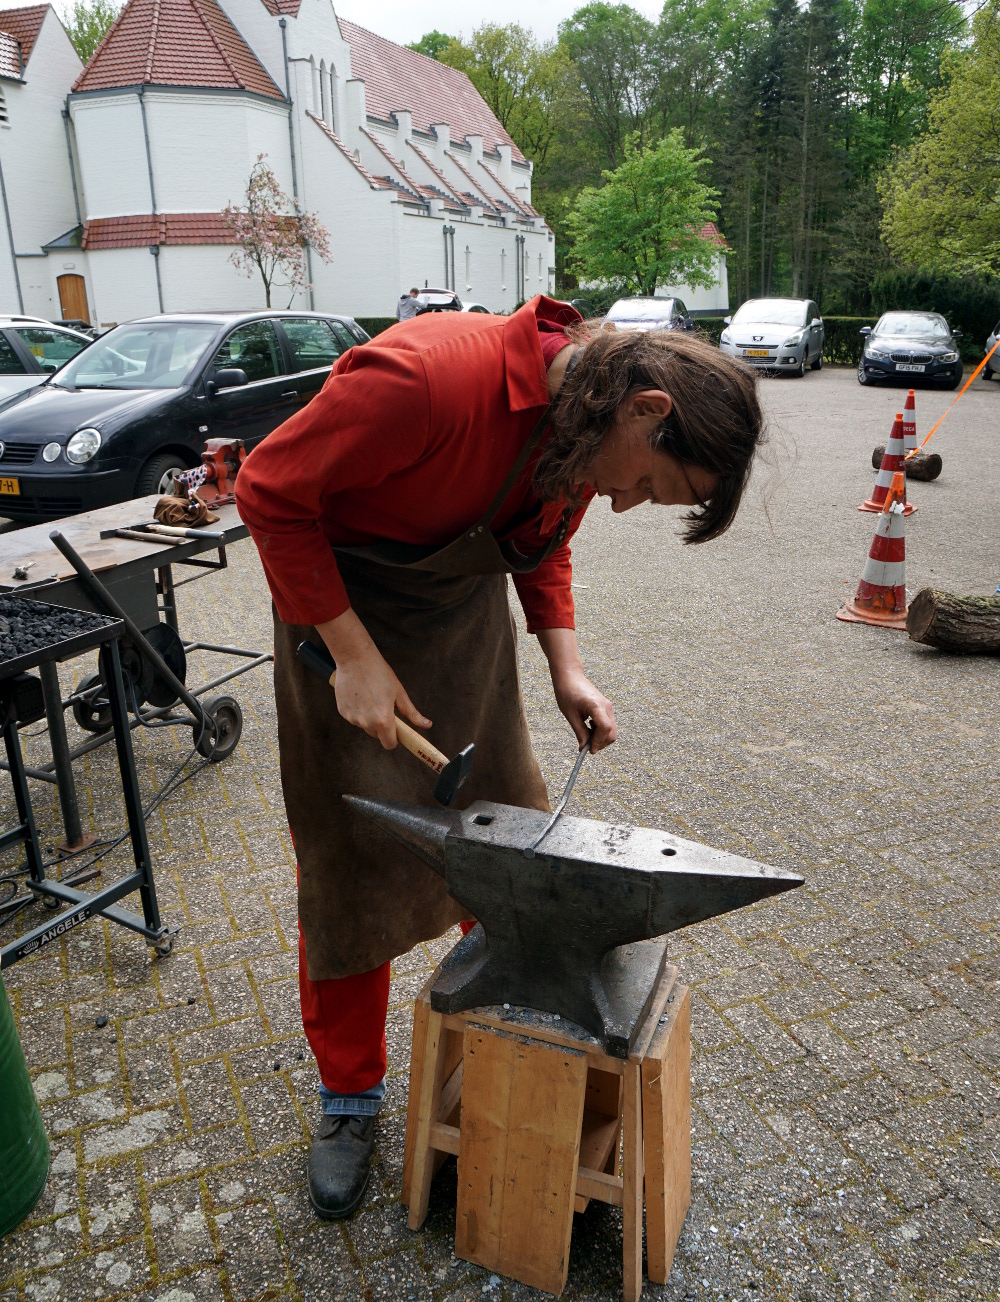
For the past few months we’ve been running this series of Blacksmithing For The Uninitiated posts, exploring the art of forge work for a novice. It’s based upon my experience growing up around a working blacksmith’s business and becoming an enthusiastic if somewhat inexpert smith, and so far we’ve spent our time looking at the equipment you might expect to need were you embarking on your own blacksmith work. Having assembled by now a basic forge of our own it’s now time to fire it up and take to the anvil for our first bit of smithing.
Lighting a forge is easy enough. Some people do it with a gas torch, but I break a piece of firewood into sticks using a hammer with the fuller set in the hardy hole on the anvil as an impromptu splitter. Making a small fire by lighting some paper under my pile of sticks placed on the hearth next to the tuyere I start the blower and then pile coke on top of the resulting conflagration. After about ten minutes I will have a satisfying roar and a heap of glowing coals, and as they burn there will be some slag collecting in the bottom of the fire that I will eventually need to rake out. Continue reading “Blacksmithing For The Uninitiated: Your First Time At The Anvil”→
Regular readers will recognise this as the third part of a series exploring blacksmithing for those who have perhaps always fancied having a go but have never quite known where to start. It’s written from a position of the unusual experience of having grown up around a working forge, my dad may now be retired but he has a blacksmith specialising in architectural ironwork.
So far in this series we’ve looked in detail at the hearth and anvil that you might find in a typical forge, and delivered some pointers as to where you might look to find or even construct your own.Those are the signature pieces of equipment you’ll find in a forge, but with them alone you can still not be a blacksmith.
If I Had A Hammer…
An array of hammers of different weights and types.
Given an anvil, a hearth, and a vat of water to quench hot work in, and you’re almost set for your forge, but not quite. Most of a modern blacksmith’s workshop is the standard metalworking assortment of welders and angle grinders, but there is a set of tools that remain essential for blacksmithing alone. Your hammers are what connect you to the work, and can be as individual as the preferences of the blacksmiths themselves. There is no “right” answer to the question of what hammer you should use, instead you should use the one that works best for you. I instinctively favour a round-faced ball-peen hammer because that’s what my dad mostly used, but for example my Dutch friends use square faced cross-peen hammers. Blacksmiths will often make their own hammers to suit their needs, for example my dad made more than one using the high-quality steel of vehicle half-shafts as a starting point. Hardening them is a specialist skill in its own right, and I remember quite a few experiments before he perfected it.
It may well be stating the obvious, but the weight of the hammer influences how much energy it can impart to the work, and in turn the size of work that can be done. Casting an eye over my dad’s hammers the three workaday weights were 2 pound, 3 pound, and 4 pound (roughly 1 kg, 1.5 kg, and 2 kg), allowing a variety from fine work to heavier hitting of larger pieces. In a recent project, making a mediaeval nail, I selected an unsubtle lump hammer to draw out the larger square stock, and a much smaller one to finish it up, create the fine point, and relatively thin head. These are only a subsection of the hammers at his disposal though, like most blacksmiths he has a variety for all tasks, up to sledgehammers. I have frequently taken my turn either holding a piece with tongs while he used a sledgehammer, or on the sledgehammer myself.
Tongs, for Hot Gripping Moments
A selection of tongs, including some designed for very specific tasks. Our thanks to [Igor Nikolic] for making this picture possible.The constant companion to a blacksmith’s hammer is a pair of tongs. These can be bought from blacksmith’s suppliers, but making a pair can be a task within the reach of most smiths. Two identical sides are made from pieces of stock, with long thin handles, a flat piece to form the hinge, and whatever jaw piece is required. It feels like cheating to form the hole for the hinge on a drill press rather than on the anvil with a punch, but riveting it with a short piece of bar is a straightforward enough process. Blacksmiths will have a huge array of tongs with different jaws for specific jobs, built up over years as jobs demand it. If you cast your mind back to the Finnish smith pictured halfway down the first installment of this series, you’ll find several racks of tongs. A later episode of this series will look at making a set of tongs, though we can’t promise in advance the quality of the finished article.
A final moment for today should be spent on the subject of protective equipment. The hazards of blacksmithing are relatively uncomplicated, but some basic protective clothing is still very much worth having. The most obvious hazard is heat, you will be working in a noisy environment with red hot metal and fire. Though you will generate fewer sparks than you’d expect, I have a blacksmith’s leather apron and a set of fire-resistant overalls. Both of these are readily available from blacksmith’s supply stores, and are well worth the investment. There are also a lot of heavy and sharp items involved, not to mention hot particles on the floor. For that reason I also have a set of steel-toecapped workboots rated for hot particles. They aren’t the most elegant of footwear, but they have saved me from a few nasty moments.
I do not have any face protection specifically for blacksmithing, but depending on the work in hand there may be some sparks created. A polycarbonate face shield rated for hot particles should be available from any safety equipment supplier, and shouldn’t cost too much, and is an essential thing to own if you are doing any grinding or rotary wire brushing. Beyond that, there are also leather gloves designed for handling hot metal. I don’t use them because I prefer the feel of the hammer directly and am happy to use a pair of tongs to hold hot pieces of steel.
We’ve taken you through the basic workshop equipment of a blacksmith over the last few episodes of this series, and you should now have a basic idea of the safety kit you would be well advised to own. From this foundation we’ll next take you into the forge and start looking at a few blacksmithing techniques and simple projects, and along the way we’ll see some of the materials involved, too.
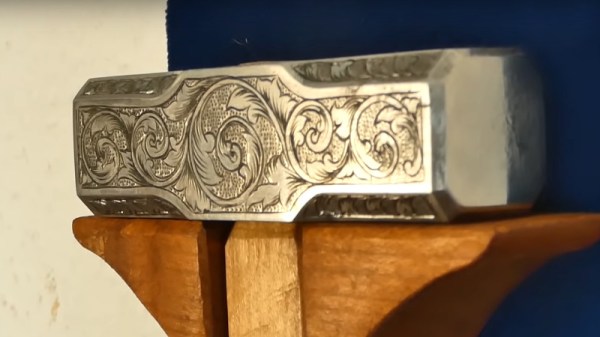
Tools are a key part of any maker’s pursuit of their work. For most of us, our tools come from the local hardware store or are purchased online. Some prefer to craft their own, however, and [Uri Tuchman] is just one such person.
[Uri] starts at the absolute beginning, with a piece of unfinished rectangular stock. The workpiece is marked up, and the shape of the hammer head meticulously filed out by hand. The wooden handle is similarly prepared from raw stock with a combination of planes, chisels and files.
It may not be the fastest way to work, but careful hand craftsmanship is always impressive to watch. The build also showcases [Uri]’s talent at engraving, with the complex designs all carved out of the surface a millimeter at a time. [Uri] recommends enamel paint to highlight such works, for its rich color and the ease of removing excess paint.
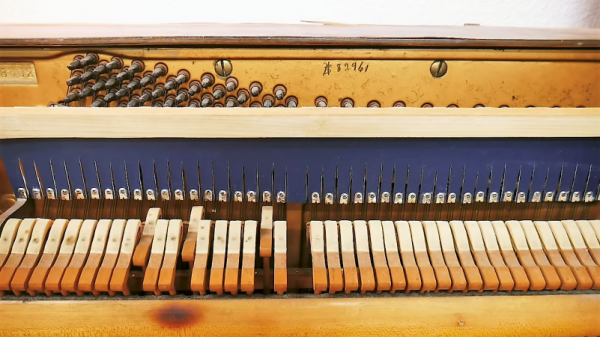
We’re partial to musical instrument hacks around here, mainly because we find instruments to be fascinating machines. Few are more complex than the piano, and, as it turns out, few are quite so hackable. Still, we have to admit that this ragtime piano hack took us by surprise.
We always thought that the rich variety of tones that can be coaxed from a piano, from the tinny sound of an Old West saloon piano to the rich tones of a concert grand, were due mainly to the construction of the instrument and the way it’s played. Not so, apparently, as [Measured Workshop] demonstrated by installing a “mandolin rail” in a small upright piano. The instrument had seen better days, so step one was disassembly and cleaning. A wooden rail spanning the entire width of the string board was added, with a curtain of fabric draping down to the level of the hammers. The curtain was cut into a fringe in the same spacing as the hammers – marking the hammer locations with cornstarch was a nice trick – and metal clips were crimped to each fringe. The completed mandolin rail can be raised and lowered using a new foot pedal, completely changing the tone as the hammers hit the strings with the metal clips rather than their soft felt heads. It makes the piano sound a little like a harpsichord, or the aforementioned saloon instrument, and at the touch of a foot, it’s back to its original tone.
Most of the piano hacks we offer tend toward the electronic variety, so it’s nice to see a purely mechanical piano hack for a change. And if the hacked piano doesn’t work out as an instrument, you can always turn it into a workbench.
When [Leon van den Beukel] found a toy glockenspiel in a thrift store, he knew what had to be done – Arduinofy it. His first attempt was a single hammer on a pair of gimballed servos, which worked except for the poor sound quality coming from the well-loved toy. The fact that only one note at a time was possible was probably the inspiration for version two, which saw the tone bars removed from the original base, cleaned of their somewhat garish paint, and affixed to a new soundboard. The improved instrument was then outfitted with eight servos, one for each note, each with a 3D-printed arm and wooden mallet. An Arduino runs the servos, and an Android app controls the instrument via Bluetooth, because who doesn’t want to control an electronic glockenspiel with a smartphone app? The video below shows that it works pretty well, even if a few notes need some adjustment. And we don’t even find the servo noise that distracting.
Hammers! They’re good for knocking in nails, breaking things apart, and generally smashing up the joint, if you’re in such a mood. Typically, they’re made of iron or steel and come in a variety of sizes depending on the purpose — from tiny chipping hammers for delicate sculpture work, to the heavy-duty sledge for tearing through building materials. But what if you built your own comically large mallet? Enter UnMaker 2.0.
The hammer receiving an eye-catching lick of paint.
Basically, it’s a really big hammer. It’s vaguely reminiscent of a dead blow type design, in that it consists of a moderately shock-absorbing outer shell filled with heavier material. In this case, steel ball bearings find a home inside the shell made out of maple and with a traditional tapered handle. In many ways it’s quite a typical build — other than the fact of its gigantic size and 34-pound head weight. Both of these make it a shoe-in for the ACME catalog. That roadrunner won’t know what hit him.
[Kevin] reports that it is not so much “swung” as it is “raised and allowed to drop”, due to its impressive weight. Clearly, it packs a punch. It’s a solid follow-on from the group’s former work – a truly gigantic utility knife.


![A selection of tongs, including some designed for very specific tasks. Our thanks to [Igor Nikolic] for making this picture possible.](https://hackaday.com/wp-content/uploads/2019/04/tong-selection.jpg)