DIY Repair Brings An X-Ray Microscope Back Into Focus

Aside from idle curiosity, very few of us need to see inside chips and components to diagnose a circuit. But reverse engineering is another story; being able to see what lies beneath the inscrutable epoxy blobs that protect the silicon within is a vital capability, one that might justify the expense involved in procuring an X-ray imager.  But what’s to be done when such an exotic and expensive — not to mention potentially deadly — machine breaks down? Obviously, you fix it yourself!

To be fair, [Shahriar]’s Faxitron MX-20 digital X-ray microscope was only a little wonky. It still generally worked, but just took a while to snap into the kind of sharp focus that he needs to really delve into the guts of a chip. This one problem was more than enough to justify tearing into the machine, but not without first reviewing the essentials of X-ray production — a subject that we’ve given a detailed look, too — to better understand the potential hazards of a DIY repair.

With that out of the way and with the machine completely powered down, [Shahriar] got down to the repair. The engineering of the instrument is pretty impressive, as it should be for something dealing with high voltage, heavy thermal loads, and ionizing radiation. The power supply board was an obvious place to start, since electrostatically focusing an X-ray beam depends on controlling the high voltage on the cathode cup. After confirming the high-voltage module was still working, [Shahriar] homed in on a potential culprit — a DIP reed relay.

Replacing that did the trick, enough so that he was able to image the bad component with the X-ray imager. The images are amazing; you can clearly see the dual magnetic reed switches, and the focus is so sharp you can make out the wire of the coil. There are a couple of other X-ray treats, so make sure you check them out in the video below.

Continue reading “DIY Repair Brings An X-Ray Microscope Back Into Focus”

Electro-Optical Control Of Lasers With A Licorice Twist

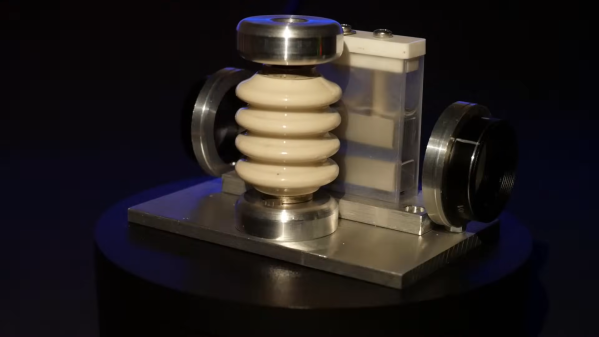
You’ve got to hand it to [Les Wright]; he really knows how to dig into optical arcana and present topics in an interesting way. Case in point: an electro-optical control cell that’s powered by ouzo.

OK, the bit about the Greek aperitif may be stretching things a bit, but the Kerr Cell that [Les] builds in the video below does depend on anethole, the essential component of aniseed extract, which lends its aromatic flavor to everything from licorice to Galliano and ouzo. As [Les] explains, the Kerr effect uses a high-voltage field to rapidly switch light passing through a medium on and off. The most common medium in Kerr cells is nitrobenzene, a “distressingly powerful organic solvent” with such fun side effects as toxicity, flammability, and carcinogenicity.

Luckily, [Les] found a suitable substitute in the form of anethole — a purified sample, not just an ouzo nip. The solution went into a plain glass cuvette equipped with a pair of aluminum electrodes, which got connected to one of the high-voltage supplies we’ve seen him build before for his nitrogen laser. A pair of polarizing filters go on either end of the cuvette, and are adjusted to blank out the light passing through it. Applying 45 kilovolts across the cell instantly turns the light back on. Watch it in action in the video below.

There’s a lot of room left for experimentation on this one, including purification of the anethole for potentially better results. We’d also be curious if plain ouzo would show some degree of Kerr effect. For science, of course.

Continue reading “Electro-Optical Control Of Lasers With A Licorice Twist”

Little Ionic Thruster Blows Out Candles With Ease

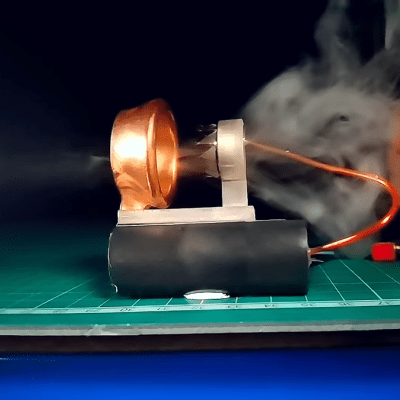
Want to generate some thrust by way of an exposed high voltage discharge that looks great when you turn down the lights? [Integza] has a video showing how to do exactly that with some simple components. His little thruster manages to blow out candles at surprising distances before being pressed into service propelling a model boat.

Here’s how it works: ionic wind is generated when a strong enough electric field causes nearby air to ionize, for example from sharp tips of a conductor carrying a high enough voltage. This discharge creates ionized air molecules with an electrical charge matching the polarity of the nearby conductor. Because matching polarities repel one another, the small cloud of ionized air molecules are repelled from both the nearby conductor, as well as from each other.

The result is a wind-like force from a device with no moving parts, and if the parts are structured right, it’ll blow out a candle with ease. [Integza] attached a cheap DC high-voltage transformer to a nickel strip cut into sharp points and rolled into a circlet. The other half of the thruster — in contrast to the thin crown of sharp points — is a smooth ring shaped a little like a thruster nozzle. 3D models of the parts are  available online should you wish to try it yourself without all the trial and error of trying to optimize.

In an effort to minimize mass, [Integza] electroplates a 3D-printed version of the large ring with great results, spraying it with graphite first to make it conductive. Cheap and safe copper electroplating is entirely within the reach of hobbyists, and the resulting unit does a pretty nice job. You can watch it in action in the video, embedded below.

Continue reading “Little Ionic Thruster Blows Out Candles With Ease”

High Voltage Power Supply From USB

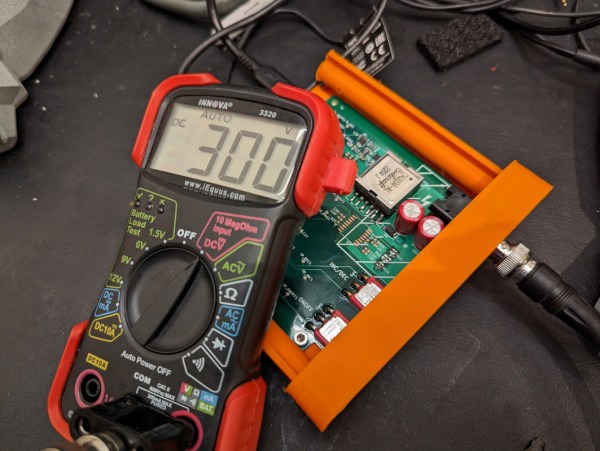
Those who work in different spaces may have different definitions of the term “high voltage”. For someone working on the GPIO pins of a Raspberry Pi it might be as little as 5 volts, someone working on a Tesla coil might consider that to be around 20 kV, and an electrical line worker might not reference something as HV until 115 kV. What we could perhaps all agree on, though, is that getting 300 volts out of a USB power supply is certainly a “high voltage” we wouldn’t normally expect to see in that kind of context, but [Aylo6061] needed just such a power supply and was eventually able to create one.

In this case, the high voltages will eventually be used for electrophoresis or electrowetting. But before getting there, [Aylo6061] has built one of the safest looking circuits we’ve seen in recent memory. Every high voltage part is hidden behind double insulation, and there is complete isolation between the high and low voltage sides thanks to a flyback converter. This has the benefit of a floating ground which reduces the risk of accidental shock. This does cause some challenges though, as voltage sensing on the high side is difficult while maintaining isolation, so some clever tricks were implemented to maintain the correct target output voltage.

The control circuitry is based around an RP2040 chip and is impressive in its own right, with USB isolation for the data lines as well. Additionally the project code can be found at its GitHub page. Thanks to a part shortage, [Aylo6061] dedicated an entire core of the microprocessor to decoding digital data from the high voltage sensor circuitry. For something with a little less refinement, less safety, and a much higher voltage output, though, take a look at this power supply which tops its output voltage around 30 kV.

New Possibilities From Fading Lighting Technology

Like the incandescent bulb before it, the compact fluorescent (CFL) bulb is rapidly fading into obscurity as there are fewer and fewer reasons to use them over their LED successors. But there are plenty of things to do with some of the more interesting circuitry that made these relatively efficient light bulbs work, and [mircemk] is here to show us some of them.

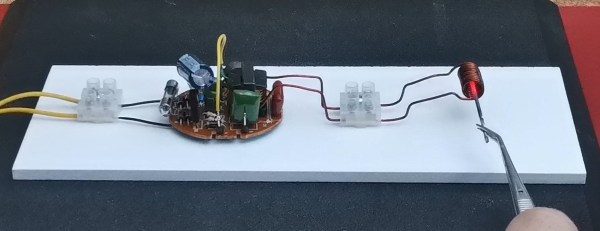
Fluorescent bulbs require a high voltage to work properly, and while this was easy enough for large ceiling installations, it was a while until this hardware could be placed inside a bulb-sized package. When removed, the high voltage driver from the CFL is used in this case to drive a small inductive heating coil circuit, which can then be used to rapidly heat metals and other objects. After some testing, [mircemk] found that the electronics on the CFL circuit board were able to easily handle the electrical load of its new task.

When old technology fades away, there are often a lot of interesting use cases just waiting to be found. [mircemk] reports that he was able to find these light bulbs at an extremely low price due to low demand caused by LEDs, so anyone needing a high voltage driver board for something like a small Tesla coil might want to look at a CFL first.

Building A Plasma Piano Ain’t Easy

Electronic arcs can be made to “sing” if you simply modulate them on and off at audible frequencies. We’ve seen it done with single Tesla coils, and even small Tesla choirs, but [Mattias Krantz] took this to extremes by building an entire “plasma piano” using this very technique.

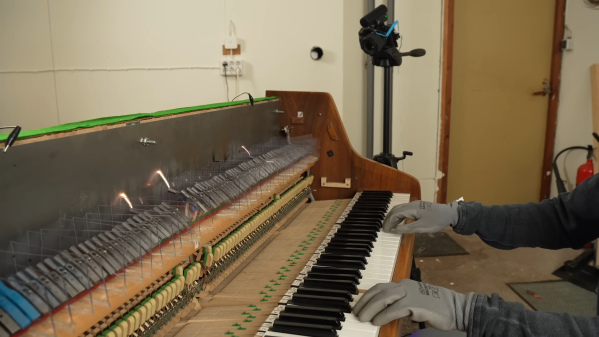
The build relies on ten transformers more typically used in cathode ray tubes. The transformers are capable of generating high enough voltages to create arcs in the air. The transformers are controlled by an Arduino, which modulates the arcs at musical frequencies corresponding to the keys pressed on the piano. Sensing the keys of the piano is achieved with a QRS optical sensor strip designed for performance capture from conventional pianos. For the peak aesthetic, the transformer outputs are connected to the metal hammers of the piano, and the arcs ground out on a metal plate in the back of the piano’s body. This lets arcs fly across the piano’s whole width as its played. Ten transformers are used to enable polyphony, so the piano to play multiple tones at once.

Building the piano was no mean feat for [Mattias], who admitted to having very limited experience with electronics before beginning the build. However, he persevered and got it working, while thankfully avoiding injury from high voltage in the process. This wasn’t easy, as Arduinos would regularly freeze from the noise produced by the arcs and the system would lose all control. However, with some smart software tweaks to the arc control and some insulating panels, [Mattias] was able to get the piano playable quite well with a beautiful chiptune tone.

It bears stating that HV work can be dangerous, and you shouldn’t try it at home without the proper understanding of how to do so safely. If you’re confident though, we’ve featured some great projects in this space before. Video after the break.

Continue reading “Building A Plasma Piano Ain’t Easy”

Enjoy The Beauty Of Corona Discharge With This Kirlian Photography Setup

In our age of pervasive digital media, “pics or it didn’t happen” is a common enough cry that most of us will gladly snap a picture of pretty near anything to post online. So if you’re going to take a picture, it may as well be as stunning as these corona discharge photographs made with a homebrew Kirlian photography rig.

We know, Kirlian photography has a whole “woo-woo” vibe to it, associated as it has been with paranormal investigations and the like. But [Hyperspace Pirate] isn’t flogging any of that; in fact, he seems way more interested in the electronics of the setup than anything else. The idea with Kirlian photography is basically to capacitively couple a high-voltage charge across a dielectric, which induces an electrostatic discharge to a grounded object. The result is a beautiful purple discharge, thanks to atmospheric nitrogen, that outlines the object being photographed.

[Pirate]’s first attempt at a Kirlian rig used acrylic as a dielectric, which proved to be susceptible to melting. We found this surprising since we’ve seen [Jay Bowles] successfully use acrylic for his Kirlian setup. Version 2 used glass as a dielectric — right up until he tried to drill a fill port into the glass. (Important safety tip: don’t try to drill holes in tempered glass.) Version 3 used regular glass and a 3D-printed frame to make the Kirlian chamber; filled with saltwater and charged up with a homebrew Tesla coil, the corona discharge proved enough to char fingertips and ignite paper. It also gave some beautiful results, which can be seen starting at around the 7:40 mark in the video below.

We loved the photos, of course, but also appreciated the insights into the effects of inductance on the performance of this setup. And that first homebrew flyback transformer [Hyperspace Pirate] built was pretty cool, too.

Continue reading “Enjoy The Beauty Of Corona Discharge With This Kirlian Photography Setup”